The Complete Guide to Winterizing Your Pool (Any Type)

I learned the hard way that winterizing a pool isn’t about following a checklist — it’s about understanding what $2,000 in freeze damage looks like so you don’t skip the one step that causes it. I’ve opened pools in April that were crystal clear under the cover, and I’ve opened pools that looked like swamp water with a cracked pump housing. The difference is always three or four decisions made in October.
This guide covers every pool type — inground concrete, vinyl liner, fiberglass, above-ground, and salt water. If you have a specific inground setup with multiple skimmers, spa spillover, or complex plumbing, our inground pool winterizing guide goes deeper on those details.
When to Close: Watch the Water, Not the Calendar
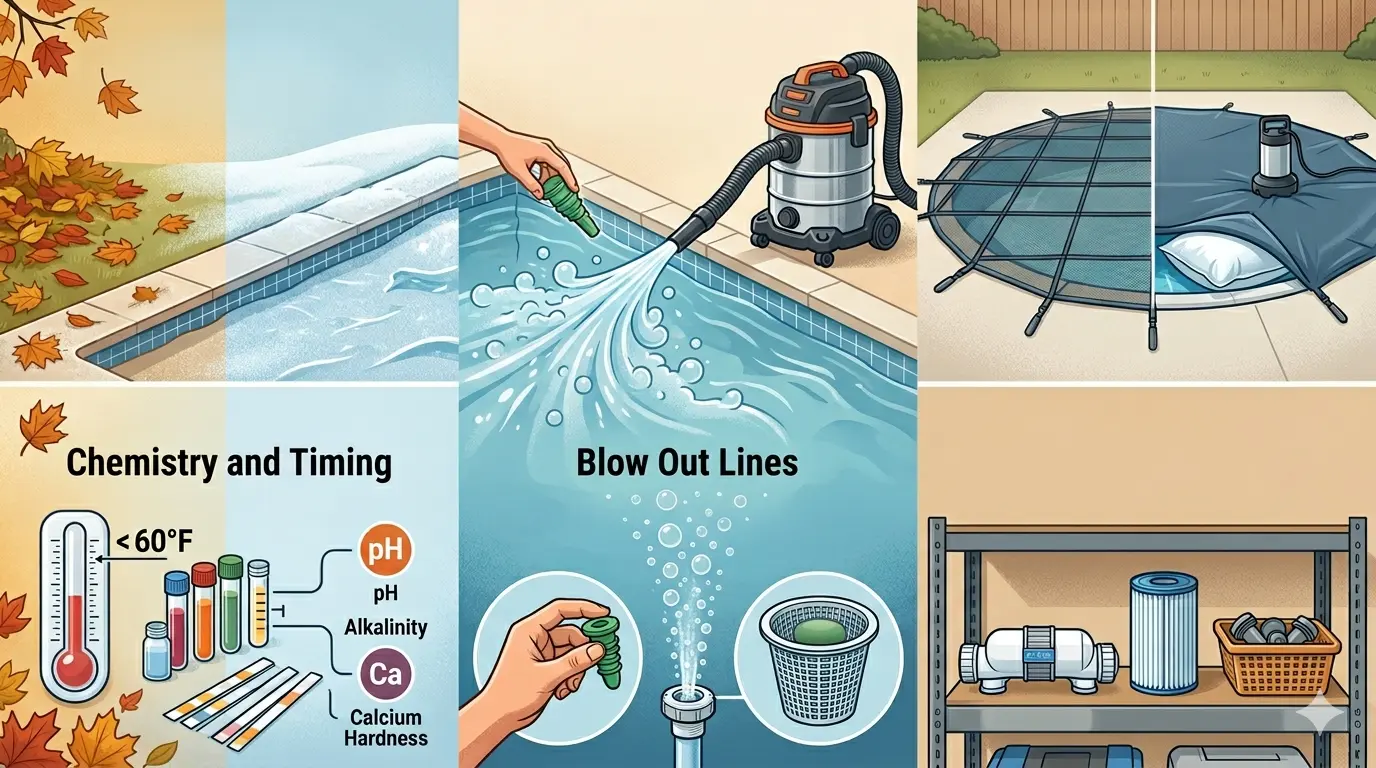
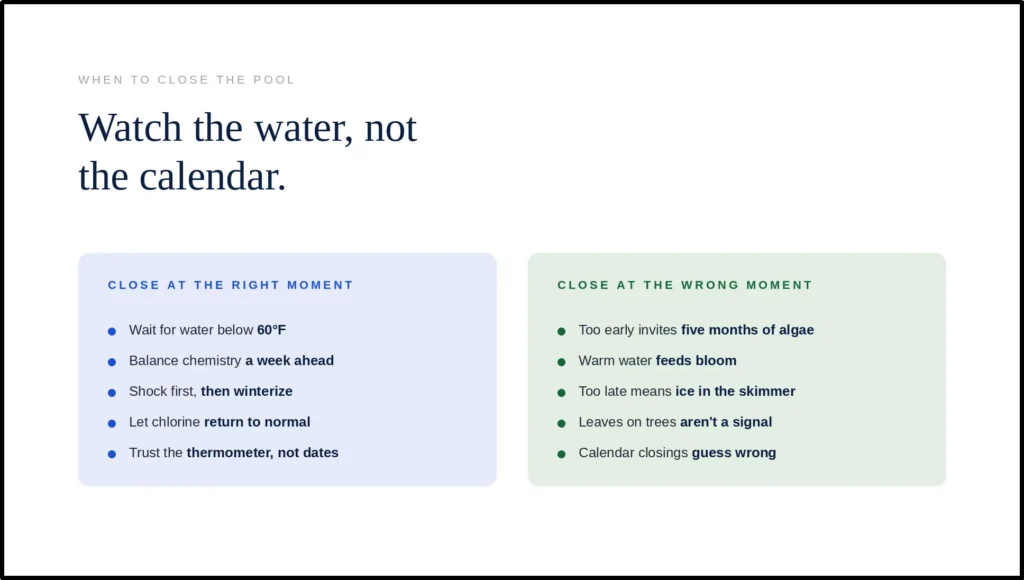
The single most expensive mistake in pool winterizing is closing by the calendar. You close when water temperature stays consistently below 60°F (15°C) — not when the leaves fall, not when the neighbors close theirs, not when the pool store sends you a “winterizing sale” email.
Close too early (warm water, above 65°F): algae and bacteria stay active under the cover. You’ll open to a green swamp in spring, and that algae can stain plaster and etch surfaces over five months of sitting.
Close too late (water near freezing): you’re working with numb hands, racing a freeze, and one missed drain plug means a cracked pump or split pipe. Freeze damage repair starts around $500 and goes up from there.
Regional rule of thumb:
- Northern US / Canada: mid-September to early October — water hits 60°F earlier
- Mid-Atlantic / Midwest: late September to mid-October
- Southern US (freezing winters): late October to November — wait for consistent cooldown
- Warm climate (no hard freeze): you may not need to fully winterize. Run the pump during freeze warnings, keep water circulating, and you can skip most of this guide. But you still need a plan for the one cold snap each winter.
What You’ll Need: Tools & Chemicals
Don’t wait until closing day to realize you’re missing a $4 expansion plug. Here’s everything in one place.
Chemicals:
- Chlorine shock (1-2 lbs per 10,000 gallons)
- Winter algaecide — not regular algaecide; winter formula is long-lasting and won’t break down under a cover
- pH adjuster (soda ash up, muriatic acid down — balance to 7.2–7.6)
- Alkalinity increaser (target 80–120 ppm)
- Calcium hardness increaser (target 200–400 ppm)
- Pool-grade antifreeze — never automotive antifreeze (toxic, wrong freeze range)
- Stain & scale preventer (especially for plaster/vinyl pools in hard-water areas)
Tools & Equipment:
- Air compressor or cyclone blower (shop vac on blow mode works for small pools)
- Rubber expansion plugs — one for each return jet, plus spares. Know your pipe size (1.5″ and 2″ are most common)
- Gizzmo (skimmer freeze tube) — one per skimmer. This is not optional in freeze zones.
- Teflon tape / thread sealant for reinstalling drain plugs
- Submersible cover pump (solid covers only — mesh covers don’t need one)
- Winter cover: solid, mesh, or safety cover — see Step 7 below
- Air pillow — for above-ground pools only. Absorbs ice expansion and pushes debris outward.
- Cable + winch — for above-ground pool covers
- Plastic bag or container — for storing drain plugs, pressure gauges, salt cell indoors
- Silicone lubricant — for gaskets and O-rings before storage
- Test kit or strips — verify chemistry before closing
- Leaf net (optional) — place over cover if you have heavy leaf drop after closing
Step 1: Balance the Chemistry
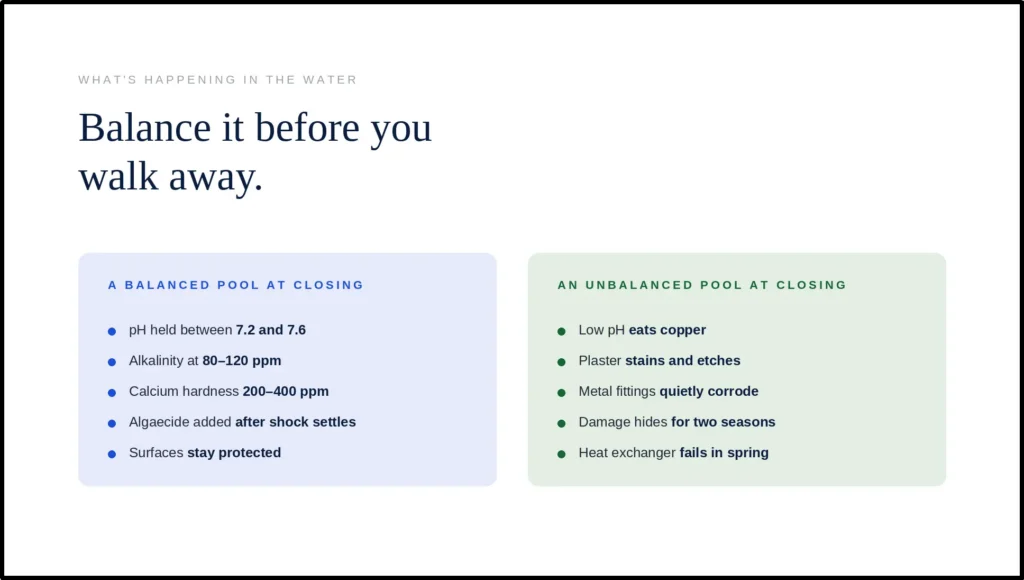
Do this a week before you close — not on closing day. Water that sits unbalanced for five months etches plaster, corrodes metal fittings, and stains surfaces. The damage isn’t always visible in spring; sometimes a heat exchanger fails two seasons later and the tech traces it back to low pH eating through copper over the winter.
Your targets:
- pH: 7.2 – 7.6
- Alkalinity: 80 – 120 ppm
- Calcium hardness: 200 – 400 ppm
- Chlorine: Shock to 10–12 ppm, then let it drift back to 1–3 ppm before adding winter chemicals. Algaecide added to freshly shocked water gets destroyed by the high chlorine.
Add winter algaecide after chlorine drops. Use a long-lasting winter formula — not the maintenance algaecide you use during swim season. Winter algaecide is designed to stay active for months under a cover without degrading. Follow the bottle dosage; overdosing won’t hurt but wastes money.
If you have metal in your water (well water, old heater), add a stain-and-scale sequestrant. Five months of sitting water gives metals plenty of time to deposit on surfaces.
Step 2: Clean Everything Before You Cover It
Anything you leave in the pool — leaves, dirt, algae spores, dead bugs — becomes spring sludge. The cleaner the pool on closing day, the clearer it’ll be when you pull the cover.
- Brush walls, floor, steps, and behind ladders where algae likes to hide
- Vacuum thoroughly — manual or robotic, just get the debris off the floor
- Empty skimmer and pump baskets
- Backwash the filter (sand/DE) or pull and hose down cartridges
- Remove ladders, diving boards, ropes, floats, and toys — they’ll crack or stain over winter
Running a robotic pool cleaner a day or two before closing takes this step off your plate — it scrubs the floor and waterline while you handle the chemicals and equipment. If you don’t own one, a manual pole brush and vacuum work fine; it just adds an hour to your closing day.
Step 3: Lower the Water Level
How much you drain depends on your pool type and cover:
Water level guidelines by pool type:
• Inground, mesh cover: 4–6″ below skimmer — rain and snow pass through mesh, water level rises over winter
• Inground, solid cover: Just below tile line — solid cover blocks precipitation, level stays roughly stable
• Vinyl liner (any): No more than 6″ below normal; keep as high as possible — over-draining causes liner to shrink, tear, or pull from track
• Fiberglass: Keep water high — no more than 6″ below normal — low water + high groundwater can flex or float the shell
• Above-ground: Below skimmer OR use skimmer plate to keep full — air pillow under cover absorbs ice pressure
The vinyl liner warning is serious. Liners shrink when exposed to cold air without water pressure behind them. If the liner pulls away from the coping, you’re looking at a replacement — $2,500 to $4,500 with labor. I’ve seen it happen to a neighbor who drained 18 inches because “the internet said to drain below the returns.” Keep that water high.
Step 4: Drain & Winterize the Equipment Pad
This is where most DIY closings go right or wrong. Water anywhere in the system = freeze damage. No exceptions.
Pump: Remove both drain plugs (there are usually two — one on the housing, one on the volute). Store them in the pump basket so you can actually find them in April. Tip the pump if possible to let any trapped water drain.
Filter:
- Sand filter: Backwash thoroughly, drain the tank via the bottom drain plug, set multiport valve to “Winterize” or a position between settings (so the gasket isn’t compressed all winter). Leave the drain cap off.
- Cartridge filter: Remove cartridge, hose it down, let it dry, store indoors. Drain the tank. Leave the band clamp loose — a tight clamp all winter can seize.
- DE filter: Full breakdown and rinse. Remove grids, hose each one, inspect for tears. Reassemble loose or store grids indoors. Drain tank completely.
Heater: Drain completely via the drain plug. If your heater has a pressure switch, blow through that line too. Heater replacement runs $3,000+ — the five minutes you spend here are the best return on time in the entire process.
Chlorinator / chemical feeder: Empty it. Remove any remaining tablets. Rinse. Drain. Chlorine tabs sitting in a closed feeder all winter produce corrosive gas that eats seals and O-rings.
Pressure gauges: Take them off and store indoors. They freeze and crack every time. $15 part, but annoying to discover in spring when you’re ready to fire up the system.
Step 5: Blow Out the Lines
Every pipe that holds water needs to be emptied. That means skimmer lines, return lines, main drain, dedicated cleaner suction lines, waterfall lines, spa jets — anything wet.
What you need: A cyclone blower is the gold standard ($300–400 if you buy one; many pool stores rent them). An air compressor works for smaller systems — set it to 20–30 PSI, no higher, or you risk blowing fittings apart. A shop vac on blow mode handles small above-ground pools but may not have enough volume for long inground runs.
The process:
1. Connect the blower to the skimmer line — use a threaded adapter, not duct tape. It will pop off at the worst moment.
2. Blow until you see steady bubbles from each return jet in the pool.
3. While air is still blowing, plug each return jet with a rubber expansion plug. Tighten until snug only — overtightening can crack the fitting.
4. Shut off the blower, then quickly plug the skimmer line at the equipment pad.
5. Pour pool-grade antifreeze into each line through the skimmer and returns — about 1 gallon per 10 feet of 1.5-inch pipe. The antifreeze displaces any residual water and prevents freeze cracks where the blower couldn’t clear everything.
6. Blow the main drain line until a rush of bubbles comes from the deep-end drain. Close the valve immediately — the air lock method keeps the vertical water column below the freeze line stable while the air gap at the top protects the exposed section.
Skimmer protection: Install a Gizzmo (threaded plastic tube) in each skimmer. The Gizzmo compresses if ice forms inside the skimmer housing, absorbing the expansion instead of cracking the plastic. Then stuff the skimmer with a piece of pool noodle or foam rope as backup. Skimmer replacement on a gunite pool is a $1,000+ concrete-cutting job. Don’t skip this.
Step 6: Plug, Protect & Secure
Double-check every plug is tight. Walk the pool and press on each return plug — they should be firm with no give. A plug that pops out in January means that line freezes.
Store all loose items: ladders, handrails, diving board, slide, ropes, floats, solar cover and reel. Anything plastic left outside for five months of freeze-thaw cycling will be brittle or cracked by spring.
For above-ground pools: position the air pillow in the center of the pool before pulling the cover over. The pillow absorbs ice expansion and pushes rain/snow/debris toward the edges where the cover drains. Secure the cover with the cable and winch around the top rail — tight enough that wind can’t get under it, not so tight that the cover tears when snow loads it.
Step 7: Choose & Install the Right Cover
Your cover determines what you’ll find in spring.
Cover type comparison:
• Mesh safety cover: Spring water is green and needs work, but winter maintenance is almost none. Cost: $1,200–3,000. Lifespan: 12–15+ years.
• Solid safety cover: Spring water is clear, minimal shock needed. Pump water off top periodically. Cost: $1,500–3,500. Lifespan: 10–15 years.
• Solid tarp cover (water bags): Spring water is clear. Frequent pumping needed; water bags leak or freeze. Cost: $100–300. Lifespan: 2–5 years.
• Above-ground cover (cable + winch): Spring water depends on mesh/solid. Debris removal from top needed. Cost: $50–150. Lifespan: 3–7 years.
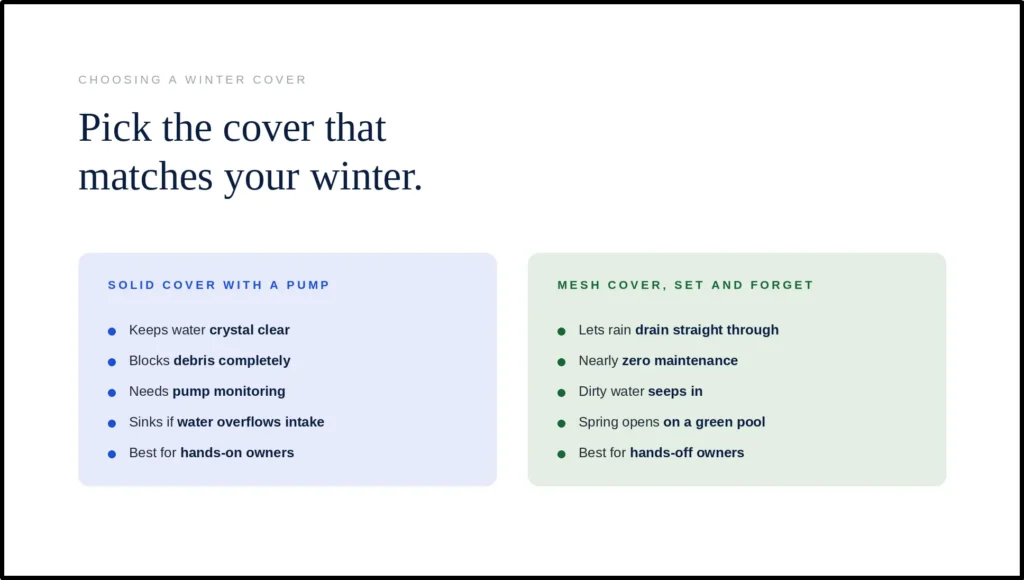
Safety covers are the standard for a reason. An ASTM-rated safety cover holds the weight of a person, a pet, or a deer that wanders onto it. If you have kids or animals anywhere near your property, a tarp-and-water-bag setup is not enough. I don’t say this to scare you — I say it because I’ve pulled a neighbor’s dog out of a pool after a tarp cover gave way. It’s not something you want to experience.
For solid safety covers on inground pools: install the cover pump in the center and run the discharge hose to a spot that drains away from the pool. Check after heavy rain or snowmelt — if the pump intake gets blocked by leaves, water accumulates and the whole cover sinks, pulling on the anchors.
Interactive Winter Closing Checklist
Click each step as you complete it. Your progress is saved — come back anytime to pick up where you left off.
Salt Water Pools: The Extra Steps
Salt pools follow the same closing procedure as chlorine pools with one critical difference: the salt cell comes inside.
The salt chlorine generator cell is the single most expensive component most pool owners have — $500 to $900 to replace. Freezing destroys it instantly because the thin electrode plates inside have no room for expansion. One freeze, and you’re buying a new cell.
- Remove the salt cell from the plumbing (it unscrews — no tools needed on most models)
- Inspect the electrode plates for scale buildup. If you see white crusty deposits, acid-wash with 4:1 water to muriatic acid for 3–5 minutes (or use a commercial cell cleaning solution)
- Rinse thoroughly, let it dry, store indoors
- Install the dummy cell / bypass pipe that came with the system — or just leave the gap open if your plumbing runs are supported
- The flow switch and salt cell cord connector should be bagged and taped to keep moisture out
Salt levels don’t need adjustment for winter — the salt doesn’t evaporate or degrade. But test salinity in spring before starting the cell; dilution from rain and snow over winter can drop levels below the cell’s operating threshold.
DIY vs. Hiring a Pro: What It Actually Costs
Winterizing is one of the more DIY-friendly pool tasks — it’s labor, not specialized skill. But the math changes if something goes wrong.
DIY vs. Professional Service cost breakdown:
• Chemicals: DIY $40–80, Professional: included in service
• Antifreeze + plugs + Gizzmo: DIY $20–50, Professional: included
• Cover (if replacing): $100–3,500 either way, professional adds install fee
• Labor: DIY is 4–6 hours of your time, Professional: $250–500
• Risk: DIY: you pay for mistakes. Professional: they pay for mistakes (verify warranty)
• Total (typical): DIY $60–130 (+ cover if needed), Professional $350–600 (chemicals included)
If you’re reasonably handy and follow this guide, DIY is entirely doable. The one scenario where I’d strongly recommend paying a pro: your first time closing a complex inground pool with multiple pumps, a spa spillover, water features, and an automation system. One missed drain valve on a $100,000 pool setup isn’t worth the $400 you’ll save.
5 Mistakes That Cost More Than Hiring a Pro
Every one of these is something I’ve seen — or paid for.
1. Skipping the drain plugs. “I forgot one.” The pump housing fills with water, freezes, and cracks. Replacement: $300–800 for a new pump, more if you need an electrician to wire it. Always store your plugs in the pump basket so they’re right there next season.
2. Using automotive antifreeze. It’s toxic (ethylene glycol), the color stains your pool, and it doesn’t protect at the right temperature range. Pool antifreeze (propylene glycol) is non-toxic, rated for plumbing, and costs about $5–8 per gallon. You need maybe three gallons. This is not where you save money.
3. Closing with unbalanced water. Low pH over winter corrodes your heat exchanger — and you won’t know until the heater fails, sometimes two years later. Heat exchanger replacement: $1,200–2,000. The pH test takes 30 seconds.
4. Draining too much from a vinyl liner pool. The liner shrinks, pulls from the track, and won’t stretch back when you refill. Liner replacement: $2,500–4,500. All because you drained 18 inches instead of 6.
5. Closing too early in warm water. You tuck the pool in at 70°F water temperature. Algae and bacteria are still active, and they feast on whatever organic matter you left behind. Come spring, you open to a green swamp — and now you’re doing a full drain-and-clean instead of a simple opening. The green-water rescue alone can cost more in chemicals than the entire winterizing process.
Mid-Winter Check-Ins: What to Look For
A closed pool isn’t a forgotten pool. Five minutes once a month saves you March surprises.
- After heavy rain or snowmelt: check the cover. If water is pooling on a solid cover, make sure the cover pump is working. If debris is piling up on a mesh cover, rake it off before it rots through
- Check water level: if you have a mesh cover, the water below should be below the skimmer. If it’s risen to the skimmer mouth, you may need to pump some out
- Walk the equipment pad: look for anything shifted, cracked, or exposed. Snow and ice can shift covers, knock off drain plugs, or expose equipment you thought was protected
- Animals: rodents love a warm equipment pad. Check for nests in heaters and under covers. If you find signs, stuff copper mesh (not steel wool — it rusts) into any openings
When Spring Comes
A well-winterized pool opens fast. You pull the cover, top off the water, reinstall drain plugs and the salt cell, prime the pump, shock, and run. If you did the chemistry right in the fall and kept the cover maintained through winter, the water underneath should be clear or just slightly cloudy — not green, not black, not a five-day project.
When you’re ready to reverse the process, our pool opening guide walks through everything from pulling plugs to balancing chemicals for swim-ready water.
A little effort in October means a clear, clean pool in April — and no surprises when you fire up the pump for the first time next season.
Get more pool and lawn care guides from Aiper on Google