
Pool party food is its own genre — it needs to be make-ahead friendly (so the host is not trapped in the kitchen while guests are in the pool), serveable at room temperature or kept cold (hot food cools within minutes on a pool deck in summer), eatable with one hand (the other is holding a drink or toweling off after a swim), and safe outdoors in heat for several hours. Whether you are hosting a kids’ birthday splash, a casual weekend barbecue-and-swim, or an evening cocktail party by the water, we have gathered 35 of the best pool party food ideas with practical recipes, prep-ahead strategies, budget guidance, and food-safety tips for outdoor entertaining. Each idea covers exactly what to make, how to serve it poolside, and — crucially — when to make it so you spend the party enjoying your guests, not working the kitchen.
Appetizers & Finger Foods: Grazing All Afternoon
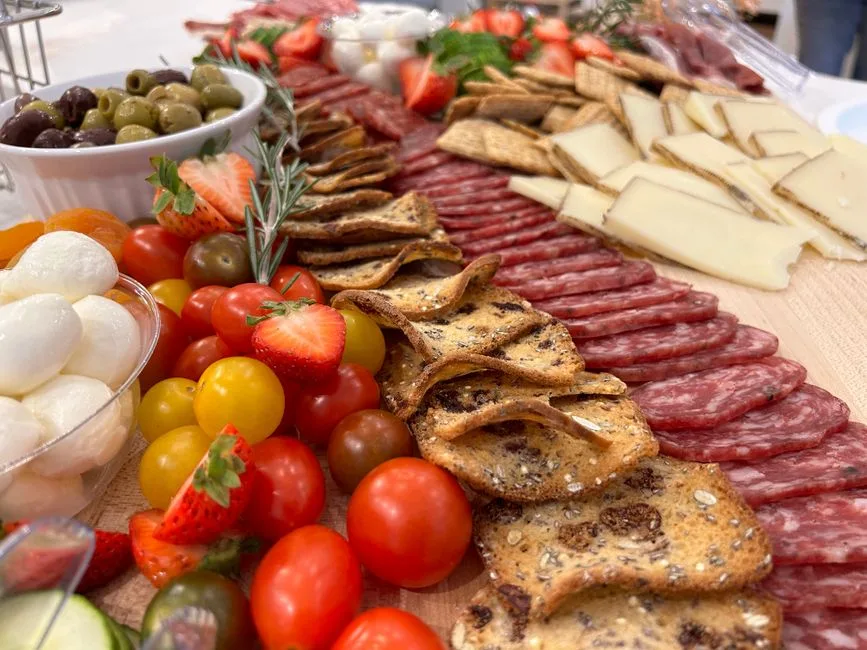
The Ultimate Poolside Charcuterie & Grazing Board
A large grazing board — a continuous spread of cured meats, cheeses, crackers, fresh and dried fruits, nuts, olives, and spreads arranged on a single large board or directly on a butcher-paper-covered table — is the most versatile and photogenic pool party food format. Guests graze throughout the party (no fixed meal time needed), the variety accommodates different dietary preferences, and the board itself is a stunning centerpiece. Poolside-specific considerations: (1) choose hard or semi-hard cheeses (aged cheddar, gouda, manchego, parmesan) that hold up better in outdoor warmth than soft cheeses (brie, camembert, goat cheese — these turn to puddles above 24°C / 75°F within 30 minutes), (2) avoid chocolate-based elements (they melt) and anything with a sugar glaze that attracts wasps, (3) place the board in shade and consider setting a bag of ice under the cheese section of the board (concealed under the butcher paper or a thin platter), and (4) replenish in smaller batches from a fridge/cooler rather than putting everything out at once — outdoor grazing boards have a safe window of roughly 60–90 minutes at 24–29°C / 75–85°F, after which cheeses should be refreshed. Budget $50–$90 for a generous board feeding 15–25 guests. The grazing board also doubles as the party’s pre-swim fuel — guests arriving hungry can eat immediately without waiting for the grill.
Photo by Patti M on Pexels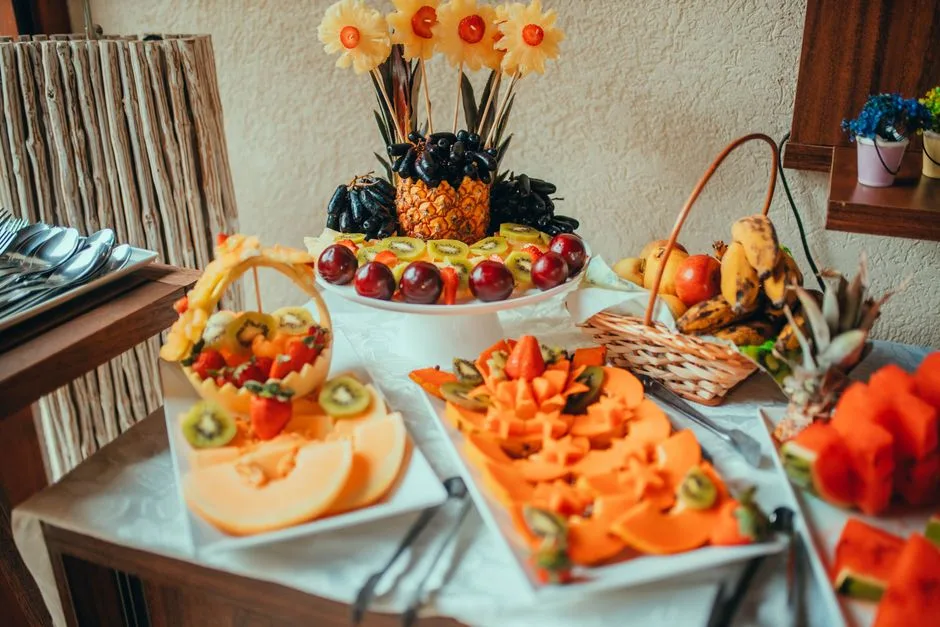
Tropical Fresh Fruit Platter & Carved Watermelon
A large, colorful fruit platter — watermelon wedges, pineapple spears, mango slices, berries, grapes, kiwi rounds, and melon chunks arranged in a rainbow pattern — is the pool party food that disappears fastest, requires zero cooking, and costs the least per guest. For maximum visual impact: carve a watermelon into a basket or shark shape (youtube tutorials abound, 15–30 minutes with a sharp knife and a marker for the template), fill it with mixed fruit salad, and use the removed watermelon flesh in the surrounding arrangement. Poolside fruit pro-tips: (1) pre-cut ALL fruit (guests will not peel or cut fruit poolside), (2) toss apple, pear, and banana slices in lemon or pineapple juice to prevent browning (the acid inhibits oxidation), (3) provide toothpicks, small skewers, or cocktail forks for hygienic one-hand grabbing (wet pool hands in a shared fruit bowl is unappetizing), (4) keep the platter on a bed of ice or chilled gel packs — cold fruit is more refreshing on a hot day and lasts longer. Budget $25–$40 for an abundant fruit platter serving 20–30 guests. The carved watermelon centerpiece is one of the highest-impact, lowest-cost DIY food presentations — a $6 watermelon and 20 minutes of carving produces a centerpiece that guests photograph and talk about.
Photo by Matheus Bertelli on Pexels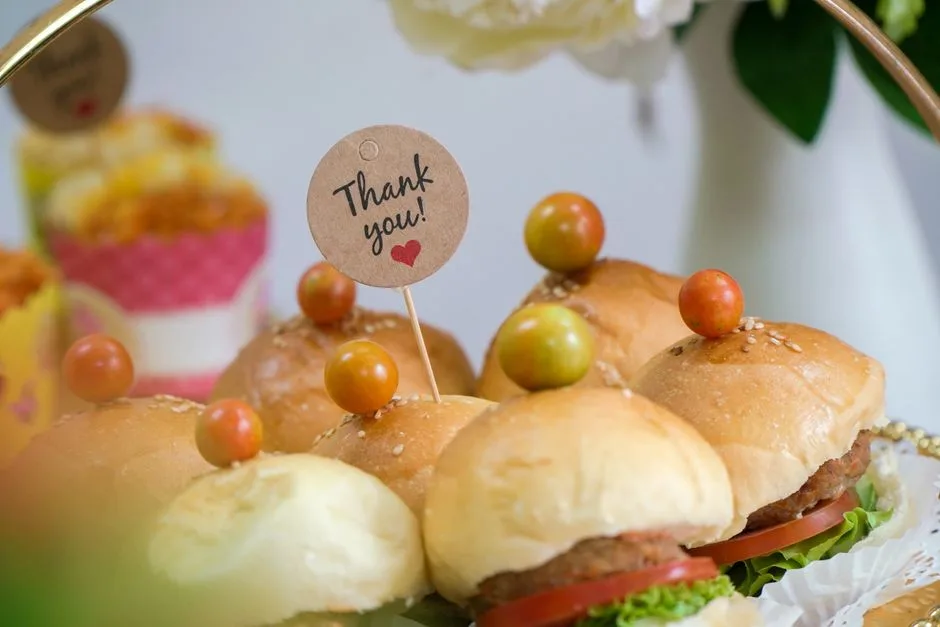
Mini Sliders & Burger Bites Station
Mini sliders — small 2–3oz / 60–85g beef patties (or pulled pork, fried chicken, or veggie patties) on soft dinner rolls or mini brioche buns, with a DIY topping bar of lettuce, tomato, cheese, pickles, caramelized onions, bacon, and sauces — are the ideal pool party main: they cook fast on the grill (3–4 minutes per side versus 8–10 for full-size burgers), guests can customize their own, they are eaten in 4–5 bites (one hand, poolside-friendly), and the mini format means guests can try different combinations (one classic cheeseburger slider, one BBQ bacon slider, one spicy jalapeño slider) rather than committing to a single large burger. The slider bar setup: grill the patties in batches and transfer to a warming tray or chafing dish on the serving table, keep buns in a covered basket (they dry out fast in sun and wind), and arrange toppings in a logical assembly order (bottom bun → lettuce → patty → cheese → tomato → pickles → sauce → top bun) with small tongs or spoons for each topping. Budget $30–$50 for slider ingredients serving 15–20 guests (roughly 2–3 sliders per person). For kids’ parties, the slider bar is especially effective — kids love building their own food, and the mini format is less intimidating than a full burger. Vegetarian option: portobello mushroom caps or black bean patties in the same mini format — cook them first on a clean section of the grill to avoid meat cross-contamination.
Photo by Xuân Thống Trần on Pexels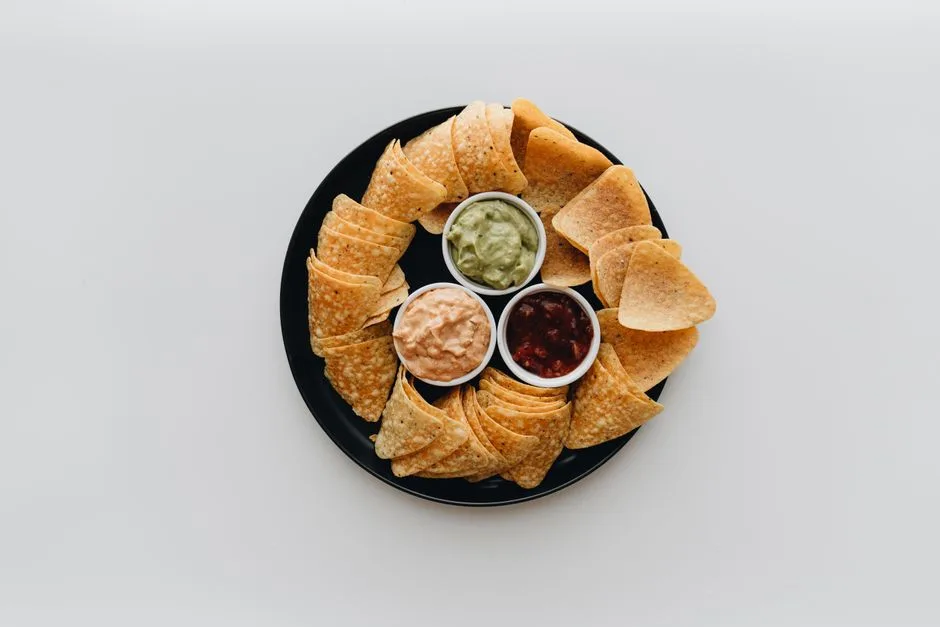
Dips Trio Station: Guacamole, Salsa & Queso
A three-dip station — fresh guacamole, chunky tomato salsa (or mango salsa for a tropical twist), and warm queso (cheese dip) — with a generous supply of tortilla chips, plantain chips, and fresh vegetable dippers (carrot sticks, cucumber rounds, bell pepper strips, jicama) is the universally popular, no-utensils-required snack station that anchors the ‘arrival and mingle’ phase of the party. The key to dip station success: make the guacamole no more than 1–2 hours before serving (guac oxidizes and browns even with lime juice — the ‘pit in the bowl prevents browning’ myth is only partially true; pressing plastic wrap directly onto the surface of the guac is more effective), keep the queso warm in a small slow cooker or fondue pot (queso that cools and congeals is unappealing), and have at least twice as many chips/dippers as you think you need (chips vanish at roughly 3× the rate of dip — a common hosting underestimate). For a tropical pool party variant: mango salsa (diced mango, red onion, jalapeño, cilantro, lime) plus pineapple salsa (diced pineapple, red bell pepper, red onion, cilantro, lime) alongside the classic tomato salsa. Budget $25–$40 for a dips station serving 20–25 guests — one of the most cost-effective party food strategies. Position the dips station AWAY from the pool edge (chips + pool water = soggy chip fragments on the water surface within minutes).
Photo by alleksana on Pexels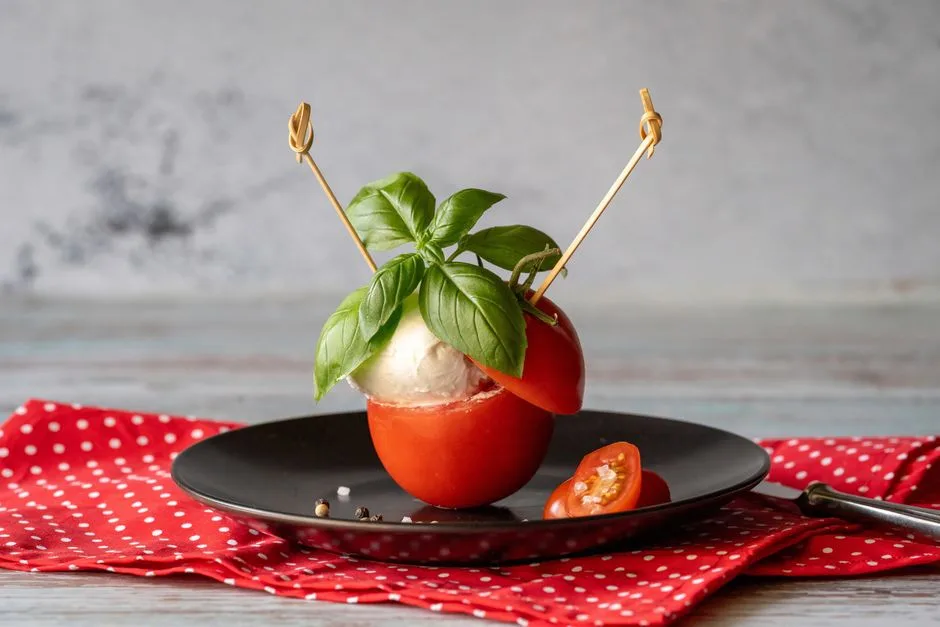
Caprese & Antipasto Skewers on a Stick
Food on a stick is the ultimate pool party format — no plates needed, one hand stays dry, and skewers can be prepped entirely in advance. Caprese skewers (cherry tomato, fresh basil leaf, mini mozzarella ball / bocconcini, drizzled with balsamic glaze and olive oil, sprinkled with flaky salt) are the classic — fresh, colorful, no-cook, and genuinely delicious at room temperature or slightly chilled. Antipasto skewers upgrade the concept: folded salami or prosciutto, mozzarella, marinated artichoke heart, roasted red pepper, and an olive on a 6-inch / 15cm bamboo skewer or rosemary sprig (strip the lower leaves, use the woody stem as the skewer for an aromatic, beautiful presentation). Prepare skewers 2–4 hours ahead, arrange on a platter, cover with plastic wrap, and refrigerate until 30 minutes before serving (they are best at cool room temperature, not ice-cold). Budget $20–$35 for 30–40 skewers serving 15–20 guests. The skewer format also eliminates double-dipping concerns — each guest takes a whole skewer, eats it, and discards the stick. Set out a designated ‘used skewer’ container (a wide-mouth jar or cup) prominently — loose bamboo skewers on the deck are a foot-poke hazard around a pool.
Photo by Gundula Vogel on Pexels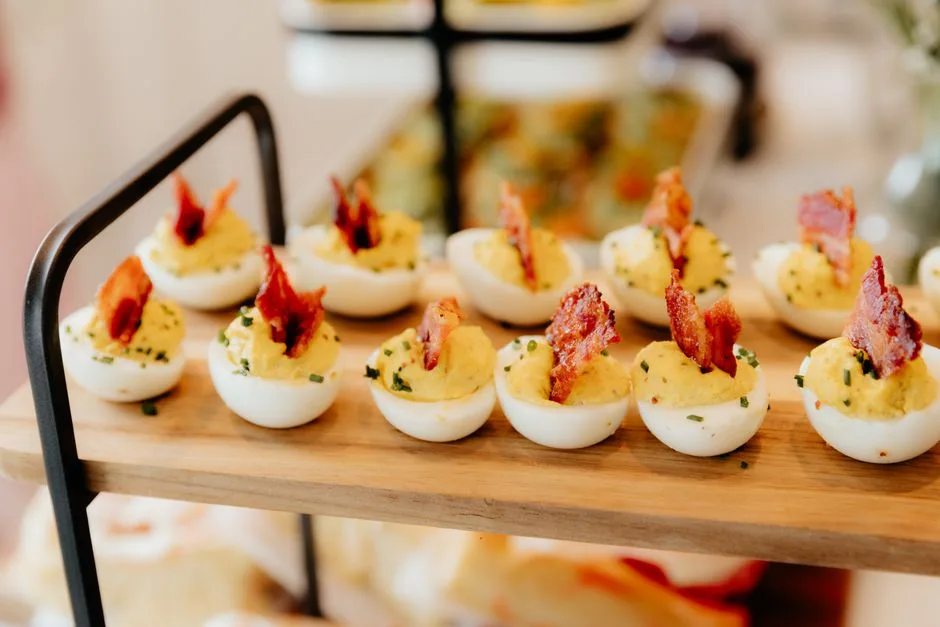
Deviled Eggs & Stuffed Bites with a Twist
Deviled eggs — the retro party classic — have been fully rehabilitated in modern entertaining and are especially well-suited to pool parties: they are pre-portioned, eaten in two bites, require no utensils, and can be made entirely the night before. The classic filling (egg yolk, mayonnaise, mustard, vinegar, salt, paprika) is reliably good, but pool party variations elevate them: (1) sriracha + lime deviled eggs (add sriracha to the yolk mixture, garnish with a cilantro leaf and a tiny lime wedge), (2) smoked salmon + dill deviled eggs (fold finely chopped smoked salmon and fresh dill into the yolk mixture, top with a tiny caper and dill sprig), (3) guacamole deviled eggs (replace half the mayo with mashed avocado, add lime and cilantro, garnish with a tiny tortilla chip), (4) bacon + jalapeño deviled eggs (crispy bacon crumbles and minced pickled jalapeño folded in, topped with a small jalapeño slice). Make the eggs the night before — they actually improve with 12–24 hours in the fridge as the flavors meld. Transport and serve them on a deviled egg platter (with indentations to hold each egg half upright) or on a bed of crushed ice (shallow tray, ice layer, eggs nestled in — keeps them cold for hours poolside). Budget $8–$15 for 24 deviled egg halves (12 eggs) serving 10–15 guests. The crushed-ice serving method is essential for outdoor pool parties — deviled eggs left at 29°C / 85°F for more than 2 hours are unsafe.
Photo by Adriana Coulson on Pexels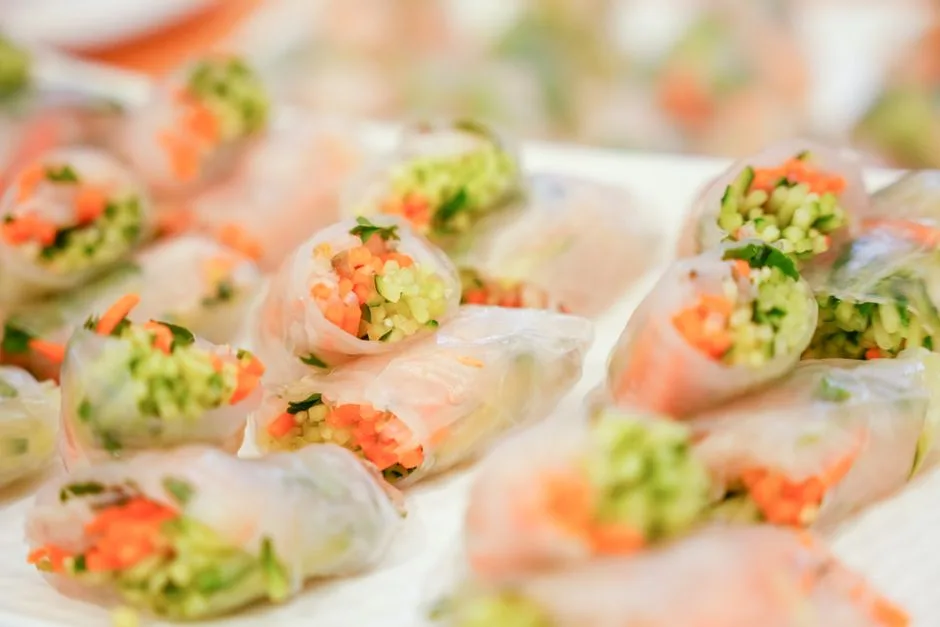
Fresh Summer Rolls with Dipping Sauces
Vietnamese-style fresh summer rolls — rice paper wrappers filled with vermicelli noodles, shrimp or tofu, fresh herbs (mint, cilantro, Thai basil), shredded carrot, cucumber strips, and lettuce, served with peanut dipping sauce and nuoc cham (Vietnamese fish sauce dressing) — are the light, fresh, gluten-free pool party option that counters the heavier grilled and fried foods. They are best made 1–3 hours ahead (any longer and the rice paper becomes gummy; any shorter and you are frantically rolling while guests arrive), stored in a single layer (not stacked — they stick together) on a damp-paper-towel-lined platter covered with plastic wrap, and served at cool room temperature — not refrigerated (cold rice paper wrappers become tough and chewy). The summer roll station can also be interactive: lay out all fillings and a bowl of warm water for softening rice paper, and let guests roll their own — this is a fun 20-minute activity that doubles as food prep, though it requires a dedicated table and someone to demonstrate the rolling technique. Budget $20–$30 for 25–30 summer rolls serving 15–20 guests. The fresh, herbaceous flavors are a welcome contrast to the rich, smoky flavors from the grill, and the visual appeal (translucent rice paper showing the colorful fillings inside) photographs beautifully on a poolside table. Vegetarian/vegan version: replace shrimp with marinated tofu or just increase the vegetable fillings.
Photo by lee c on Pexels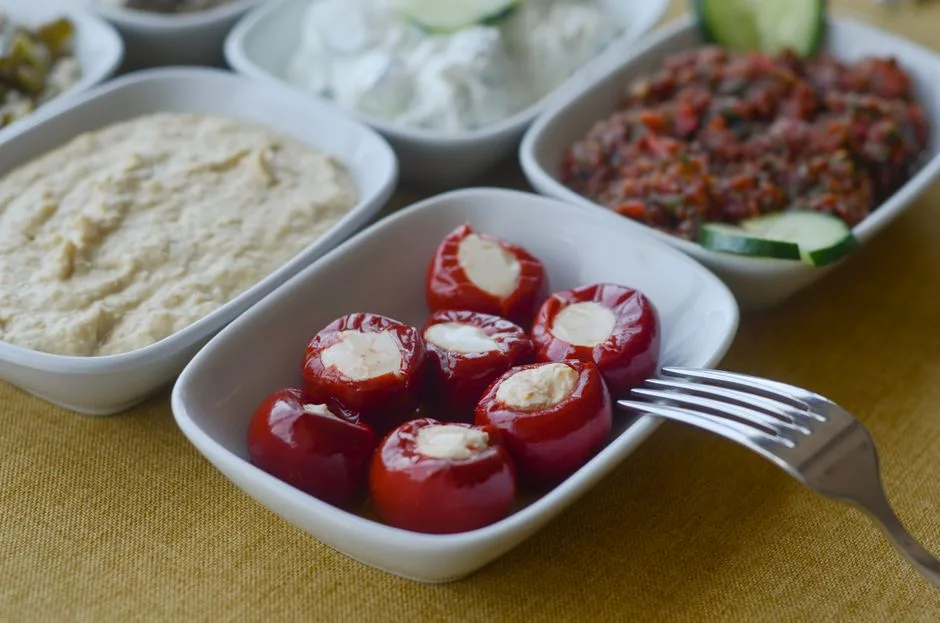
Stuffed Mini Sweet Peppers & Bite-Sized Poppers
Mini sweet peppers (the small, colorful bell peppers sold in bulk bags at grocery stores) stuffed with a seasoned cream cheese or goat cheese mixture and served cold or at room temperature are the no-cook, gluten-free, keto-friendly pool party bite that looks far more impressive than the effort required. The filling base: softened cream cheese or chèvre (goat cheese) mixed with fresh herbs (chives, dill, parsley), lemon zest, garlic powder, salt, and pepper. Variations: (1) everything-bagel stuffed peppers (add everything-bagel seasoning to the cheese mixture), (2) Mediterranean stuffed peppers (mix in chopped kalamata olives, sun-dried tomatoes, and oregano), (3) spicy Southwest peppers (mix in minced jalapeño, cumin, cilantro, and a dash of hot sauce). Halve the peppers lengthwise, remove seeds and membranes, pipe or spoon the filling in, and arrange on a platter. These can be made the morning of the party and refrigerated; they are actually better after 2–4 hours of chilling as the flavors meld. For a hot version: jalapeño poppers (halved jalapeños, seeds removed for mild heat or left in for spicy, stuffed with cream cheese + cheddar + bacon, baked or grilled until the pepper softens and the cheese bubbles — 10–12 minutes on a medium grill). The mini sweet pepper version is universally crowd-pleasing (zero heat, sweet pepper flavor that kids and spice-averse adults enjoy); the jalapeño version is for heat-seekers. Budget $12–$20 for 40–50 stuffed pepper halves serving 20–25 guests.
Photo by Gül Işık on PexelsGrilled Mains & BBQ Favorites: Fire Up the Flavor
Build-Your-Own Burger Bar with Gourmet Toppings
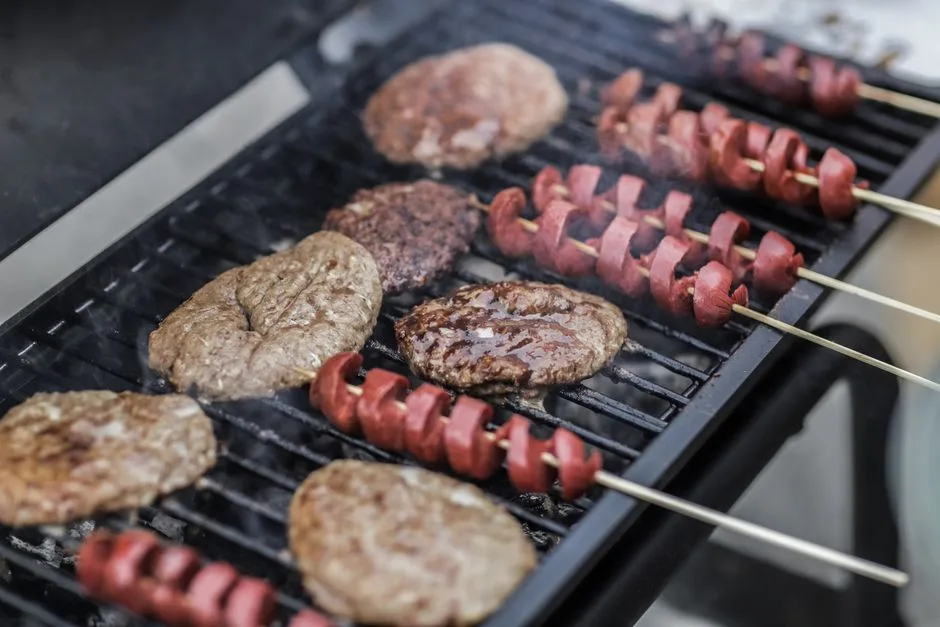
A burger bar takes the classic cookout staple and turns it into an interactive, customizable experience that guests of all ages enjoy. The core setup: a grill station turning out 4–6oz / 110–170g patties (beef, turkey, chicken, and a plant-based option like black bean or Impossible) at a steady pace, and a topping bar with 10–15 options arranged in assembly order. Essential burger bar toppings beyond the basics: caramelized onions (cook them low and slow in a pan on the grill for 30–40 minutes before the party — they hold in a covered dish for hours), crispy bacon strips (pre-cook in the oven that morning, reheat briefly on the grill), sautéed mushrooms, sliced avocado or guacamole, roasted green chiles or jalapeños, multiple cheese options (sharp cheddar, pepper jack, smoked gouda, blue cheese crumbles), and ‘special sauce’ options (chipotle mayo, garlic aioli, BBQ sauce, sriracha ketchup). Label each topping with a small card — guests move through the line faster when they can read options rather than having to lift lids and peer into bowls. Keep buns warm and covered (a cooler with a clean towel and the buns inside works surprisingly well — the insulation keeps them soft and warm, not cold like a refrigerator). Budget $35–$60 for a burger bar feeding 15–20 guests. The burger bar is also the most forgiving grilled main — patties can be cooked to varying doneness preferences and the DIY assembly means every guest gets exactly what they want.
Photo by Luis Quintero on Pexels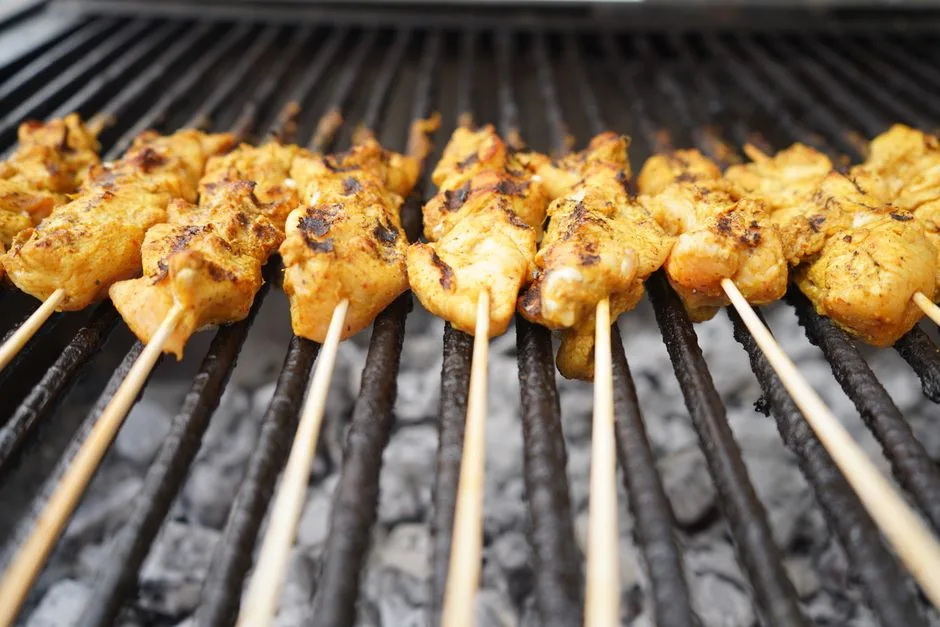
Marinated Chicken Skewers with Global Flavors
Chicken skewers — boneless, skinless chicken thighs (preferred over breast — thighs stay juicier on the grill and are more forgiving of the slight overcooking that happens when the grill master is also trying to socialize) cut into 1.5-inch / 4cm chunks, marinated for 4–24 hours, threaded onto soaked bamboo or metal skewers, and grilled 4–5 minutes per side — are the most versatile grilled pool party protein. Serve 3–4 different marinade flavors for variety: (1) Mediterranean lemon-herb (olive oil, lemon juice, garlic, oregano, thyme), (2) Southeast Asian satay (coconut milk, curry powder, turmeric, fish sauce, brown sugar — serve with peanut sauce), (3) Mexican chili-lime (lime juice, chili powder, cumin, garlic, cilantro), (4) Japanese yakitori-style (soy sauce, mirin, sake, ginger, garlic, brown sugar). Thread the marinated chicken onto skewers alternating with pieces of bell pepper, onion, zucchini, cherry tomato, and pineapple — the vegetables add color, flavor, and help stretch the protein to feed more guests (roughly 0.5lb / 225g of chicken per 4–5 skewers, serving 2–3 people). Prep all skewers the night before or morning of — they sit in the fridge on a sheet pan, covered, ready to go straight onto the grill. Budget $25–$40 for 40–50 skewers serving 15–20 guests. The skewer format is poolside-perfect: one hand holds the stick, the other holds a drink, and the variety of marinades means guests come back for ‘one more of the satay one’ throughout the party.
Photo by Said Mpinga on Pexels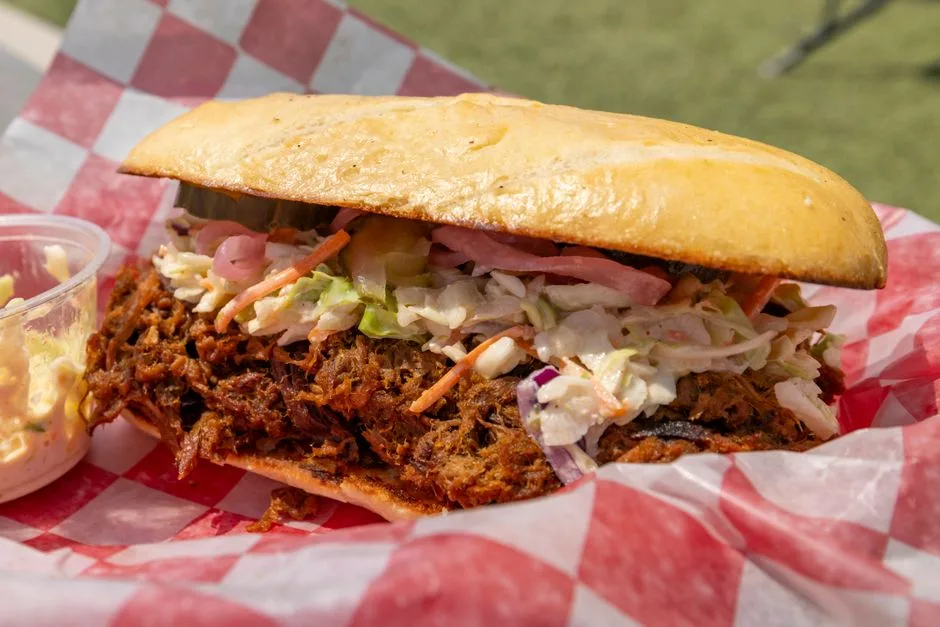
BBQ Pulled Pork & Brisket Sliders
Slow-cooked pulled pork or beef brisket — cooked low (120°C / 250°F) for 6–8 hours until it shreds effortlessly with two forks, then tossed with BBQ sauce and piled onto soft slider buns with coleslaw — is the make-ahead grilled main that requires essentially zero party-day cooking effort (the long cook happens hours before guests arrive, and the meat stays warm in a slow cooker or covered pan for hours). For pulled pork: a 4–5lb / 1.8–2.3kg bone-in pork shoulder (Boston butt), dry-rubbed the night before (brown sugar, smoked paprika, garlic powder, onion powder, cumin, salt, pepper), cooked in a smoker, outdoor pellet grill, or indoor oven until internal temperature reaches 93°C / 200°F and the bone pulls clean. For brisket: a 4–5lb / 1.8–2.3kg beef brisket flat, similar dry rub, cooked to 93°C / 200°F internal. The meat is shredded or sliced and placed in a slow cooker or chafing dish set to ‘warm’ for the duration of the party, with slider buns, coleslaw, pickles, and extra BBQ sauce alongside for DIY assembly. The aroma of slow-cooked BBQ drifting across the pool area is one of the most appetite-stimulating party signals possible. Budget $30–$50 for pulled pork or brisket serving 15–20 guests (meat shrinks by roughly 40% during the long cook — buy accordingly). The slider format keeps portions manageable, and the coleslaw adds a fresh, crunchy contrast.
Photo by Nobleseed Nobleseed on Pexels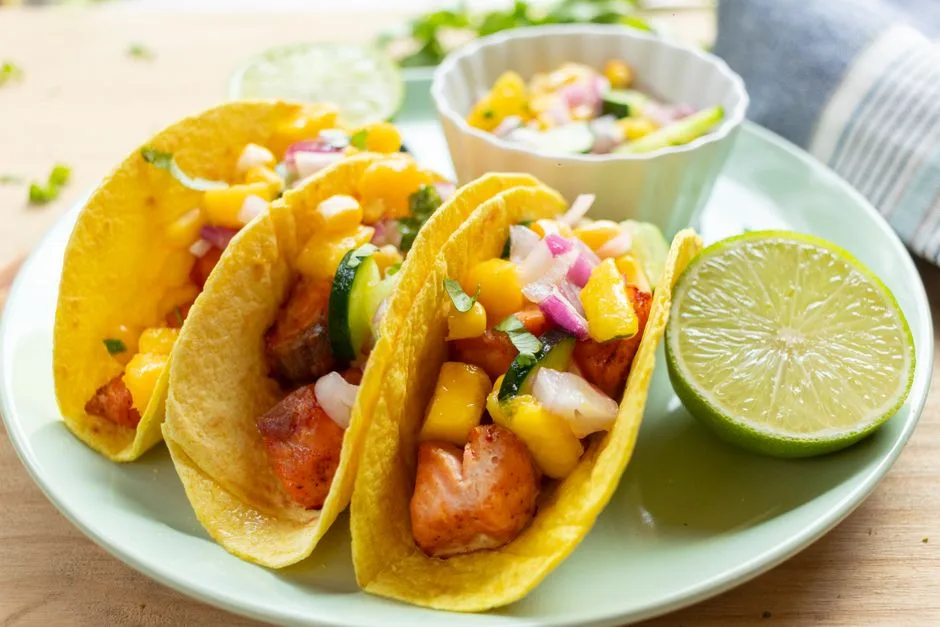
Fish Tacos with Mango Salsa & Lime Crema
Fish tacos — grilled or blackened white fish (mahi-mahi, tilapia, cod, or halibut) flaked into warm corn or flour tortillas and topped with fresh mango salsa, shredded cabbage, lime crema, and cilantro — are the fresh, lighter grilled main that feels distinctly summery and pool-appropriate in a way that heavier BBQ meats do not. The fish: season fillets with chili powder, cumin, garlic powder, salt, and lime juice, grill 2–3 minutes per side over medium-high heat until just opaque and flaking, then transfer to a platter and break into large chunks. The mango salsa (diced mango, red bell pepper, red onion, jalapeño, cilantro, lime juice, salt) can be made the morning of and gets better as it sits. The lime crema (sour cream or Mexican crema, lime juice, lime zest, salt — thinned slightly with water to a drizzle consistency) ties everything together. Set up the taco bar with warm tortillas (wrapped in foil and kept on the cool side of the grill or in a tortilla warmer), the fish, salsa, crema, shredded cabbage, cilantro, lime wedges, and hot sauce. Guests build their own tacos — the combination is light enough that swimming immediately after eating feels fine (unlike a heavy burger and fries), which makes fish tacos especially suitable for the pool party format. Budget $30–$45 for a fish taco bar serving 15–20 guests. For non-fish-eaters, add a grilled chicken or roasted vegetable option using the same taco bar setup.
Photo by Laura oliveira on Pexels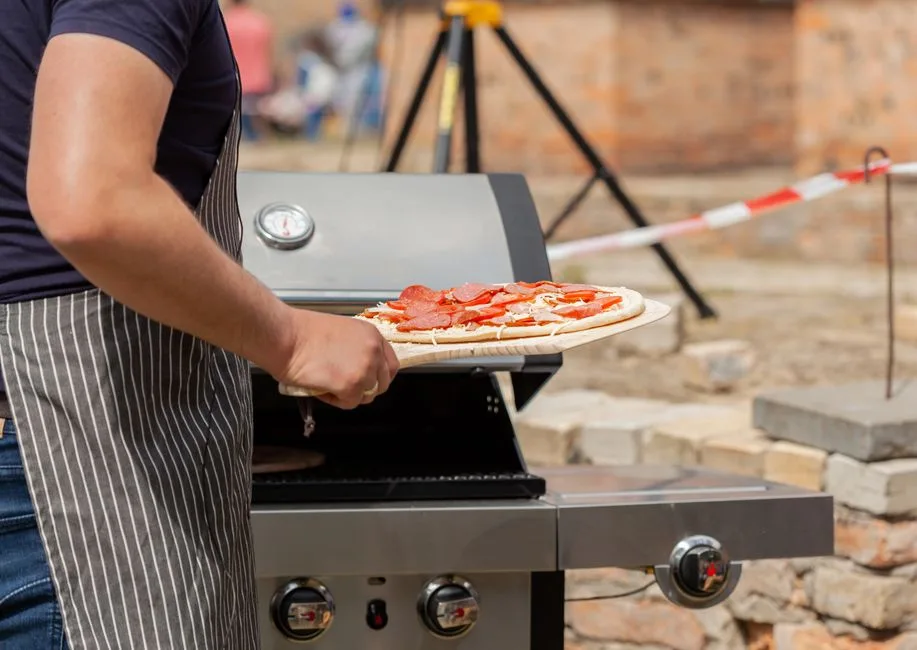
Wood-Fired / Grilled Poolside Pizza
Grilled pizza — dough stretched thin, grilled directly on the grates for 2–3 minutes per side until charred and bubbly, then topped and finished on the grill — is the unexpectedly easy, wildly impressive pool party main that guests will talk about. The technique is simpler than most people assume: (1) Use store-bought pizza dough (from a good bakery or supermarket deli — $3–$5 per ball, each makes one 12-inch / 30cm pizza), let it come to room temperature, stretch into an irregular oval or rectangle (rustic shape is part of the charm), brush one side with olive oil, and place oiled-side-down on a hot, clean grill grate over medium-high heat. (2) Grill the first side for 2–3 minutes until it has distinct grill marks and releases easily from the grate. (3) Flip the crust, quickly top the grilled side with sauce, cheese, and toppings (prep all toppings in small bowls before starting — speed matters here), close the grill lid, and cook 3–4 minutes until the bottom is charred and the cheese is melted and bubbly. The total cook time per pizza is 5–7 minutes — you can produce 6–8 pizzas per hour on a standard 3–4 burner grill. Set up a ‘pizza topping bar’ with sauce (tomato, pesto, white/alfredo), cheeses (mozzarella, parmesan, goat cheese), and toppings (pepperoni, prosciutto, sautéed mushrooms, roasted peppers, olives, arugula, fresh basil) so guests can request custom combinations. Budget $30–$45 for 8–10 grilled pizzas serving 15–20 guests. The grilled pizza station works best with someone dedicated to the grill during pizza service — it is active cooking, not passive, and requires the griller’s full attention for 30–45 minutes.
Photo by Julia Filirovska on Pexels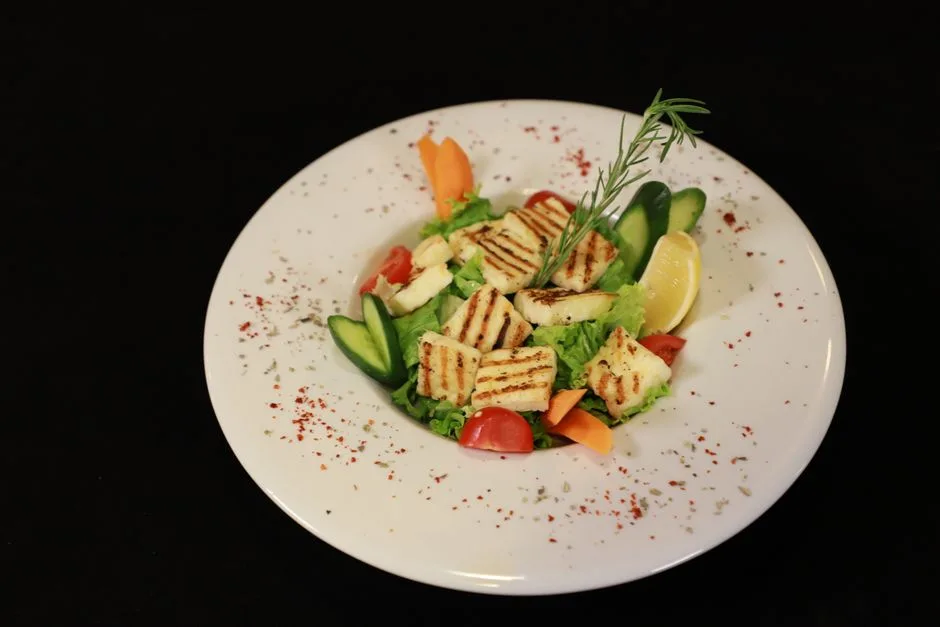
Grilled Halloumi & Vegetable Platter
Grilled halloumi — the Cypriot cheese that can be grilled directly without melting (thanks to its high melting point and firm texture) — plus a colorful array of grilled vegetables is the vegetarian main that even dedicated meat-eaters drift toward. Halloumi develops a golden-brown, crispy exterior and a warm, squeaky-creamy interior when grilled 2–3 minutes per side; serve it with a squeeze of lemon, a drizzle of olive oil, and a sprinkle of fresh oregano and chili flakes. The accompanying grilled vegetable platter: thick slices of eggplant and zucchini (brushed with olive oil, salt, and oregano), portobello mushroom caps (marinated in balsamic, olive oil, and garlic for 30 minutes), thick-cut bell pepper strips (grilled until the skin blisters and chars), asparagus spears (2–3 minutes, turning once), and corn on the cob (grilled in the husk, then peeled back as a handle). Arrange everything on a large platter with lemon wedges, fresh herbs, and a bowl of tzatziki or romesco sauce. Everything on this platter can be grilled in batches before the party and served at room temperature — it does not need to be hot, making it the lowest-stress grilled option. Budget $25–$40 for a generous halloumi and vegetable platter serving 15–20 guests. The platter also functions as a stunning centerpiece — the char marks, vibrant colors, and fresh herbs make it one of the most photogenic items on the food table. Vegan option: skip the halloumi and add grilled tofu steaks (pressed, marinated, and grilled) plus a tahini-lemon dressing.
Photo by Piriyonel on Pexels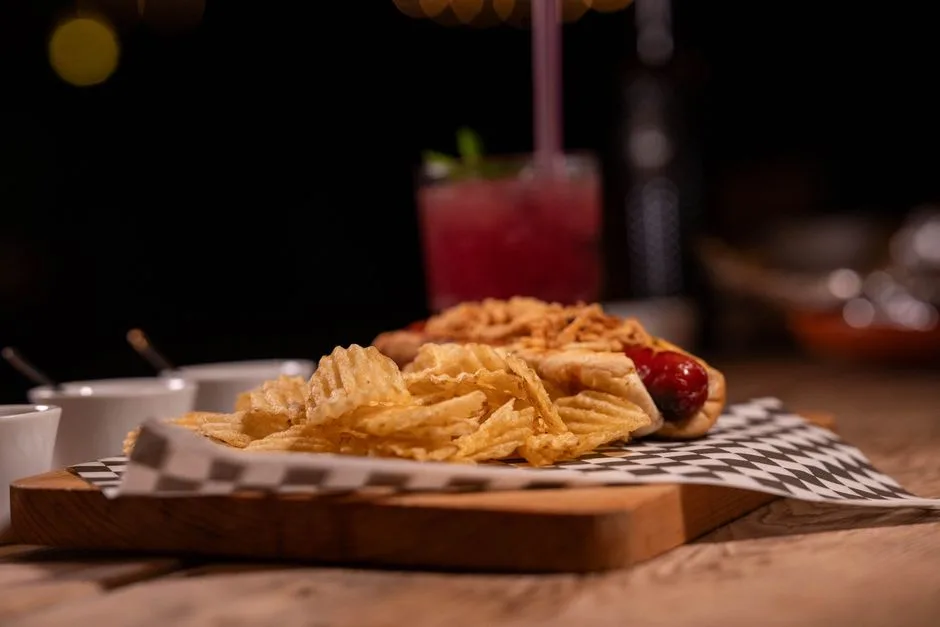
Gourmet Hot Dog Bar with Creative Toppings
A hot dog bar elevates the humble wiener from kids’ food to a genuinely fun, customizable all-ages station — and hot dogs have the advantage of being the fastest-cooking grilled protein (3–4 minutes total), the cheapest per-serving cost ($0.50–$1.50 per quality sausage), and universally familiar to every guest. Use quality sausages — all-beef franks, bratwurst, smoked chorizo, or Italian sausage — rather than budget hot dogs; the price difference is negligible per serving and the quality difference is dramatic. The topping bar is where the personality comes in — go far beyond ketchup and mustard: (1) Chicago-style (yellow mustard, neon green relish, chopped onion, tomato wedges, pickle spear, sport peppers, celery salt on a poppy seed bun), (2) Sonoran-style (bacon-wrapped dog, pinto beans, chopped tomato, onion, jalapeño salsa, mustard, mayo), (3) banh mi-style (pickled carrot and daikon, cucumber, cilantro, jalapeño, sriracha mayo), (4) chili-cheese (beef chili, shredded cheddar, diced onion, jalapeño), (5) Seattle-style (cream cheese spread on the bun, grilled onions, jalapeños, sriracha). Label each topping combination with a small tent card describing the style — most guests will never have tried a Sonoran or banh mi hot dog and the novelty is part of the fun. Keep buns warm and covered, and have a dedicated ‘bun toaster’ zone on the grill (30 seconds, cut side down) for guests who want a toasted bun. Budget $20–$35 for a hot dog bar feeding 15–20 guests — the most budget-friendly grilled main on this list. For kids’ parties, simplify the toppings to the familiar (ketchup, mustard, relish, cheese) and let them customize without overwhelming choices.
Photo by Mike C on PexelsFresh Salads & Cold Sides: Light, Bright & Make-Ahead
Watermelon Feta Mint Salad
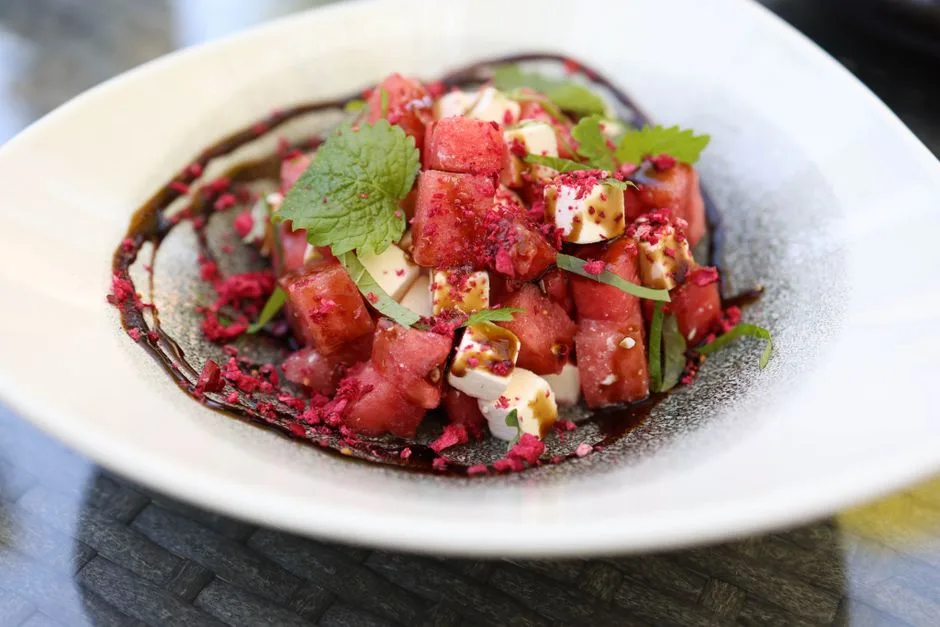
Watermelon feta salad — cubes of sweet, juicy watermelon tossed with crumbled feta cheese, fresh mint leaves, thinly sliced red onion, and a simple lime-olive oil dressing — is the definitive pool party salad: it is refreshing (cold watermelon on a hot day is almost as good as being in the pool), requires zero cooking, can be assembled in 10 minutes, and the sweet-salty-herbaceous flavor combination is universally appealing. The key details: (1) Use a good-quality barrel-aged feta (Greek or Bulgarian) packed in brine — the creamy, tangy complexity of real feta is essential here; pre-crumbled, dry feta in plastic tubs lacks the flavor and creamy texture. (2) Cut the watermelon into 1-inch / 2.5cm cubes no more than 2–3 hours before serving — watermelon releases water as it sits cut, and beyond 3–4 hours the salad becomes watery. (3) Add the mint and dressing just before serving (mint wilts and darkens after 30–60 minutes dressed). (4) Optional additions: pitted kalamata olives (adds brininess), cucumber cubes (adds crunch and freshness), arugula (adds peppery bite and makes it more of a ‘real’ salad), and a drizzle of balsamic reduction (adds sweetness and a dramatic visual element). The salad can be partially prepped ahead: cube the watermelon and store in a colander set over a bowl in the fridge (so excess water drains away rather than pooling), crumble the feta, slice the onion, and pick the mint — then toss everything together 10 minutes before the food table opens. Budget $12–$18 for a large watermelon feta salad serving 15–20 guests.
Photo by Valeria Boltneva on Pexels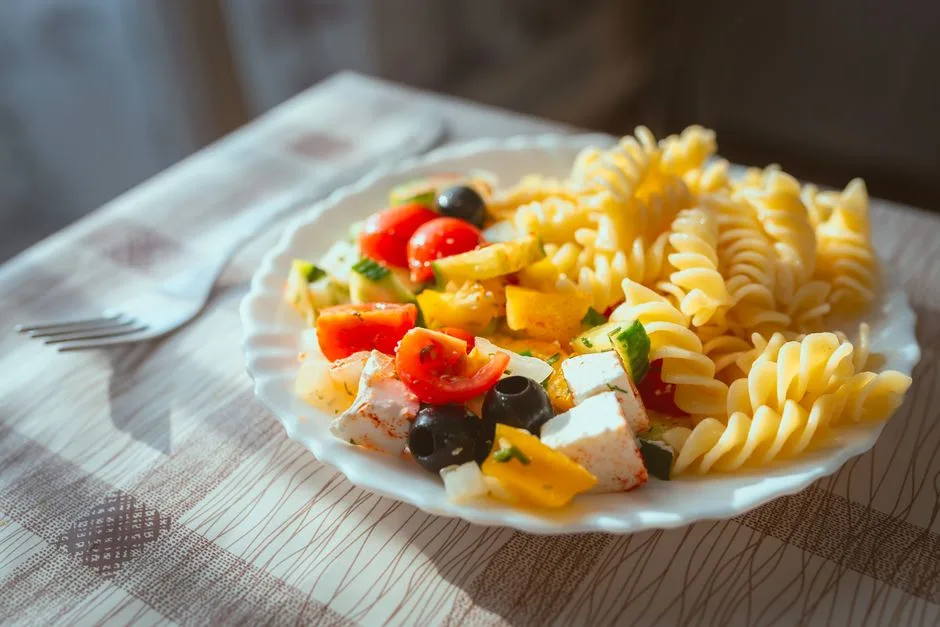
Mediterranean Orzo Pasta Salad
A Mediterranean orzo pasta salad — tiny rice-shaped orzo pasta tossed with cherry tomatoes, cucumber, red onion, kalamata olives, crumbled feta, fresh parsley and dill, and a lemon-oregano vinaigrette — is the make-ahead side dish that gets BETTER after several hours in the fridge (the orzo absorbs the dressing, the flavors deepen), making it the ideal prep-ahead pool party contribution. Pasta salad’s poolside advantages: (1) it is served cold or at cool room temperature — no grill space, no timing coordination with hot food, (2) it holds safely at outdoor temperature for 2–3 hours (the acid in the vinaigrette helps inhibit bacterial growth, though standard food safety rules still apply — keep it shaded and consider nesting the serving bowl in a larger bowl of ice for extended outdoor service), (3) it is filling enough to be a main for vegetarian guests while functioning as a side for everyone else, (4) the Mediterranean flavor profile pairs with essentially every grilled protein on this list. Orzo is the ideal pasta for poolside salad because its small, rice-like shape means it mixes evenly with the chopped vegetables and each spoonful delivers the complete flavor combination. Cook the orzo to al dente (slightly firm — it continues to absorb liquid from the dressing as it sits, and overcooked orzo turns mushy), rinse with cold water to stop cooking, drain thoroughly, and toss with the vegetables, feta, herbs, and dressing. Make it the morning of the party (or the night before) and refrigerate — take it out 30 minutes before serving to take the chill off. Budget $15–$25 for a large orzo salad serving 15–20 guests.
Photo by Ayrat on Pexels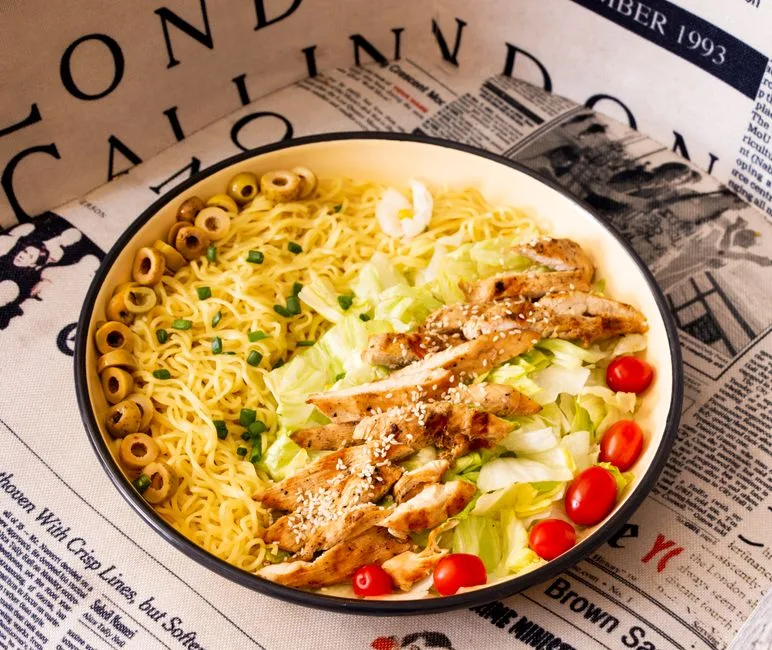
Asian Sesame Noodle Salad
A cold sesame noodle salad — thin noodles (soba, somen, or spaghetti) tossed in a creamy sesame-peanut dressing with shredded carrot, cucumber matchsticks, edamame, sliced scallions, cilantro, and toasted sesame seeds — is the non-mayo-based cold salad that feels substantial and satisfying without being heavy. The sesame-peanut dressing (peanut butter or Chinese sesame paste, soy sauce, rice vinegar, sesame oil, ginger, garlic, honey or brown sugar, and a splash of warm water to thin to coating consistency) is what makes the salad — it coats each noodle strand with savory, nutty, slightly sweet flavor that tastes even better after a few hours of chilling. Soba (buckwheat) noodles are traditional and gluten-free (check the label — some soba brands include wheat flour), but standard spaghetti or linguine works perfectly and costs less. Cook the noodles, rinse thoroughly in cold water (this stops cooking and removes surface starch that would make the salad gummy), drain well, toss with a small amount of sesame oil to prevent sticking, then fold in the dressing and vegetables. Garnish generously with toasted sesame seeds, extra scallions, and a pile of fresh cilantro leaves just before serving. This salad is vegan (omit honey or use maple syrup), can be made entirely the night before, and is one of the few pool party dishes that actually tastes better after 12–24 hours in the fridge. Budget $15–$22 for a large sesame noodle salad serving 15–20 guests.
Photo by Ahmad Taba on Pexels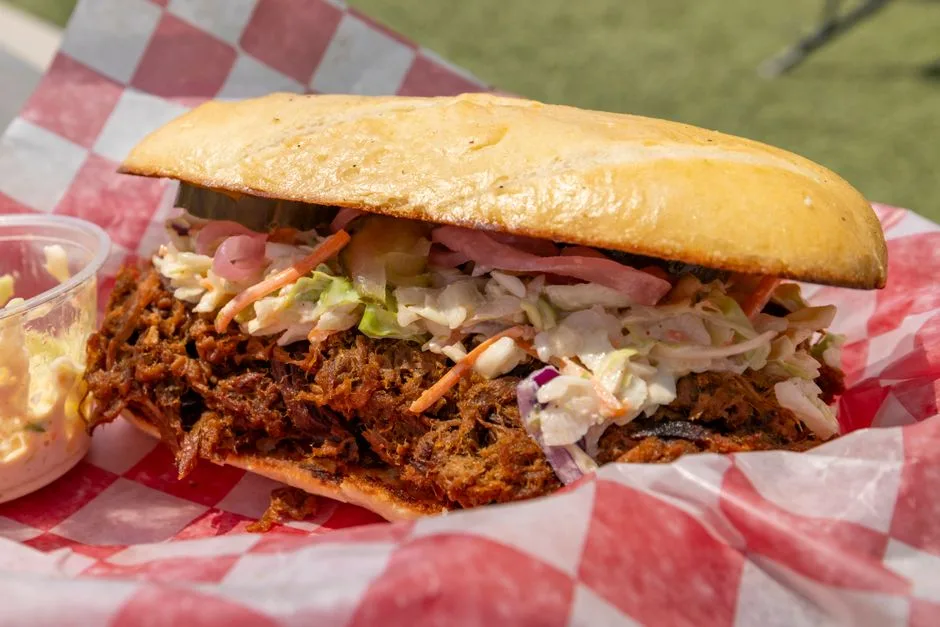
Classic Coleslaw Trio: Creamy, Vinegar & Tropical
Coleslaw is the essential BBQ side dish that cuts through the richness of grilled meats with its crunch and acidity — and offering three different slaw styles gives guests variety while using mostly the same base ingredients (cabbage, carrot). (1) Classic creamy coleslaw: shredded green and red cabbage + carrot, dressed with mayo, apple cider vinegar, sugar, celery seed, salt, and pepper — the familiar, crowd-pleasing version. (2) Vinegar-based Carolina slaw: same base vegetables, dressed with apple cider vinegar, a small amount of sugar, celery seed, mustard powder, and a splash of vegetable oil, no mayo — lighter, tangier, and specifically designed to pair with pulled pork (it is the traditional Carolina BBQ slaw). (3) Tropical pineapple slaw: shredded cabbage + carrot + diced fresh pineapple + red bell pepper + jalapeño, dressed with lime juice, a small amount of mayo or Greek yogurt, honey, and cilantro — the pineapple sweetness and jalapeño heat make this version memorable and conversation-worthy. All three slaws can be made the morning of or night before; the vinegar and creamy versions improve with time, the tropical version is best made no more than 4–6 hours ahead (the pineapple releases juice and can make the slaw watery if made too far in advance). Serve in separate bowls with labeled cards — the visual contrast of the three slaws (white, translucent, and golden-speckled) is appealing. Budget $12–$18 for a slaw trio serving 20–25 guests — cabbage is one of the cheapest vegetables per pound and one of the most forgiving for large-batch prep.
Photo by Nobleseed Nobleseed on Pexels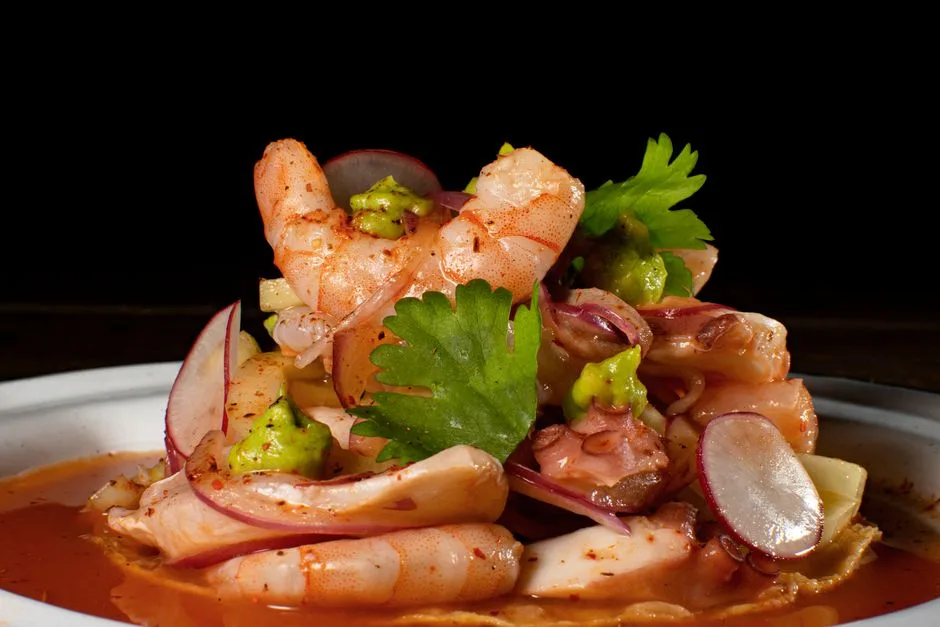
Shrimp Ceviche & Seafood Cocktail Cups
Ceviche — raw shrimp ‘cooked’ in citrus juice (lime and lemon) with diced tomato, cucumber, red onion, jalapeño, cilantro, and avocado — is the elegant, no-cook seafood dish that reads as sophisticated and tastes like summer in a cup. For pool party service, serve ceviche in individual clear plastic cups or small mason jars (4–6oz / 120–180ml each): a layer of ceviche, topped with diced avocado, a lime wedge on the rim, and a small spoon or fork. The individual cup format solves three pool party problems: (1) guests can grab a cup and eat while standing or lounging (no plate + fork balancing act), (2) portion control (each cup is a complete serving — no one takes too much or too little), (3) the clear cup shows off the colorful layers (red tomato, white shrimp, green avocado, cilantro) and looks intentionally designed. Critical ceviche safety: the shrimp must be extremely fresh (purchased the morning of the party from a trusted fishmonger), ‘cooked’ in fresh lime juice for at least 30–45 minutes (the acid denatures the proteins, turning the shrimp opaque — this is chemical ‘cooking,’ not heat cooking, but it does kill many pathogens; it is not equivalent to heat cooking and is not recommended for pregnant or immunocompromised individuals), and kept on ice at all times (ceviche must stay below 4°C / 40°F — serve the cups nested in a tray of crushed ice, and discard any uneaten cups after 2 hours outdoors). For a cooked, safer alternative with the same cup format: shrimp cocktail cups (poached shrimp, cocktail sauce, lemon wedge — much lower food safety risk). Budget $25–$40 for ceviche or shrimp cocktail cups serving 15–20 guests.
Photo by Leslie del Moral on Pexels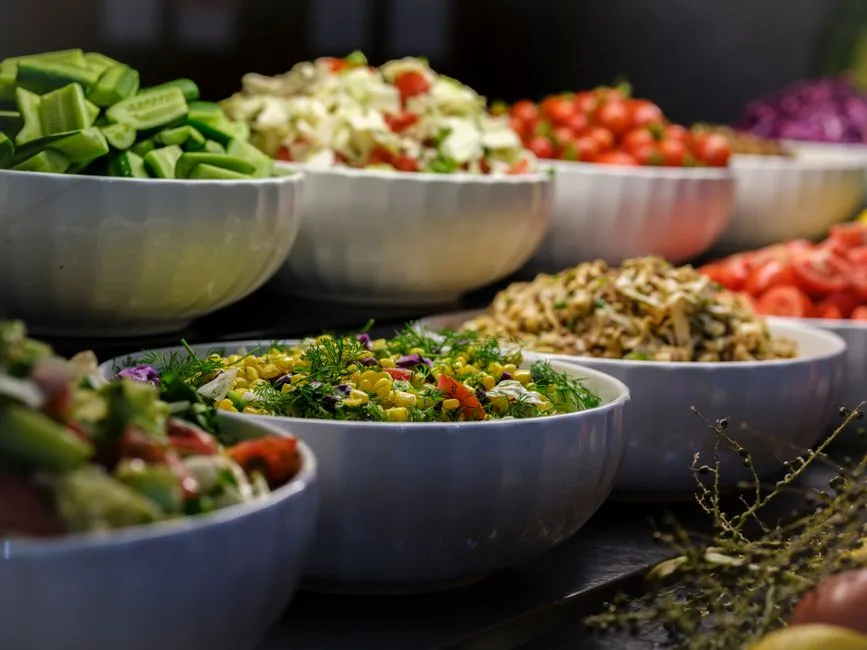
Build-Your-Own Grain Bowl Salad Bar
A grain bowl bar — a self-serve station with a cooked grain base (quinoa, farro, brown rice, or couscous), an array of raw and roasted vegetables, proteins, cheeses, nuts, seeds, and dressings — is the fully customizable, dietary-restriction-friendly main-course salad option that lets every guest build a bowl that matches their preferences and restrictions. The bowl bar components: (1) Grains (2–3 options, cooked and cooled): quinoa (gluten-free, high protein), farro (chewy, nutty, contains gluten), brown rice or couscous. (2) Raw vegetables: baby spinach, arugula, chopped romaine, shredded carrot, cucumber, cherry tomatoes, diced bell pepper, radish, avocado. (3) Roasted vegetables (cooked ahead, served at room temp): roasted sweet potato cubes, roasted broccoli, roasted beets. (4) Proteins: grilled chicken strips (from the skewer batch), hard-boiled egg halves, chickpeas, edamame, crumbled feta. (5) Crunch & flavor: toasted nuts, seeds, dried fruit, olives, pickled onions. (6) Dressings (2–3 options, in squeeze bottles): lemon-tahini, balsamic vinaigrette, green goddess. Label everything clearly, especially noting common allergens (gluten-containing grains, dairy, nuts). The grain bowl bar is the most inclusive food station at the party — it works for vegetarian, vegan, gluten-free, dairy-free, and paleo guests simultaneously, each building what works for them. All components can be prepped the day before; assembly on party day is simply arranging bowls of pre-prepped ingredients. Budget $30–$50 for a grain bowl bar serving 15–20 guests.
Photo by Engin Akyurt on Pexels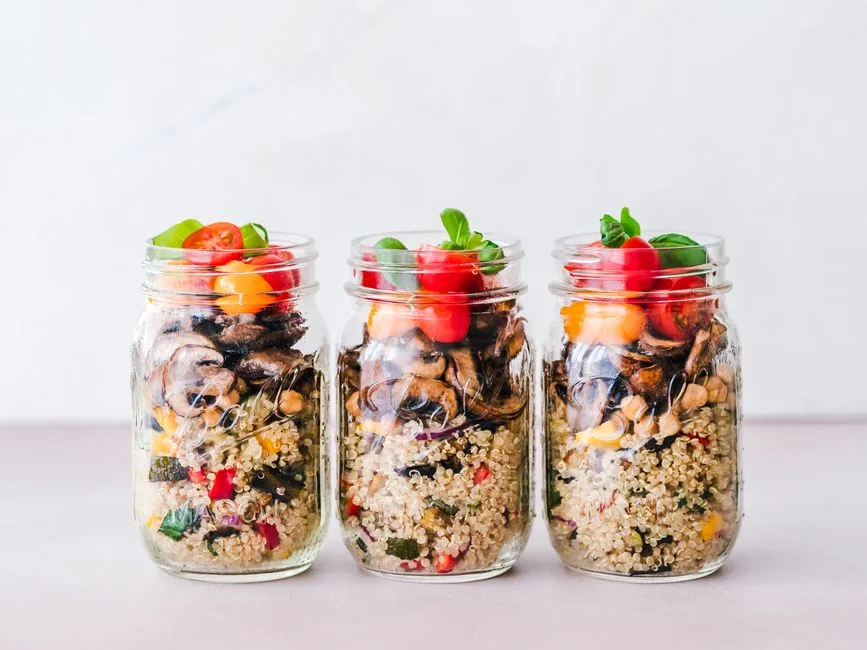
Mason Jar Layered Salads (Grab & Go)
Mason jar salads — individual salads layered in 16oz / 500ml wide-mouth glass or clear plastic jars in a specific order (dressing at the bottom → hearty vegetables/proteins → grains/pasta → delicate greens at the top, well away from the dressing so they stay crisp) — are the ultimate grab-and-go pool party salad format. Each jar is a complete individual meal, requires zero serving utensils or plates, can be made 1–2 days ahead, and guests simply grab a jar, shake it to distribute the dressing, and eat directly from the jar (or dump into a bowl if they prefer). The layering order is critical: (1) Dressing (2–3 tablespoons in the bottom of the jar), (2) hard, non-absorbent vegetables that can sit in dressing without getting soggy (cherry tomatoes, cucumber, bell pepper, carrot, celery, onion), (3) protein and grains (grilled chicken, chickpeas, quinoa, farro, hard-boiled egg), (4) nuts, seeds, cheese, dried fruit, (5) delicate greens last (baby spinach, arugula, mixed greens, fresh herbs) — these stay completely dry and crisp because the dressing is at the bottom. Label each jar or set out a menu card listing the salad compositions (e.g., ‘Mediterranean: lemon vinaigrette, cucumber, tomato, olives, feta, quinoa, arugula’; ‘Asian Sesame: ginger-sesame dressing, edamame, carrot, bell pepper, almonds, mixed greens’). The jar format also makes it easy to offer several different salad compositions, and guests can see the colorful layers through the glass. For safety: jars with dairy or meat-based dressings must stay on ice; vegan dressing jars are more forgiving but should still be kept cool. Budget $25–$40 for 20–25 mason jar salads.
Photo by Ella Olsson on PexelsFrozen Desserts & Sweet Treats: Beat the Heat
DIY Popsicle Creation Station
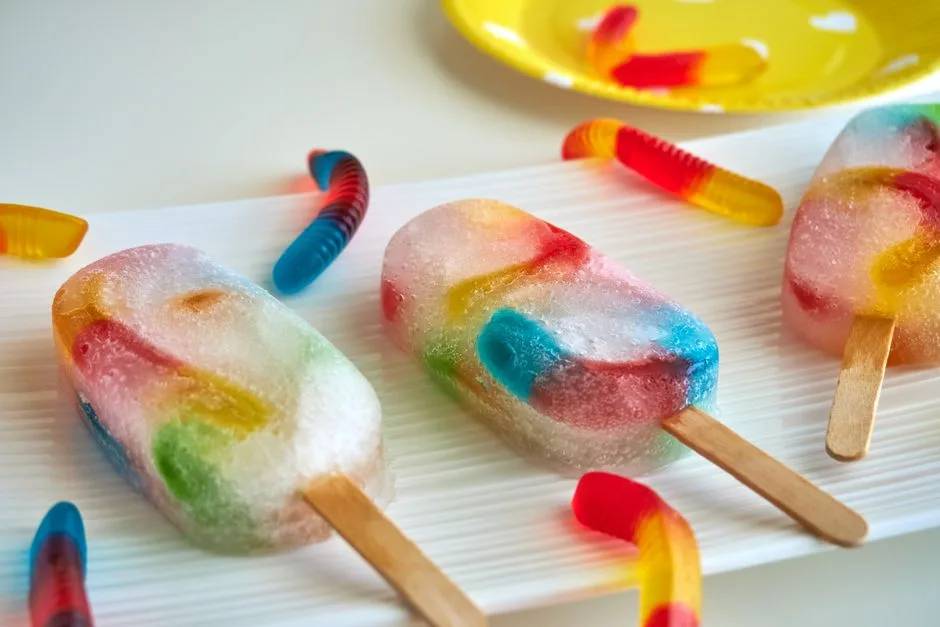
A DIY popsicle bar — where guests fill popsicle molds with their choice of fruit juice, yogurt, pureed fruit, coconut milk, or layered combinations and insert the stick — is the interactive frozen dessert activity that kids and adults both genuinely enjoy. The setup: 15–25 popsicle molds (silicone molds are easiest for DIY — they release frozen popsicles more cleanly than rigid plastic, $15–$30 for a set of 10), a selection of liquids in pour-spout containers or pitchers (orange juice, pineapple juice, watermelon puree, strawberry puree, coconut milk, lemonade, yogurt thinned with milk), bowls of add-ins (fresh berry pieces, kiwi slices, shredded coconut, mini chocolate chips, crushed graham crackers), and a dedicated cooler or freezer space for the filled molds to freeze. Guests fill their mold, add their mix-ins, insert the stick, label it with their name (masking tape and a marker), and place it in the freezer container. Popsicles take 3–5 hours to freeze solid, so this works best when set up early in the party — guests make their popsicles at the start, and they are ready as a mid-to-late-party treat. As a host backup, also have a batch of pre-made popsicles frozen and ready (made the night before) so there is something to hand out immediately — the DIY versions become the ‘second round.’ Budget $25–$50 for the popsicle station (molds, ingredients, cups) serving 20–30 guests. The DIY aspect makes it a memorable party activity in addition to a food station.
Photo by Anton Uniqueton on Pexels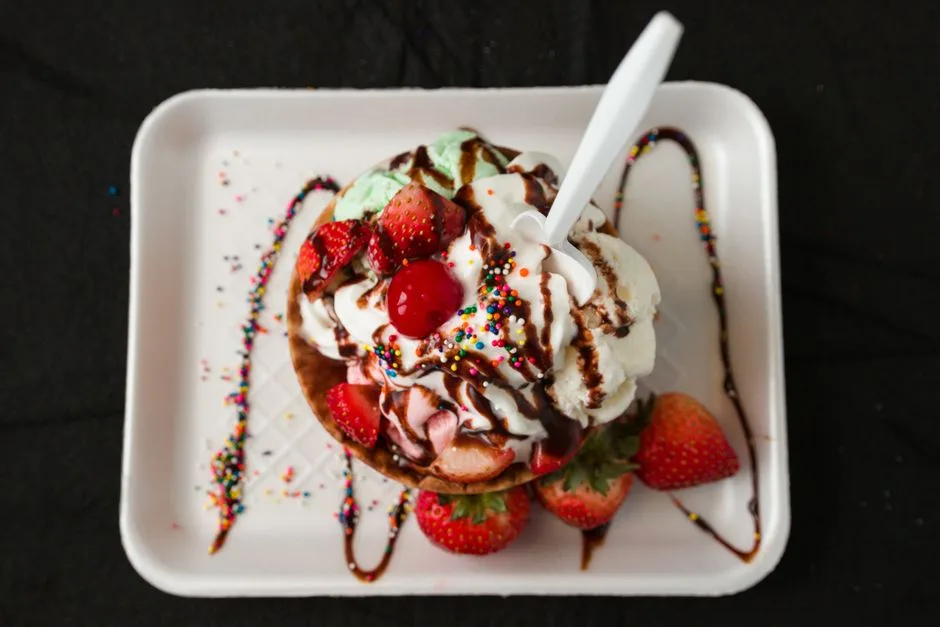
Ice Cream Sundae & Topping Bar
An ice cream sundae bar — 2–3 ice cream flavors (vanilla, chocolate, and a fruit sorbet for non-dairy guests) in insulated tubs set in a bed of ice, with a row of 10–15 toppings in bowls with spoons — is the crowd-pleasing dessert station that scales effortlessly from kids’ parties (sprinkles! gummy bears! chocolate sauce!) to adult gatherings (espresso powder, toasted nuts, sea salt caramel, amarena cherries, crumbled biscotti). The key to an outdoor sundae bar: (1) Ice cream must be served from insulated containers (a thick styrofoam cooler with ice packs, or purpose-built ice cream freezer tubs) that keep it scoopably cold (around -12°C to -15°C / 5–10°F) for 2–3 hours in outdoor heat. Standard cardboard ice cream cartons left on a table in 30°C / 85°F will be soup within 20 minutes. (2) Pre-scoop the ice cream into cups if the party is large (30+) — scooping to order creates a bottleneck. Pre-scooped cups in a freezer or cooler with dividers let guests grab and go straight to toppings. (3) Warm toppings (hot fudge, caramel, melted peanut butter) in small insulated pump dispensers or squeeze bottles kept warm in a thermos — cold hot fudge is disappointing. (4) Include 1–2 non-dairy options (fruit sorbet, coconut milk ice cream) so dairy-free and lactose-intolerant guests are included. Toppings bar essentials: crushed nuts (almonds, peanuts, pecans), sauces (chocolate, caramel, strawberry), sprinkles and candies, crushed cookies and graham crackers, fresh fruit (sliced strawberries, bananas, blueberries), whipped cream (in a chilled dispenser or bowl-on-ice), and maraschino cherries. Budget $25–$50 for a sundae bar serving 20–30 guests.
Photo by J E on Pexels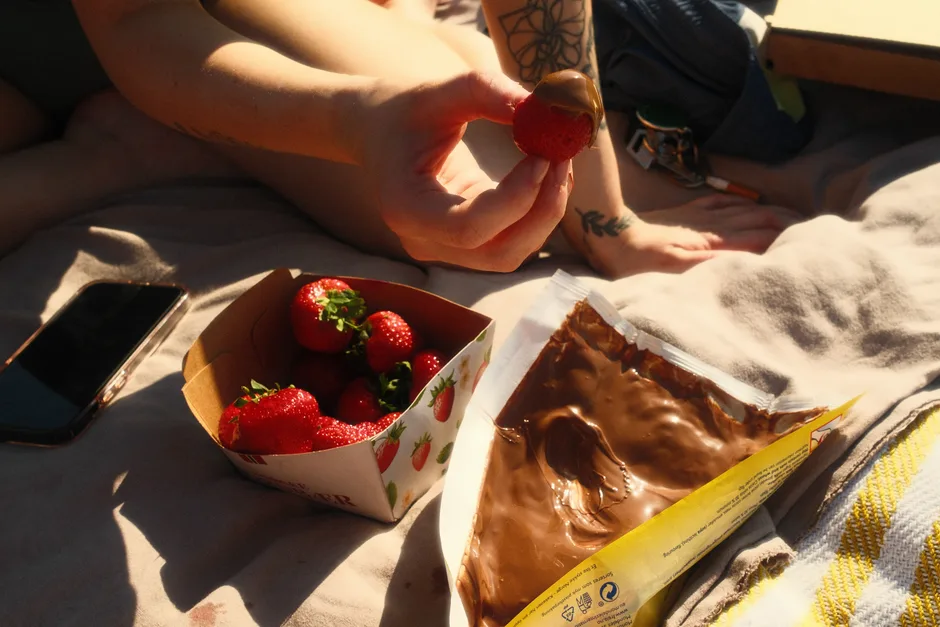
Chocolate-Dipped Frozen Fruit Skewers
Frozen fruit skewers dipped in chocolate — banana halves, strawberry skewers, pineapple wedges, kiwi slices, and mango chunks on wooden sticks, dipped in melted dark or milk chocolate, optionally rolled in crushed nuts, shredded coconut, or sprinkles, then frozen solid — are the make-ahead frozen dessert that looks professional, costs very little, and can be entirely prepared the night before. The technique: (1) Thread fruit pieces onto bamboo skewers or popsicle sticks. (2) Freeze the fruit skewers on a parchment-lined tray for 1–2 hours until firm (freezing before dipping helps the chocolate set faster and creates a thicker coating). (3) Melt chocolate (dark, milk, or white chocolate — or a combination) in a double boiler or microwave (30-second bursts, stirring between each), adding a teaspoon of coconut oil per cup of chocolate for a smoother, thinner coating that sets with a crisp snap. (4) Dip each frozen fruit skewer into the melted chocolate, let excess drip off, optionally roll in toppings, place back on the parchment-lined tray, and return to the freezer. (5) Once fully frozen (1–2 more hours), transfer to a sealed container with parchment between layers and store in the freezer until the party. The frozen chocolate shell melts slowly in the mouth (and in the hand — but the frozen fruit core means you have time), and the combination of frozen fruit + crisp chocolate is genuinely more satisfying than either element alone. Budget $15–$25 for 30–40 skewers serving 20–30 guests. Most visually stunning when arranged upright in a container of crushed ice (like a frozen bouquet) rather than lying flat on a tray.
Photo by Dua’a Al-Amad on Pexels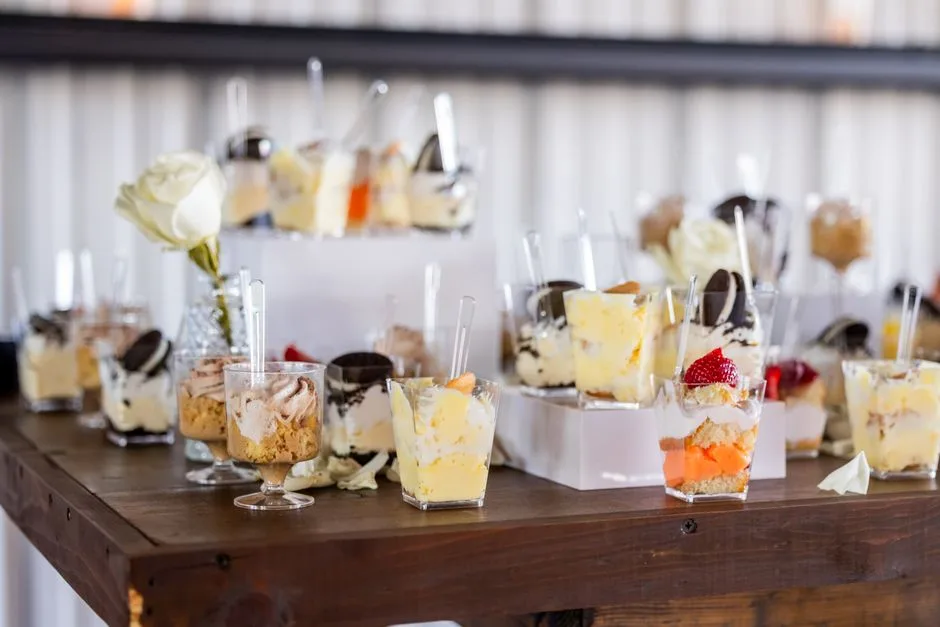
Mini Dessert Shooters & Parfait Cups
Mini dessert shooters — individual 3–5oz / 90–150ml cups containing layered desserts like tiramisu, key lime pie, chocolate mousse, berry trifle, or lemon posset — are the one-bite-to-finish dessert format that lets guests sample multiple sweets without committing to a full slice of cake or a large portion. The shooter format is ideal for pool parties: pre-portioned, no cutting or serving required, each guest grabs a cup and a small spoon, and the clear cups show off the layers for visual appeal. Dessert shooter options: (1) Berry trifle (pound cake cubes + vanilla pudding or mascarpone cream + fresh berries + berry compote, layered), (2) chocolate mousse (rich chocolate mousse topped with whipped cream, chocolate shavings, and a raspberry), (3) key lime pie (graham cracker crust crumbs + key lime filling + whipped cream + lime zest), (4) tiramisu (espresso-soaked ladyfinger pieces + mascarpone cream + cocoa dusting), (5) lemon posset (silky lemon cream topped with fresh blueberries and a shortbread crumble). All can be made 1–2 days ahead (many actually improve with 24 hours for flavors to meld) and stored in the fridge. For the party, arrange the shooters on a tiered dessert stand or a tray nestled in a shallow bed of ice — the elevated display makes them look like a professional dessert bar. Provide small spoons (espresso spoons or tasting spoons work perfectly — disposable wooden or bamboo versions are plastic-free and look great). Budget $20–$35 for 30–40 dessert shooters serving 15–25 guests.
Photo by Caleb Oquendo on Pexels
Pool Party Sheet Cake & Cupcake Display
A decorated sheet cake or cupcake tower is the dessert centerpiece that signals ‘this is a celebration’ — and for birthdays, anniversaries, or milestone pool parties, it is the non-negotiable dessert anchor. Sheet cake is more practical than a layered round cake for pool parties: it feeds more people with less cutting complexity, the flat surface is easier to decorate with a themed design (a pool-blue frosting ‘pool’ with teddy-graham ‘swimmers’ and fruit-leather ‘pool floats’ is a classic DIY pool party cake design), and it can be cut into small squares (guests who want just a taste can take a small piece). A cupcake tower ($30–$60 for 24–36 decorated cupcakes) eliminates cutting entirely and lets guests grab a self-serve portion. The cupcake format also offers flavor variety (half vanilla, half chocolate, a few red velvet) and the tower itself (a cardboard or acrylic tiered stand, $15–$25) creates height and drama on the dessert table. Poolside cake logistics: (1) Buttercream and cream cheese frostings melt and slide off in heat — fondant-covered cakes or cakes with stabilized whipped cream frosting hold up better outdoors. (2) Position the cake in full shade — direct sun on a frosted cake for even 15 minutes can cause visible melting. (3) For outdoor parties above 29°C / 85°F, consider an ‘ice cream cake’ (ice cream layered with cake and frosting, frozen solid) or an icebox cake (layers of cookies and whipped cream, frozen) — both are served frozen and are practically immune to heat damage during the serving window. (4) Pre-cut the sheet cake in the kitchen and bring it out on the serving platter already portioned (guests can lift a piece without a knife). Budget $30–$70 for a cake or cupcake display depending on whether you order from a bakery or DIY.
Photo by Cup of Couple on Pexels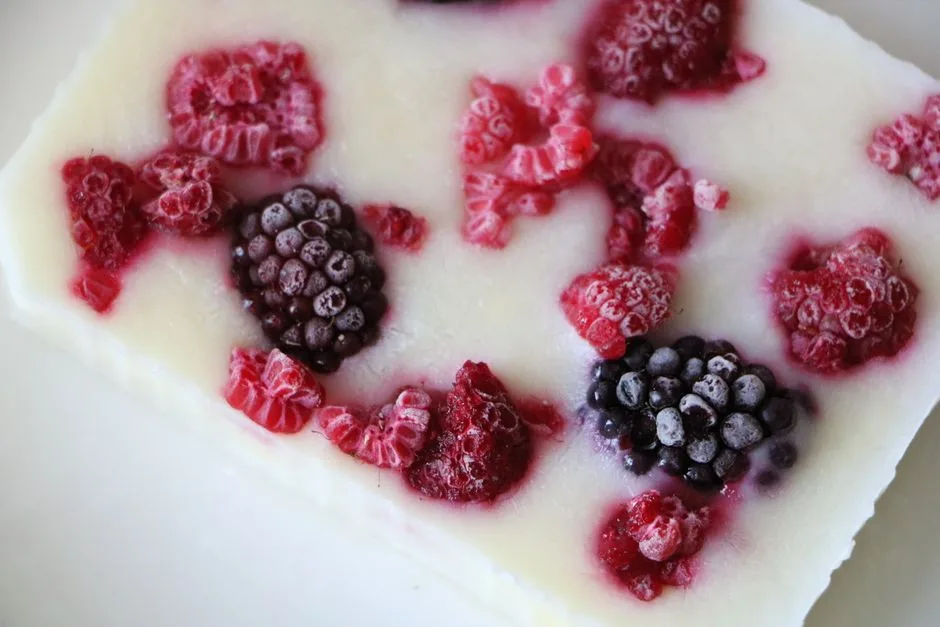
Frozen Yogurt Bark with Fruit & Granola
Frozen yogurt bark — a thin sheet of sweetened Greek yogurt (mixed with honey or maple syrup and vanilla) spread on a parchment-lined tray, scattered with fresh berries, sliced fruit, granola, nuts, and a drizzle of melted chocolate, then frozen solid and broken into irregular shards — is the make-ahead frozen dessert that requires zero cooking, looks beautiful arranged on a platter, and can be prepped entirely 1–2 days before the party. The technique: (1) Mix 3 cups / 720g of full-fat Greek yogurt with 2–3 tablespoons honey or maple syrup and 1 teaspoon vanilla extract. (2) Spread into a 1/2-inch / 1.3cm thick even layer on a parchment-lined rimmed baking sheet. (3) Scatter toppings across the surface: sliced strawberries, blueberries, raspberries, mango chunks, sliced kiwi, granola clusters, chopped pistachios or almonds, shredded coconut, and a drizzle of melted dark or white chocolate. (4) Freeze for 3–4 hours until completely solid. (5) Remove from freezer, peel off the parchment, and break into jagged shards with your hands or a heavy knife. Arrange shards on a chilled platter or a tray over ice — they will hold their structure for 10–15 minutes outdoors (the yogurt melts faster than ice cream, so put out small batches and replenish from the freezer). The bark is essentially a deconstructed frozen yogurt parfait in a snackable, handheld format — no spoon needed for small shards. Budget $15–$22 for a large tray of frozen yogurt bark serving 15–20 guests. It is also one of the healthiest dessert options (Greek yogurt protein + fresh fruit + nuts — dessert that is actually nourishing), which guests who have been swimming and active all afternoon genuinely appreciate.
Photo by Meryemce on Pexels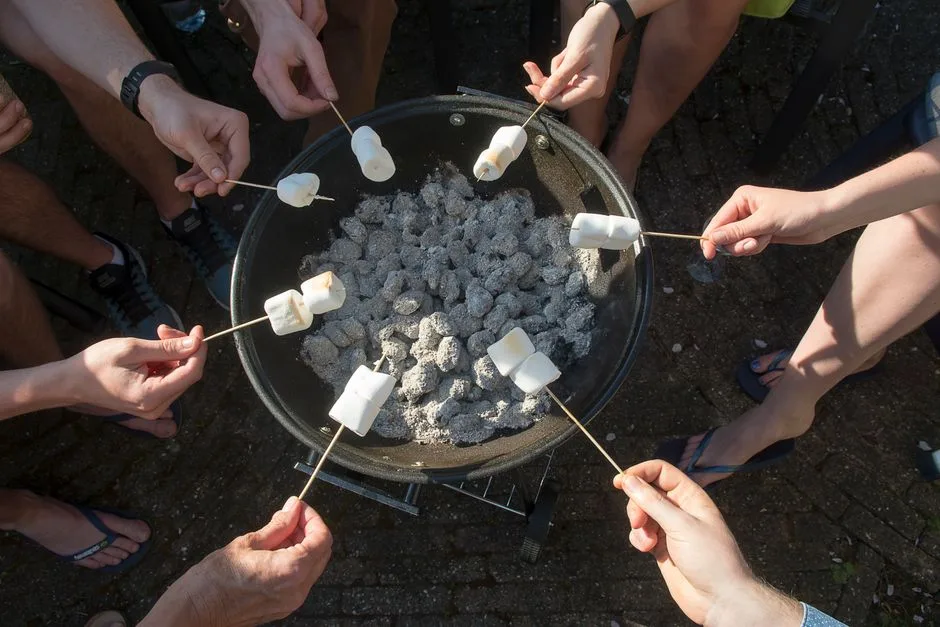
S’mores Station by the Fire Pit
A s’mores station — positioned at a fire pit, outdoor fireplace, or even a tabletop s’mores roaster (a small gel-fuel or electric tabletop unit, $25–$50) — is the evening pool party activity-dessert hybrid that transitions the party from afternoon swimming to evening lounging. The classic s’mores formula (graham cracker + toasted marshmallow + chocolate square) is beloved for a reason, but a build-your-own s’mores station with creative variations makes it memorable: (1) Multiple chocolate options: milk chocolate, dark chocolate, peanut butter cups, chocolate-mint patties, chocolate-caramel squares. (2) Cookie upgrades: replace graham crackers with chocolate chip cookies, shortbread, digestives, or stroopwafels. (3) Marshmallow variety: classic vanilla, chocolate-filled, strawberry, or coconut marshmallows. (4) Spreads and extras: peanut butter, Nutella, cookie butter, sliced bananas, strawberry slices, a sprinkle of sea salt. Arrange everything in a compartmentalized tray or several small bowls around the fire feature, with long-handled roasting forks ($10–$20 for a set of 8–12) and a container for used forks. The s’mores station works best as the party’s ‘sunset transition’ — as the afternoon heat fades and guests start drying off, the fire pit becomes the natural gathering point, and toasting marshmallows gives everyone an activity that feels cozy and communal after a day of active swimming. Safety considerations: (1) the fire feature must be on a stable, non-flammable surface at least 3m / 10ft from the pool, (2) supervise children at the roasting station (a designated adult roaster for kids under 8 avoids burns), (3) have a fire extinguisher or bucket of sand nearby — not water (splashing pool water onto a grease or gel fire can spread it). Budget $25–$40 for a s’mores station serving 20–30 guests.
Photo by Jan van der Wolf on PexelsPoolside Drinks & Refreshments: Stay Cool & Hydrated
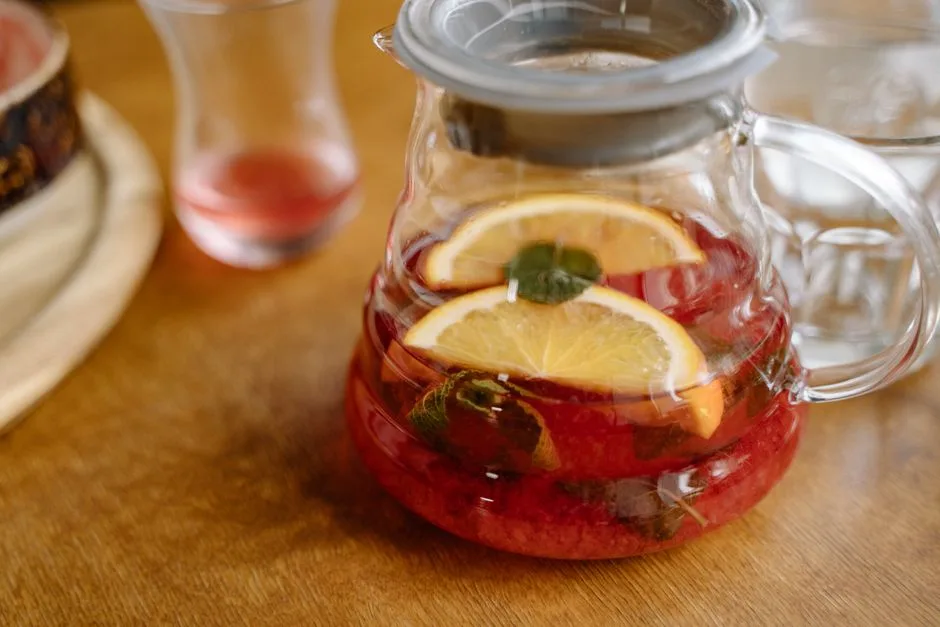
Signature Punch & Pitcher Cocktails
Batch cocktails — a large-format punch or pitcher drink made in advance and served from a drink dispenser or pitcher — are vastly more practical for a pool party than individual made-to-order cocktails. A single bartender can make 20–30 individual drinks per hour; a batch dispenser serves 50–80 guests in the same time with zero bottleneck. The ideal pool party batch cocktail formula: 1 part spirit + 1 part citrus or acid + 1 part sweet + 2–3 parts mixer/dilution, served over ice with fresh garnishes. Three batch cocktail recipes that scale effortlessly: (1) Classic Rum Punch (light rum + dark rum + pineapple juice + orange juice + lime juice + grenadine — a tropical crowd-pleaser that tastes like vacation), (2) Watermelon Margarita Pitcher (blanco tequila + fresh watermelon juice + lime juice + agave nectar + a splash of orange liqueur — blend fresh watermelon chunks, strain through a fine mesh sieve to remove pulp, and scale to pitchers), (3) Aperol Spritz Bar (Aperol + prosecco + soda water + orange slice — pre-mix the Aperol and prosecco in pitchers, have soda water and ice separate so guests can top their own and control dilution). All batch cocktails should be pre-mixed 1–4 hours before the party (the flavors integrate — a punch that sits for a few hours tastes more cohesive than one mixed 10 minutes before serving). Keep pitchers in the fridge and replenish the dispenser as needed rather than putting everything out at once. Have a non-alcoholic version of the same flavor profile (see mocktail bar idea) so non-drinkers and kids are not relegated to plain water. Budget $40–$80 for batch cocktail ingredients serving 25–35 guests. Clearly label every dispenser and pitcher (guests should never have to guess what they are drinking or whether it contains alcohol).
Photo by Yan Krukau on Pexels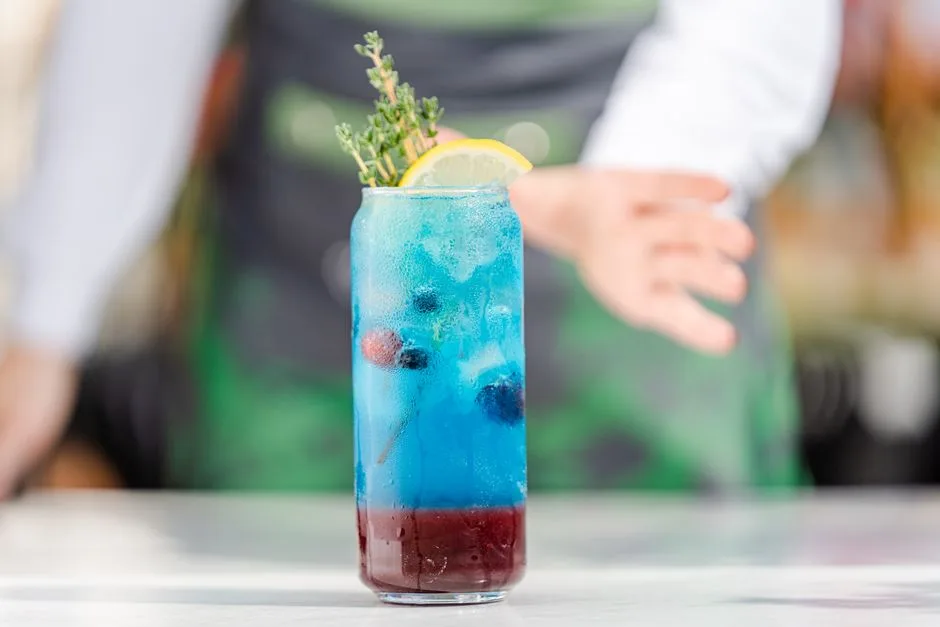
Zero-Proof Mocktail Bar with Fresh Ingredients
A dedicated mocktail (non-alcoholic cocktail) bar — with the same care, fresh ingredients, and beautiful presentation as the alcoholic bar — ensures that non-drinkers, designated drivers, pregnant guests, kids, and anyone taking a break from alcohol feel fully included rather than an afterthought. The mocktail bar uses the same setup as a cocktail bar but with zero-proof spirits, fresh juices, house-made syrups, herbs, and garnishes. Zero-proof spirits (Seedlip, Ritual, Lyre’s, Monday — $25–$40 per bottle) have improved dramatically and provide the botanical complexity that makes a mocktail taste like a crafted drink rather than juice with soda water. Three batch mocktail options: (1) Cucumber-Mint Cooler (muddled cucumber + mint + lime juice + simple syrup + soda water — the most refreshing option on a hot day), (2) Tropical Ginger Fizz (pineapple juice + ginger syrup + lime juice + coconut water + soda water — complex, spicy-sweet, feels celebratory), (3) Berry Smash (muddled mixed berries + lemon juice + honey syrup + soda water + fresh basil — deep pink color, looks beautiful in a glass with a berry and basil garnish). Serve mocktails in the same glassware as alcoholic drinks (no plastic ‘kiddie cups’ — the presentation parity matters), and use different garnish combinations so the mocktails are visually distinguishable from the alcoholic options. The mocktail bar typically costs less than the alcoholic bar ($20–$40 for ingredients serving 25–35 guests) and the fresh fruit and herb ingredients overlap with what you are already buying for the cocktail bar. This station consistently earns the most genuine gratitude from guests — being thoughtfully included as a non-drinker at a party where alcohol is prominent is a hospitality gesture people remember.
Photo by Denys Gromov on Pexels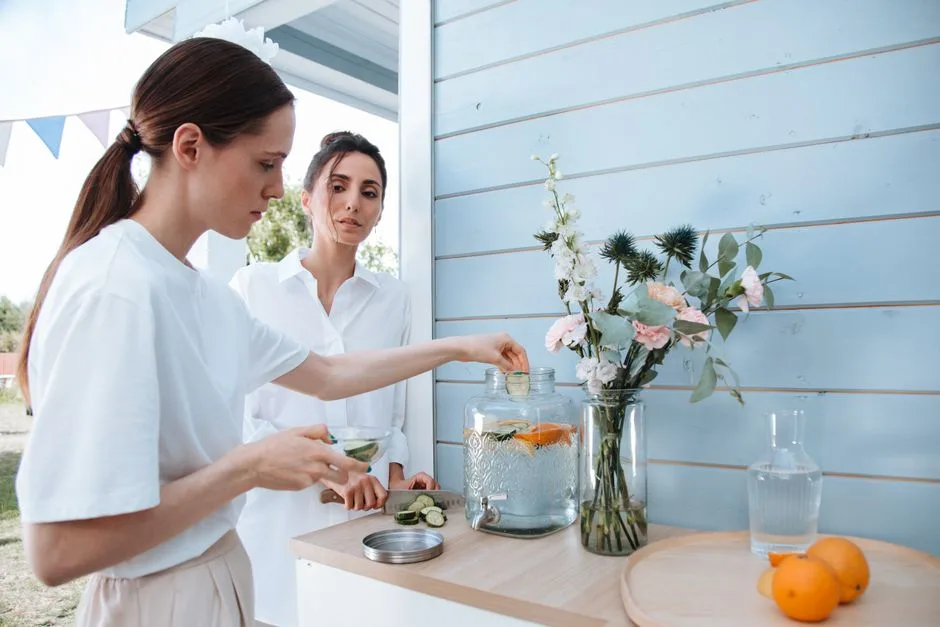
Fruit-Infused Spa Water & Hydration Station
A hydration station — large drink dispensers filled with ice water infused with fresh fruit, herbs, and cucumber, clearly labeled and positioned prominently — is the most important beverage setup at any pool party. Swimming, sun, and heat combine to dehydrate guests faster than they realize (immersion in water suppresses the thirst sensation, and the cooling effect of swimming masks how much the body is sweating). The result: guests who have been swimming for 2–3 hours without drinking water can become dehydrated, leading to headaches, fatigue, and, if alcohol is involved, much faster intoxication than expected. The hydration station solves this by making water the most visible, appealing beverage option — not an afterthought. Infused water combinations: (1) Cucumber + Mint + Lime (the most refreshing combination — clean, cooling, universally appealing), (2) Strawberry + Basil + Lemon (subtly sweet, pretty pink tint, aromatic), (3) Watermelon + Rosemary (unexpected, sophisticated, beautiful pale pink color), (4) Citrus Medley (lemon + lime + orange + grapefruit slices — classic, bright, vitamin-rich). Use large 3–5 gallon / 12–19 liter drink dispensers ($25–$40 each) with a spigot, packed with ice and fruit, and refill with water throughout the party. Position the hydration station in a central, shaded location that guests pass frequently — not tucked in a corner. Have a stack of cups clearly intended for water (a different style or color from the cocktail/mocktail cups) and a small sign: ‘Hydration Station — Refill Often!’ For kids’ parties, add a second dispenser with a lightly sweetened fruit-juice-and-water blend (25% juice, 75% water) — more appealing than plain water but far less sugary than soda or full-strength juice. Budget $20–$40 for a hydration station serving 30–50 guests — the fruit and herbs cost very little, and the dispenser is a reusable party investment.
Photo by Ron Lach on Pexels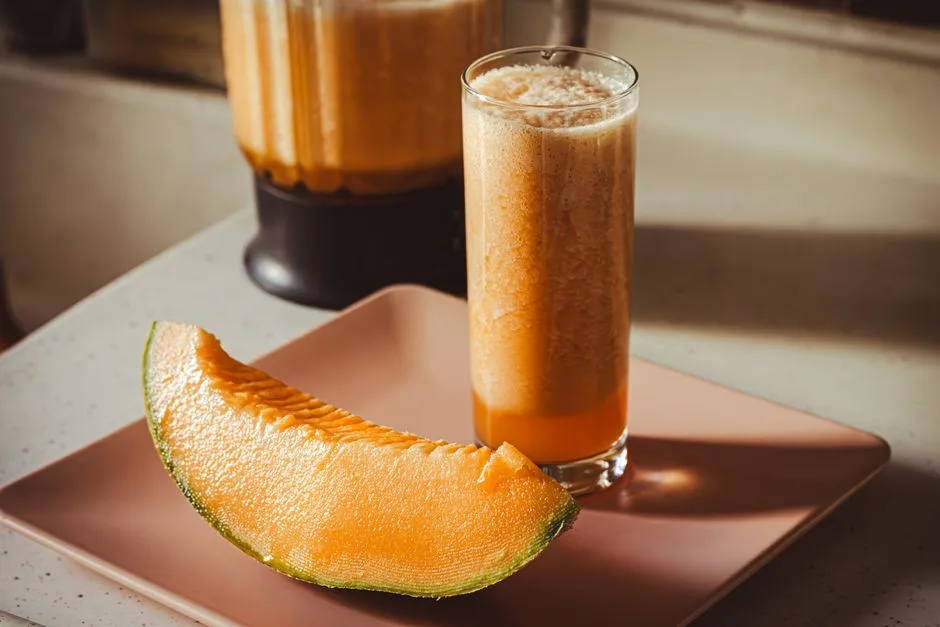
Tropical Smoothie & Blended Drink Bar
A smoothie bar — a blender station turning out fresh fruit smoothies, protein shakes, or blended fruit slushies — is the drink station that functions as both a beverage AND a snack (a mango-banana-coconut smoothie is effectively a light meal for kids and teens who are too busy swimming to stop and eat). The setup: a high-powered blender (a standard home blender works for small parties of 10–15; for 20+ guests, borrow or rent a second blender or pre-blend batches and keep them chilled in pitchers), an array of frozen fruit (frozen is essential — it creates the thick, cold texture without watering down the drink with ice; fresh fruit blended with ice produces a watery, disappointing smoothie), liquid bases (coconut milk, almond milk, Greek yogurt, orange juice, coconut water), and add-ins (honey, agave, protein powder, chia seeds, spinach for green smoothies). Create 2–3 ‘signature smoothie’ recipe cards displayed at the station so guests can order by name rather than trying to invent a combination: (1) Tropical Breeze (frozen mango + frozen pineapple + coconut milk + banana — tastes like a virgin piña colada), (2) Berry Blast (frozen mixed berries + Greek yogurt + honey + a splash of orange juice — thick, creamy, antioxidant-rich), (3) Green Machine (spinach + frozen banana + frozen mango + coconut water + lime juice — vibrant green, surprisingly delicious, a genuine energy booster). The blender is loud (it will temporarily drown out background music), so batch-blend during natural party lulls rather than constant blending. Budget $25–$40 for smoothie ingredients serving 20–25 guests. For adult parties, this station can double as a frozen cocktail bar — add rum to the Tropical Breeze, tequila to the Berry Blast, and vodka to the Green Machine for ‘make it a cocktail’ options.
Photo by The Design Lady on Pexels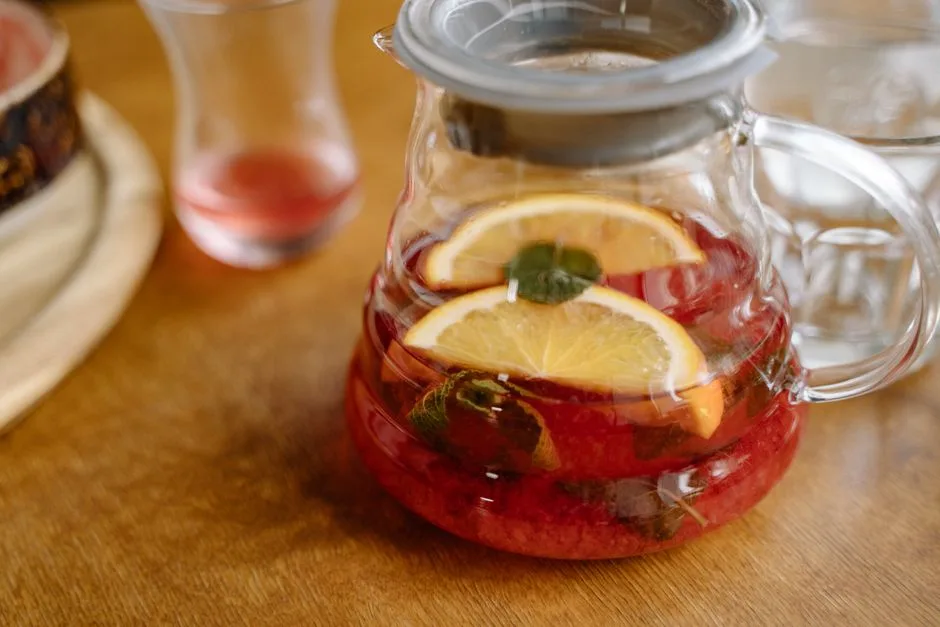
Iced Tea & Lemonade Bar with Flavor Syrups
An iced tea and lemonade bar — large dispensers of freshly brewed iced tea and homemade lemonade, with a selection of flavored simple syrups, fresh herbs, and fruit garnishes for guests to customize their own drink — is the classic, budget-friendly, all-ages beverage station that works for every pool party from kids’ birthdays to adult gatherings. The base drinks: (1) Fresh-squeezed lemonade (lemon juice, sugar, water — use a ratio of 1 cup lemon juice : 2/3 cup sugar : 4 cups water, adjust to taste; real lemonade made with fresh lemons is dramatically better than powdered mix and costs roughly the same per serving), (2) unsweetened iced black tea (brew double-strength, pour over ice to dilute — this method produces clearer, less bitter iced tea than brewing at normal strength and refrigerating), (3) an herbal or fruit tea option (hibiscus tea — deep ruby-red color, naturally tart and slightly sweet, caffeine-free, and visually stunning in a clear dispenser). The flavor syrup bar: 3–4 homemade simple syrups in squeeze bottles (peach, raspberry, ginger, lavender, mint, or passionfruit — each made by simmering equal parts sugar and water with the flavor ingredient, then straining). Guests start with a base (lemonade, black tea, or half-and-half for an Arnold Palmer), add a flavor syrup, and garnish with fresh herbs (mint, basil, rosemary) and fruit (lemon wheels, raspberries, peach slices). The customization makes it interactive and fun, and the all-ages format means no one is limited to plain water or soda. Budget $20–$35 for an iced tea and lemonade bar serving 30–40 guests — pound for pound, this is the most cost-effective beverage station possible (tea leaves, lemons, sugar, and fruit for syrup are all inexpensive bulk ingredients). For adult parties, add a bourbon or vodka option on the side so guests can spike their Arnold Palmer.
Photo by Yan Krukau on Pexels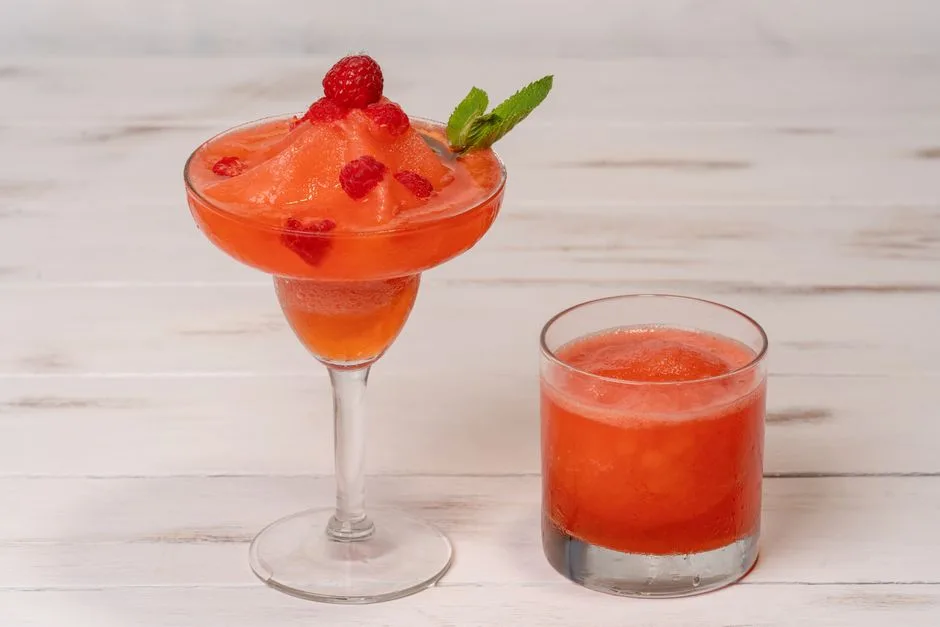
Frozen Slushie & Granita Machine Station
A frozen slushie or granita station — a commercial-style slushie machine (rented or borrowed for the party), or a DIY granita setup (a frozen, scraped-flake ice dessert served in cups with flavored syrups) — is the ‘wow factor’ drink station that guests of all ages gravitate toward on a hot pool day. A slushie machine rental costs $50–$120 for a weekend and produces 2–5 gallons / 8–19 liters of frozen slush per hour, enough for 50–100+ servings. Fill with non-alcoholic slushie mixes (blue raspberry, cherry, piña colada, mango) for all-ages parties, or offer one alcoholic and one non-alcoholic flavor for adult parties. If renting a machine is not in the budget, the DIY granita method produces a similar frozen treat: (1) Mix a flavored liquid (espresso + sugar for coffee granita; watermelon juice + lime + sugar for watermelon granita; lemon juice + sugar + water for lemon granita), (2) pour into a shallow baking dish and freeze, (3) every 30–45 minutes, scrape the frozen edges into the center with a fork, creating fluffy ice crystals, (4) after 3–4 hours of freezing and scraping, the entire dish is a mass of sparkling, flavorful ice flakes. Serve granita in small cups or paper cones — it is essentially a zero-equipment frozen dessert that costs $5–$10 in ingredients for 20–30 servings. The granita is a particularly elegant option for adult parties (espresso granita with a dollop of whipped cream, or prosecco poured over lemon granita for a frozen sgroppino) and costs essentially nothing beyond the base ingredients. Budget $10–$20 for a DIY granita station serving 25–35 guests; $60–$150 for a rented slushie machine serving 50–100+.
Photo by Denys Gromov on Pexels2–3 days before: Plan the menu and shop for all non-perishable ingredients. Make and freeze any desserts that hold in the freezer (popsicles, frozen yogurt bark, chocolate-dipped fruit skewers, cookie dough). Prepare flavored simple syrups for the drink bar (they keep in the fridge for 1–2 weeks). If using frozen fruit for smoothies, pre-portion fruit into zip-top bags — one bag per blender batch — and freeze.
1 day before: Make pasta salads, grain salads, slaws, and any cold side that improves with overnight resting (Mediterranean orzo salad, sesame noodle salad, coleslaw). Prep mason jar salads (they hold perfectly for 24 hours). Make deviled egg filling (store separately from whites to prevent sogginess; fill the whites the morning of). Marinate meats for grilling (chicken skewers, burger patties can be formed and stacked with parchment between). Make dessert shooters and parfaits. Brew iced tea and make lemonade base. Bake cupcakes or cake (leave unfrosted; frost the morning of).
Morning of the party: Fill deviled eggs and arrange on serving platters. Frost cake or cupcakes. Assemble caprese/antipasto skewers. Make guacamole (press plastic wrap directly onto surface to prevent browning). Cut fruit for platters (toss apple/pear/banana in citrus juice to prevent browning). Assemble burger patties if not done the day before. Set up drink dispensers with infused water (add ice and fruit 1–2 hours before party). Chill all drinks. Fill drink tubs with ice 1–2 hours before guests arrive.
1–2 hours before: Set up all food stations — tables, serving dishes, utensils, labels, ice beds for cold dishes. Light the grill and begin cooking items that hold well (pulled pork/brisket should already be done and warming; start with items that take longest). Put out non-perishable snacks (chips, dips, grazing board components).
During the party: Grill in batches — put out food as it is ready rather than trying to have everything on the table simultaneously. The relaxed, rolling pace of poolside eating means guests graze over 2–3 hours, and fresh-off-the-grill food arriving mid-party is an event that pulls people to the food table. Replenish cold dishes from the backup fridge supply. Keep an eye on ice levels in drink tubs and under cold dishes.
After the party: Discard any perishable food that has been out for more than 2 hours (or 1 hour above 32°C / 90°F). Non-perishable items can be saved. Clean and dry all serving dishes. The goal is to wake up the next morning to a clean kitchen, not a counter full of day-old party debris. The pool deserves the same treatment before you turn in: skim the surface while the deck lights are still on, then set a pool cleaning robot running overnight so the sunscreen film, crumbs, and stray bits of napkin are off the floor by the time anyone wants to swim the next morning.
• Appetizers/snacks: 4–6 pieces/bites per person (e.g., for 20 guests, plan roughly 80–120 individual pieces across all appetizer types). Guests graze throughout — appetizers should be available from arrival through the first 90 minutes.
• Grilled mains: 150–200g / 5–7oz of total protein per adult, 100–125g / 3.5–4.5oz per child. A 20-person mixed party (12 adults, 8 kids) needs roughly 2.5–3.2kg / 5.5–7lb of total grilled protein. Burgers: 2 patties per adult on average. Skewers: 3–4 per adult. Hot dogs: 1.5–2 per adult.
• Salads and sides: roughly 120–180ml / 1/2–3/4 cup per person per side dish. For 20 guests and 3 side dishes, each side should serve roughly 2.5–3.5 liters / 10–15 cups total. Guests tend to take smaller portions when there are multiple sides to try.
• Desserts: 1.5–2 servings per person (people often have a small serving of two different desserts rather than a large serving of one). For 20 guests, plan for 30–40 total dessert portions.
• Drinks: 2–3 drinks per person in the first hour, then 1–2 per hour thereafter. For a 4-hour party with 20 adults: roughly 120–160 total drink servings. About 40–50% should be non-alcoholic (water, lemonade, iced tea, soda) even at an adult party — hydration needs are higher due to swimming and sun. Ice: roughly 0.5kg / 1lb per person for the party duration (10kg / 22lb for 20 guests) — and buy more than you think you need. Running out of ice mid-party is the most preventable hosting failure.
These are generous guidelines — it is better to have some leftovers (which guests can take home or you can enjoy for days) than to run out of food while guests are still hungry.
A note from our service team. Food and pools mix fine on a plate — it’s the crumbs, grease, and spilled marinade drifting into the water that cause trouble. Every bit of organic matter that lands in the pool is algae food, and a grilled-meat cookout can push a borderline pool over the edge within two days. Our techs’ rule for food events: keep serving tables at least six feet from the edge, skim right after, and run the cleaner that night. If a green tint shows up in the shallow end a few days later, this mustard algae guide walks through the exact treatment we use.
After the plates are cleared, the pool still needs a pass
Crumbs, grease, and sunscreen all end up in the water, and every bit of it feeds algae. A robotic cleaner works the floor, walls, and waterline overnight, so the pool is ready again before you have finished the dishes.
Shop Aiper robotic pool cleanersMore Pool Party & Entertaining Inspiration
This article is part of our Pool Lifestyle & Entertainment series. Explore the full collection of pool party planning resources and related design guides:
For the accessories you’ll reuse all summer, see how to store pool floats without damage so they survive to the next party.


