
Pool equipment — the pump, filter, heater, salt cell, and plumbing that keep the pool clean, warm, and circulating — is essential but visually unappealing. A well-designed equipment concealment strategy makes the mechanical side of pool ownership disappear from view (and hearing) while keeping the equipment fully accessible for service and properly ventilated for safe operation. Whether you want a quick weekend screen build, a lush planted screen that improves with age, a permanent masonry enclosure, or a multi-functional screen that doubles as storage, a potting bench, or an outdoor shower — we have gathered 33 of the best pool equipment concealment ideas with real photos and practical guidance on materials, construction, ventilation, noise reduction, and cost. Each idea works as a standalone solution or can be combined with others for a comprehensive equipment-area transformation.
Equipment Enclosures & Screens: The First Line of Defense
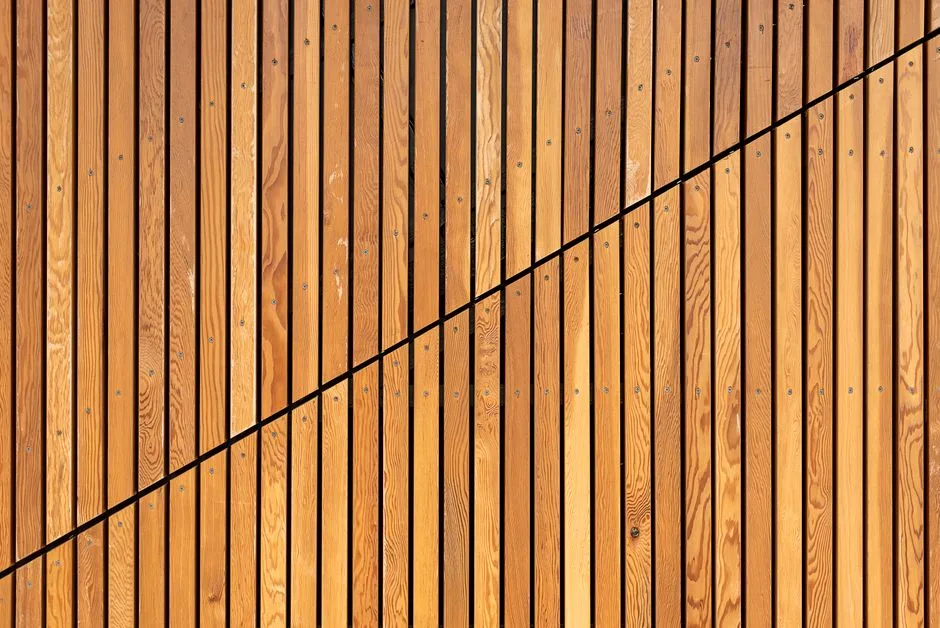
Horizontal Timber Slat Screen
A horizontal timber slat screen — typically built from treated pine, cedar, or hardwood battens (70-90mm / 2.75-3.5 inch wide) spaced 10-20mm / 3/8-3/4 inch apart and mounted on a sturdy post-and-rail frame — is the most popular and versatile equipment concealment solution. The horizontal lines read as modern and architectural, the gaps between slats provide essential airflow (pool equipment — especially gas heaters and heat pumps (see choosing between gas and electric pool heater types) — requires unobstructed ventilation to operate safely and efficiently), and the timber adds natural warmth that softens the mechanical look of the equipment pad. A DIY timber slat screen for a typical equipment pad (roughly 1.5m × 2.5m / 5ft × 8ft, screens on 2-3 sides) costs $300-$800 in materials and takes a weekend to build. Key construction details: use stainless steel or coated deck screws (not standard zinc — pool chemicals accelerate corrosion), set the bottom of the screen 50-75mm / 2-3 inches above grade to prevent ground-contact rot, and design at least one side as a removable panel or gate for equipment access and service. For a premium look, stain or oil the timber to match existing deck or fence wood tones. Budget $1,500-$3,500 for a professionally built custom timber screen with premium hardwood, concealed fasteners, and integrated gate hardware.
Photo by Jan van der Wolf on Pexels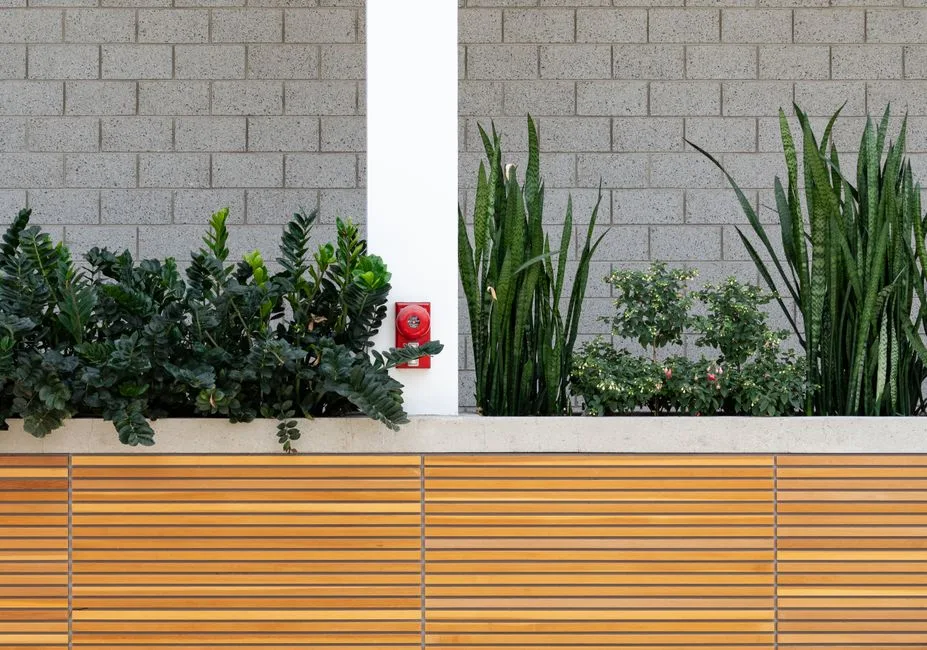
Vertical Batten Screen with Integrated Planter
A vertical batten screen — with closely spaced vertical timber or composite battens running floor-to-top in a clean, rhythmic pattern — creates a different visual language from horizontal slats: taller, more architectural, and often reading as an intentional design feature rather than something that is hiding equipment. Adding a raised planter box at the base of the screen (planted with ornamental grasses, low shrubs, or flowering perennials) softens the transition from screen to ground and makes the entire assembly read as a landscape feature rather than a utility cover. The vertical orientation also naturally draws the eye upward and away from the equipment behind it — a small psychological trick that makes the concealment more effective. Material cost for a DIY vertical batten screen with integrated planter: $500-$1,200 for timber (pressure-treated or cedar battens plus framing timber and planter box lumber), plus $100-$300 for planter soil, drainage gravel, and plants. Professional installation with premium materials (hardwood battens, self-watering planter system, integrated low-voltage lighting) runs $3,000-$7,000. Important: the planter box must be lined and have drainage that directs water away from the equipment pad — you do not want irrigation water pooling around pumps and electrical connections.
Photo by Scott Webb on Pexels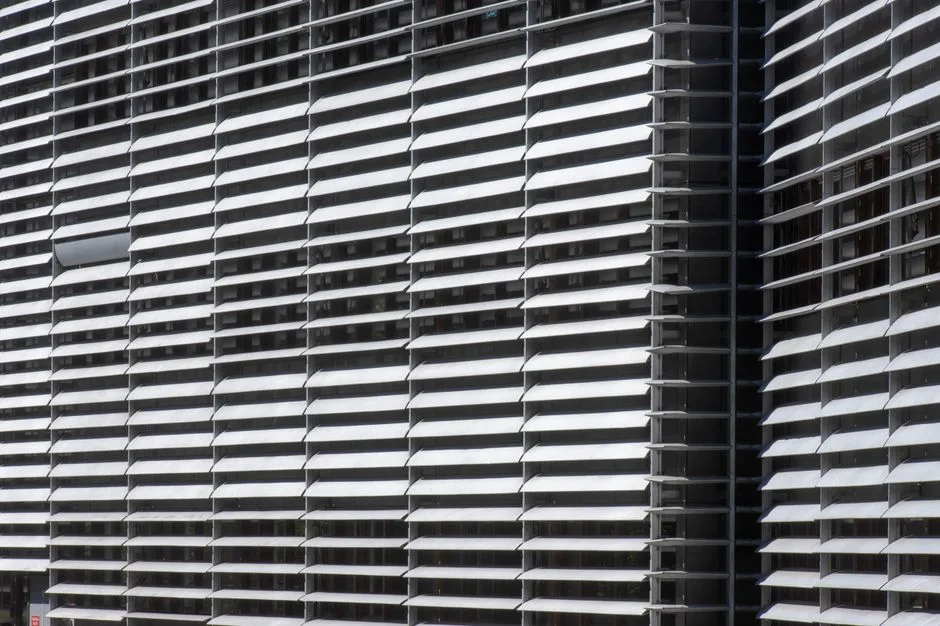
Powder-Coated Aluminum Louvered Screen
A powder-coated aluminum louvered screen — with fixed angled slats in a dark grey, charcoal, or matte black finish set in a slim aluminum frame — is the modern, zero-maintenance alternative to timber. The angled louvers block the line of sight to the equipment from most angles while allowing plenty of airflow through the angled gaps, and the aluminum will never rot, warp, fade, or need painting. Aluminum louvered screens are typically fabricated to order by fencing and screening companies; the panels come in standard widths (900-1,200mm / 36-48 inch) and heights (1,200-1,800mm / 48-72 inch) and are mounted between posts or on a wall. Installed cost: $200-$400 per linear meter / $60-$120 per linear foot for a quality powder-coated aluminum louvered system including posts, panels, and gate. For a typical equipment pad screen on 2-3 sides (roughly 8-12 linear meters / 26-39 linear feet total), budget $1,600-$4,800 professionally installed. Aluminum louvered screens pair particularly well with contemporary and mid-century modern homes where clean lines and dark metal accents are already part of the architectural vocabulary. The dark color also makes the screen visually recede — your eye passes over it without stopping, which is exactly what you want from equipment concealment.
Photo by Jan van der Wolf on Pexels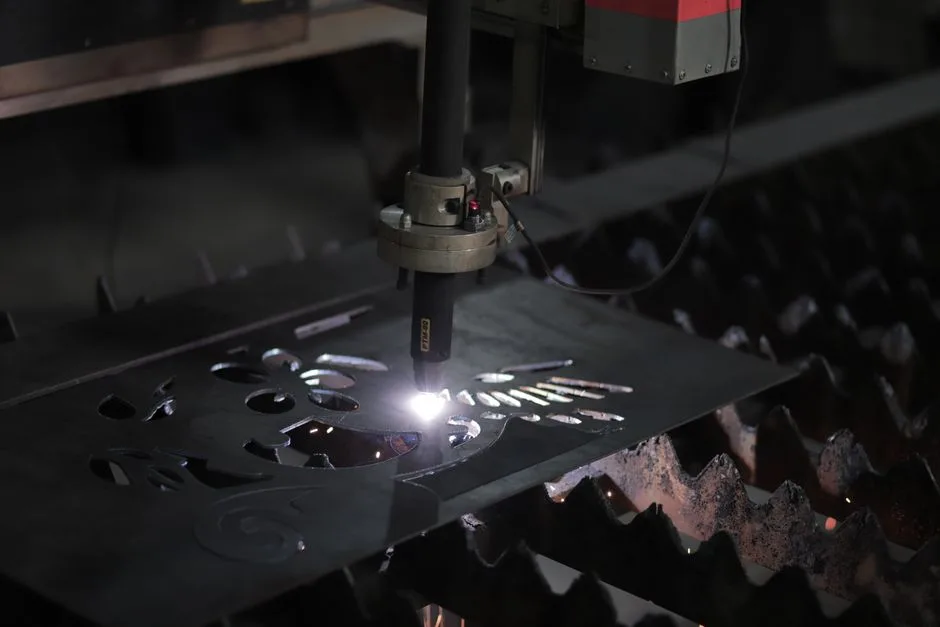
Laser-Cut Decorative Metal Panel Screen
A laser-cut or CNC-routed decorative metal panel screen — with a custom pattern (geometric, botanical, abstract, or a motif that echoes the home’s architecture) cut through a sheet of powder-coated aluminum, Corten weathering steel, or stainless steel — transforms equipment concealment from a purely functional screen into a genuine backyard art piece. The perforations provide airflow and partial visibility (the equipment behind reads as a dark, indistinct shape rather than identifiable machinery), while the pattern itself becomes a focal point and conversation starter. Custom laser-cut panels are typically fabricated from your design file or the fabricator’s pattern library; standard patterns cost $300-$600 per panel (1,200mm × 1,200mm / 4ft × 4ft); fully custom designs run $600-$1,500 per panel. A 3-panel screen with posts and installation runs $1,500-$5,000. Corten steel (which develops a stable rust patina that protects the steel beneath and gives a rich, warm orange-brown color) is an especially striking choice that reads as both industrial and organic — it pairs beautifully with native grasses and natural stone. Note: Corten steel’s rust patina takes 6-12 months to fully develop in outdoor exposure, and the runoff during the initial weathering period can stain adjacent concrete or stone — plan the screen placement so runoff drains to soil or gravel, not onto the pool deck.
Photo by Ana Victoria Valverde on Pexels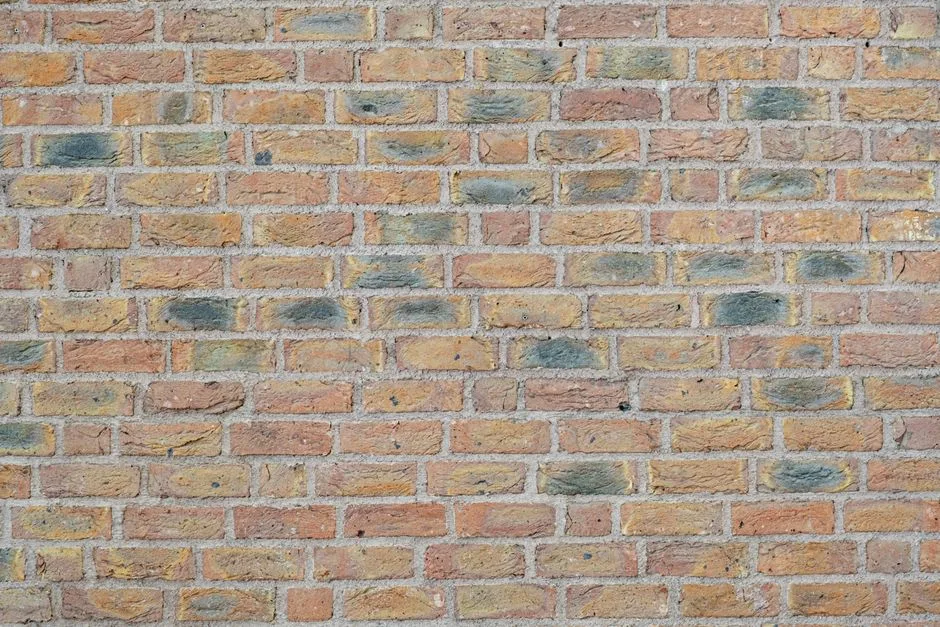
Masonry / Block Wall Equipment Enclosure
Building a low masonry wall enclosure — using brick, concrete block (rendered and painted), natural stone veneer, or gabion (wire cage filled with stone) — creates a permanent, solid, and completely opaque equipment screen that also serves as a landscape retaining wall, seating ledge, or garden bed boundary. A masonry wall is the most durable concealment option (50+ year lifespan with zero maintenance beyond occasional cleaning) and provides the best noise reduction of any screen material thanks to its mass. The wall should be built as a U-shape or L-shape — three sides of masonry, with the fourth side (facing away from the pool and living areas) left open for equipment access, or closed with a matching gate. Budget $3,000-$8,000 for a professionally built masonry equipment enclosure in brick or rendered block (roughly 6-10 linear meters / 20-33 linear feet of wall at 1.2-1.5m / 4-5ft height). A stone veneer or gabion wall runs $5,000-$12,000. Critical design requirements: the enclosure must have a minimum 30-45cm / 12-18 inch clearance on all sides of the equipment (check manufacturer specs for your specific pump, filter, and heater), the top must be fully open to the sky or have significant ventilation openings (gas heaters require a minimum open area — typically 25-50% of the enclosure footprint — for combustion air and exhaust), and a gate or removable panel at least 90cm / 36 inch wide is needed for equipment removal and replacement.
Photo by Nur Yilmaz on Pexels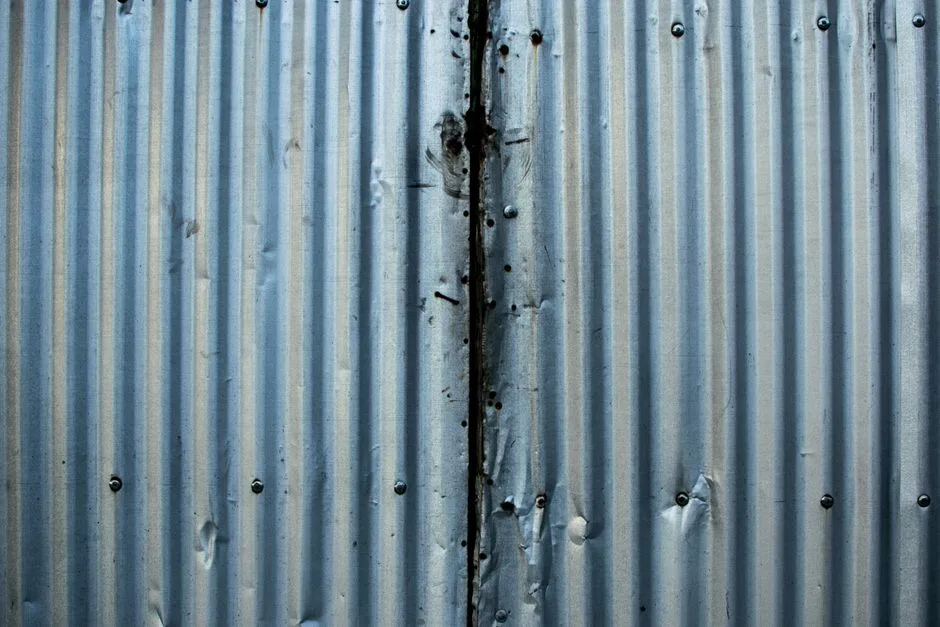
Corrugated Metal Panel Screen (Farmhouse/Industrial Style)
A corrugated metal panel screen — using galvanized steel or Colorbond corrugated sheeting in a horizontal or vertical orientation and framed with timber or steel posts — brings a crisp, utilitarian aesthetic that works especially well with farmhouse, industrial, and modern-rustic architectural styles. Corrugated metal is inexpensive (roughly $15-$30 per sheet for a 2.4m / 8ft length), completely opaque, highly durable (25-40 year lifespan for quality galvanized or Colorbond sheet), and quick to install. The corrugations create a subtle linear texture that catches light throughout the day, turning a simple sheet of metal into something with visual rhythm. A DIY corrugated metal screen for a typical equipment pad costs $200-$500 in materials and can be built in a day. Professional installation with a steel post frame and Colorbond sheets matching the house roof or fence color runs $1,200-$2,500. Two design tips: (1) orient the corrugations vertically for a more modern look and to allow rainwater to run off cleanly; (2) leave a 15-25mm / 5/8-1 inch gap between the bottom of the sheet and the ground to prevent the metal edge from sitting in damp soil and corroding. The metal will get hot in direct sun — position the screen where reflected heat will not affect nearby plants or seating areas, and never use dark-colored metal immediately adjacent to a seating zone.
Photo by Archie Binamira on Pexels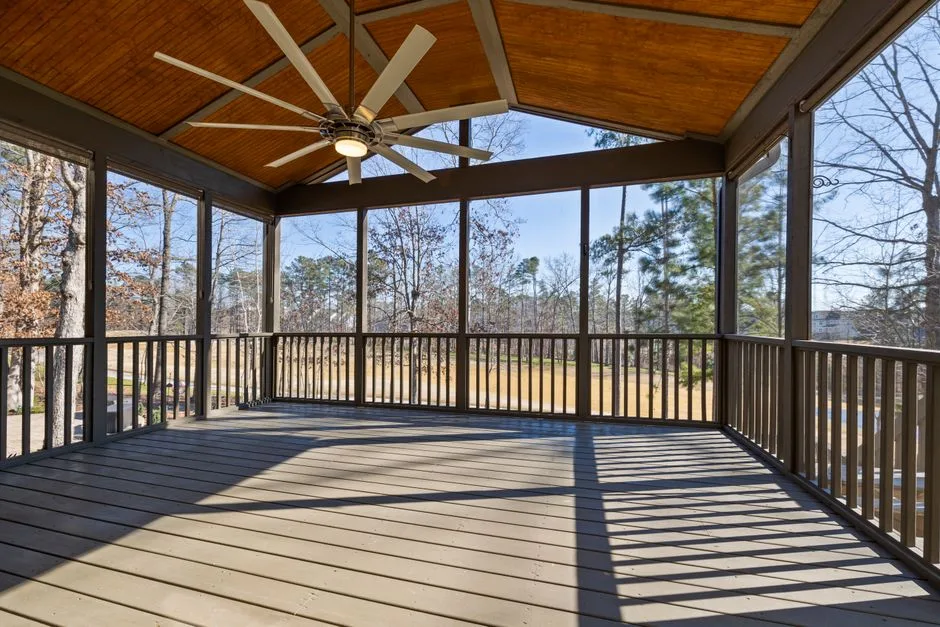
Composite / Faux-Wood Screen (Zero Maintenance)
A screen built from composite decking boards or proprietary composite screening systems — materials made from recycled wood fiber and plastic that look convincingly like timber but require zero sanding, staining, sealing, or painting — is the practical choice for owners who want the look of wood without the maintenance. Capped composite boards (Trex, TimberTech, AZEK, ModWood) have a durable polymer shell that resists fading, staining, scratching, and moisture damage. The boards are installed as horizontal or vertical slats on a treated-pine or aluminum post frame, exactly like timber, but the material itself costs more ($8-$15 per linear foot versus $3-$8 for treated pine) while requiring zero ongoing maintenance cost or labor. Budget $800-$2,000 for a DIY composite screen and $2,500-$5,000 for professional installation. Composite boards are heavier than timber and expand and contract more with temperature changes — the framing and fastening must allow for thermal movement (use composite-specific hidden fasteners or stainless steel screws in oversized, pre-drilled holes). The color range (rich browns, warm greys, charcoal, and even tropical hardwood tones) lets you match existing decking or fencing. Composite screening is particularly well-suited to coastal and high-humidity environments where timber screens require frequent re-oiling and are prone to mould and rot despite treatment.
Photo by Curtis Adams on Pexels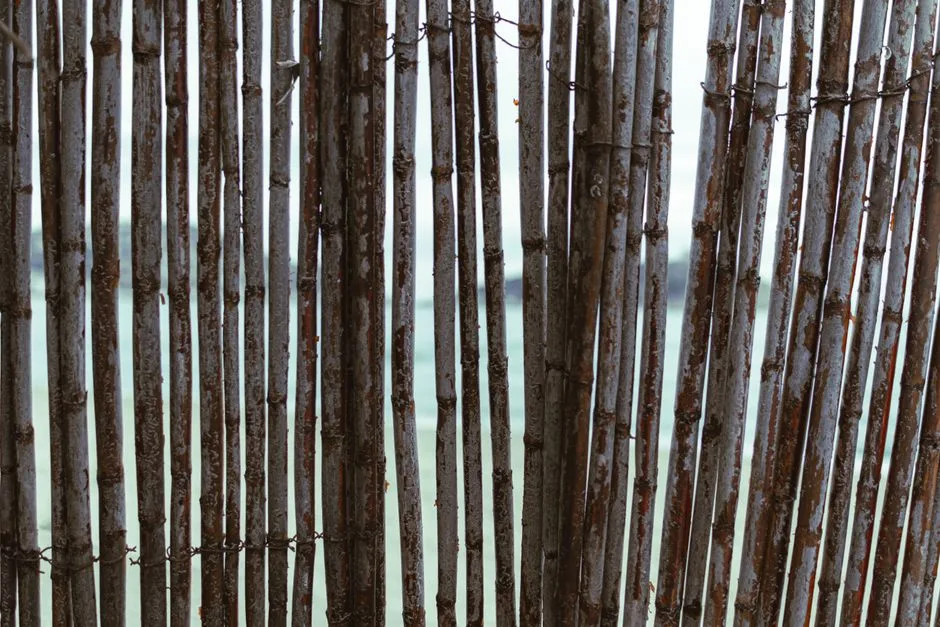
Mixed-Material Screen (Wood + Metal + Stone)
A mixed-material equipment screen — combining timber slats with a metal frame, or masonry piers with infill timber panels, or a gabion stone base topped with a louvered metal screen — creates the richest, most custom-looking concealment because the material contrast adds depth, texture, and visual weight that a single-material screen cannot match. The classic combination: stone-clad or rendered-block corner pillars (providing structure and anchoring the screen visually) with horizontal timber or aluminum slat infill panels between them (providing the screening surface with airflow gaps). This reads as a deliberate landscape architecture feature — a garden wall with screening panels — rather than a box around equipment. Budget $3,000-$8,000 for a professionally designed and built mixed-material screen depending on the materials chosen and complexity. The mixed approach also solves a practical problem: the masonry pillars can carry a heavy gate (for the equipment access opening) that would be difficult to hang from a timber-only post, while the lighter infill panels keep the overall structure from feeling too heavy and fortress-like. The combination of stone and timber also bridges the gap between hardscape (deck, coping, paths) and softscape (plants, garden beds) — the screen feels integrated into the landscape rather than imposed on it.
Photo by Mahmoud Yahyaoui on PexelsLandscaping for Concealment: Let Plants Do the Hiding
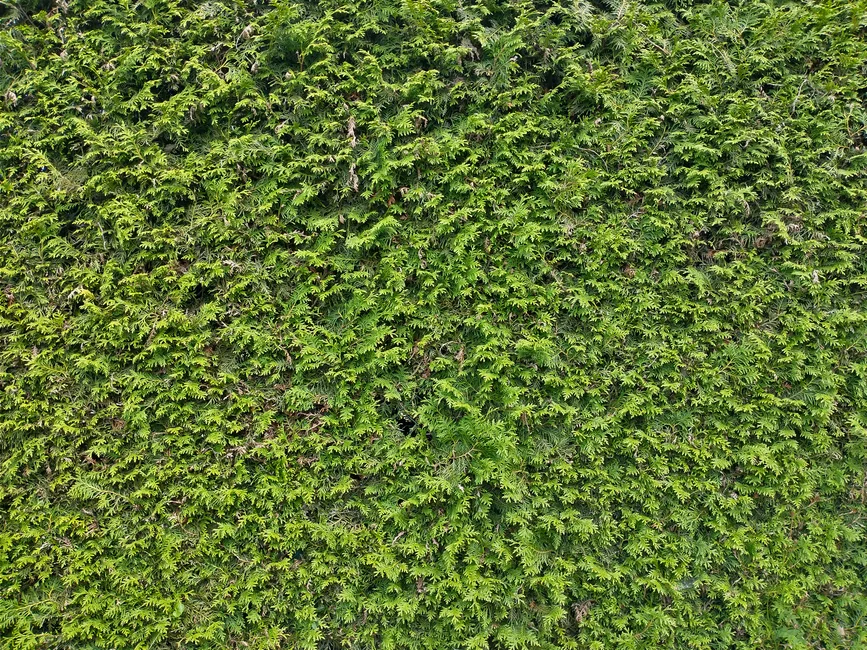
Evergreen Hedge Screen (Boxwood, Privet, or Viburnum)
A dense evergreen hedge — planted 40-60cm / 16-24 inch on center in a single row, kept trimmed to 1.2-1.8m / 4-6ft height — is the most natural-looking and cost-effective long-term equipment concealment strategy. Unlike a built screen, a hedge improves with age: it grows thicker, taller, and more effective each year, while also contributing to the garden’s overall planting scheme rather than reading as a separate screening structure. Best evergreen hedge species for poolside use (tolerant of occasional pool splash and reflected heat): Japanese boxwood (Buxus microphylla, slow-growing, dense, formal), English boxwood (Buxus sempervirens, classic formal hedge), privet (Ligustrum ovalifolium, fast-growing, tolerant of almost any soil, needs trimming 2-3 times per year), sweet viburnum (Viburnum odoratissimum, large glossy leaves, fast-growing, fragrant flowers), and Indian hawthorn (Rhaphiolepis indica, compact, pink/white flowers, very heat-tolerant). A hedge of 40-60 plants (to screen 2-3 sides of an equipment pad) costs $400-$1,200 for the plants plus soil preparation. The main trade-off: a hedge takes 2-4 years from planting to reach full screening density (faster for privet and viburnum, slower for boxwood), during which time you will want a temporary screen (bamboo roll, shade cloth, or potted plants) while the hedge establishes. Once established, the hedge needs trimming 1-3 times per year (depending on species) and occasional feeding — roughly 2-4 hours of maintenance per year total.
Photo by Jan ‘Sob’ Soběslav on Pexels
Ornamental Grass Screen (Miscanthus / Fountain Grass)
A dense planting of tall ornamental grasses — Miscanthus sinensis (maiden grass, 1.5-2.5m / 5-8ft tall), Panicum virgatum (switch grass, 1.2-1.8m / 4-6ft), or Pennisetum (fountain grass, 0.9-1.5m / 3-5ft depending on variety) — creates a soft, feathery, translucent screen that partially obscures equipment while adding movement, sound, and seasonal interest to the pool landscape. Grasses screen differently from a solid wall: they do not fully block the view, but they break up the visual mass of the equipment into an indistinct shape behind a curtain of foliage and seed heads that move in the breeze. This ‘soft screening’ approach can be more effective than a solid screen in some settings because it does not draw attention to itself — a solid screen announces ‘there is something to hide here,’ while a grass planting reads as a natural landscape feature that just happens to have some equipment behind it. Ornamental grasses are planted 45-60cm / 18-24 inch apart, establishing to full screening height in 1-2 growing seasons. A grass screen for a typical equipment pad (20-30 plants) costs $200-$500 for plants plus soil preparation. Grasses need cutting back to 15-20cm / 6-8 inch height in late winter (before new growth emerges in spring) — this is 30-60 minutes of work once per year. The dried grass stems and seed heads provide winter structure and interest, so do not cut them back in autumn. Excellent companion planting: layer lower-growing grasses or flowering perennials (Lavender, Salvia, Gaura, or Nepeta) in front of the tall grass screen to create a full, lush planting bed that happens to conceal equipment.
Photo by Frank Lee on Pexels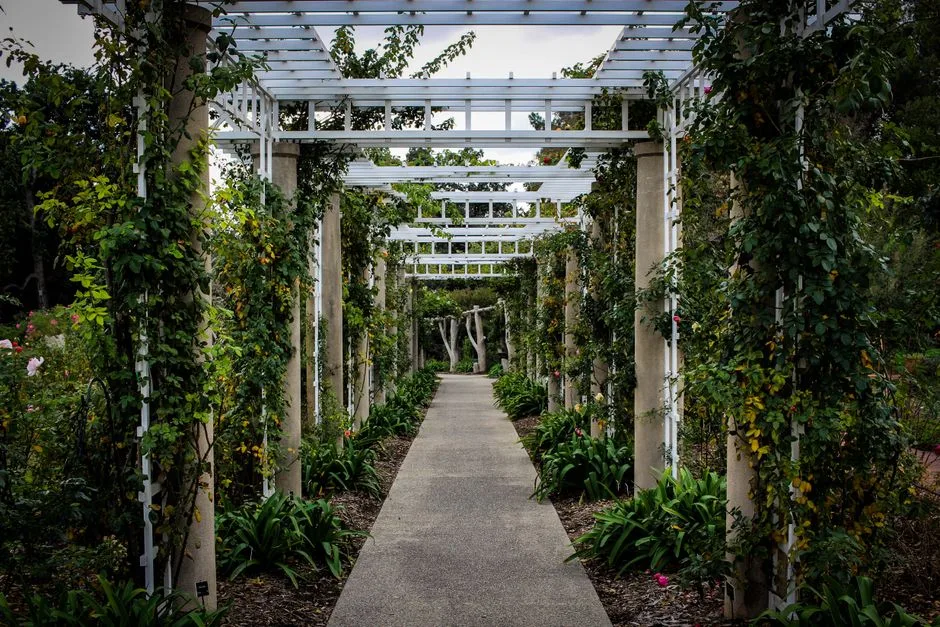
Vine-Covered Trellis Enclosure
A simple timber, metal, or wire trellis frame planted with a fast-growing evergreen climbing vine — star jasmine (Trachelospermum jasminoides, evergreen, fragrant white flowers in summer, non-invasive, 3-6m / 10-20ft spread), evergreen clematis (Clematis armandii, glossy leaves, white spring flowers), climbing fig (Ficus pumila, self-clinging, creates a dense green mat), or passionflower (Passiflora, fast-growing, exotic flowers, semi-evergreen in mild climates) — creates a living green screen that starts providing concealment within 6-12 months and reaches full coverage within 2-3 years. A trellis frame for an equipment pad (2-3 sides, timber posts with wire or timber cross-pieces) costs $200-$600 in materials and can be built in a day. The vine adds $30-$80 per plant (you typically need 1-2 vines per side, so 3-6 plants for a full enclosure). The total cost ($300-$1,000) makes this one of the most affordable concealment strategies, and the final result — a wall of green foliage — is often more beautiful than any built screen. Important considerations: (1) the trellis must be structurally capable of supporting the weight of a mature vine (a fully grown star jasmine on a 2.4m × 1.8m / 8ft × 6ft trellis panel can weigh 30-50kg / 65-110lb), so use sturdy posts set in concrete and heavy-gauge wire or substantial timber cross-pieces, not flimsy lattice; (2) the vine must be kept trimmed off the equipment itself — tendrils will find their way into fan grilles, control panels, and plumbing if not regularly redirected; (3) choose a non-invasive species appropriate to your climate — English ivy (Hedera helix) is aggressively invasive in many regions and should be avoided; (4) the trellis must still allow airflow to the equipment, so solid panels covered in vine are fine, but the vine should not be so dense that it blocks all ventilation.
Photo by Phil on Pexels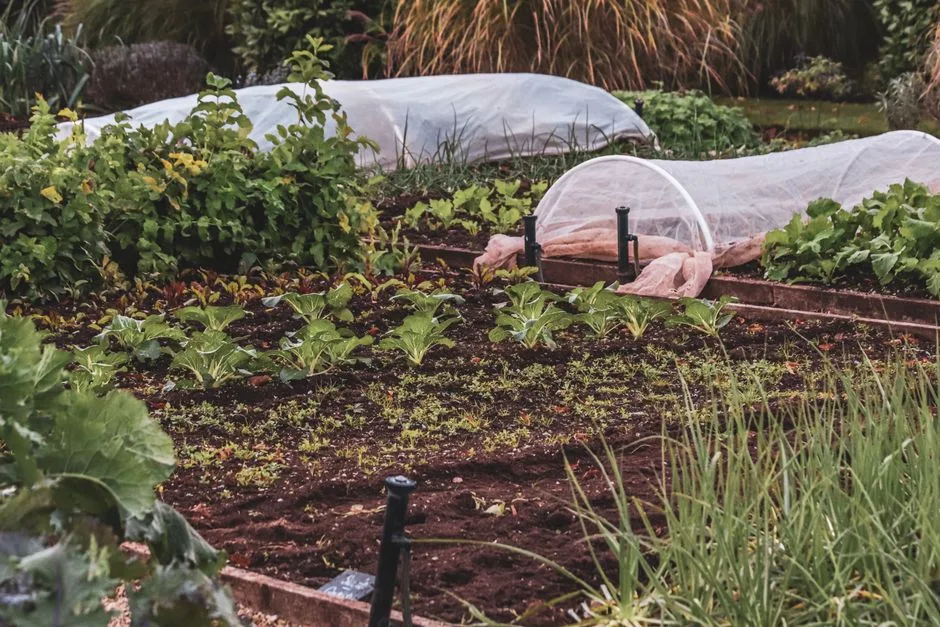
Layered Planting Bed Screen (Tall-Medium-Low)
A layered, mixed-species planting bed — with a back row of tall evergreen shrubs (1.5-2.5m / 5-8ft), a middle row of medium-height shrubs or grasses (0.9-1.5m / 3-5ft), and a front row of low perennials or groundcovers (0.3-0.6m / 1-2ft) — creates the most naturalistic and visually interesting equipment concealment because it reads as a designed garden border, not a screen. The layering technique means the equipment is screened from every viewing angle and distance: the tall back row blocks the direct sight line to the equipment from the pool and house; the medium row fills in the gaps between the tall shrubs as they mature; the low front row anchors the bed visually and prevents the ‘floating shrub’ look of a single-species hedge. Example planting combination for a warm-temperate climate: back row — sweet viburnum or photinia (evergreen, 2-2.5m / 6.5-8ft); middle row — nandina (heavenly bamboo) or abelia (semi-evergreen, 1-1.5m / 3-5ft, with bronze foliage and small flowers); front row — liriope (evergreen grass-like groundcover, 0.3m / 1ft) or lavender (0.6m / 2ft, fragrant, bee-friendly). A layered bed for screening an equipment pad (roughly 8-15m² / 86-160ft² of planted area) costs $500-$1,500 for plants, soil, and mulch. The layered bed takes 2-4 years to reach full screening density. The key advantage over a hedge: if one plant dies or underperforms, the other layers maintain the screening effect — a hedge with a dead plant leaves a gap; a layered bed with a dead middle-row shrub is barely noticeable because the back and front rows remain intact.
Photo by Boys in Bristol Photography on Pexels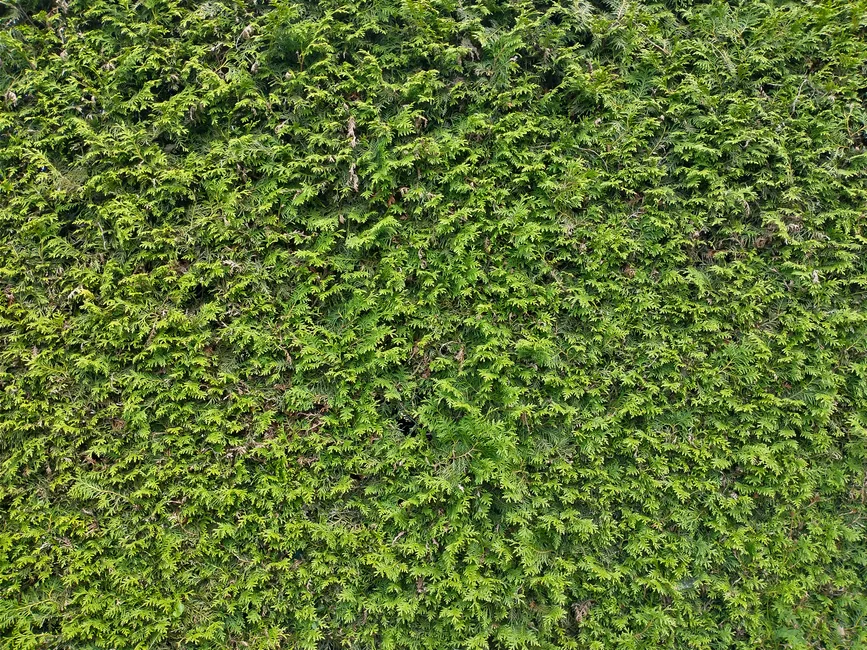
Living Wall / Vertical Garden Around Equipment
A purpose-built living wall (vertical garden) system mounted on a freestanding frame or attached to a masonry wall — with modular planting pockets, a drip irrigation system, and a selection of shade-tolerant or sun-tolerant foliage plants depending on the wall’s aspect — creates a striking vertical green screen that is both concealment and garden feature in one. Living wall systems (modular plastic or fabric pockets, or planted panels) cost $200-$600 per square meter / $20-$55 per square foot for the system plus plants and irrigation, so a screen-sized living wall (roughly 3-6m² / 32-65ft² of planted area) runs $600-$3,000 installed. The plants need regular watering (automated drip irrigation is essentially mandatory — a living wall dries out much faster than ground-level planting because the root zone is thin and exposed to air on all sides) and periodic feeding with liquid fertiliser. Plant selection is critical and must match the light exposure: for a sunny equipment pad, use tough, drought-tolerant trailing and clumping plants like sedums, sempervivums, trailing rosemary, and small ornamental grasses; for a shaded pad, use ferns, hostas, heucheras, and trailing begonias. The living wall is not the most practical option for equipment concealment — the irrigation system adds complexity, the plants need ongoing attention, and accessing the equipment behind the wall requires either demounting planted panels or working around the frame — but for owners who love gardening and want to make the equipment area a genuine garden feature rather than just hiding it, the living wall is the most expressive option available. Budget $3,000-$8,000 for a professionally designed, installed, and irrigated living wall screen.
Photo by Jan ‘Sob’ Soběslav on Pexels
Clumping Bamboo or Large Foliage Screen
Clumping bamboo (Bambusa and Fargesia species — which spread slowly from a central clump, unlike running bamboo which is aggressively invasive) and large-leaved tropical foliage plants (Philodendron selloum, Strelitzia / bird of paradise, Canna lilies, Alocasia / elephant ear, and Musa / ornamental banana) create a lush, fast-growing, tropical-vibe screen that can reach full screening height (2-4m / 6.5-13ft) within 1-3 growing seasons — faster than almost any other planting-based screening option. Clumping bamboo is the star performer for quick equipment concealment: a single clump of Bambusa multiplex ‘Alphonse Karr’ or Bambusa textilis ‘Gracilis’ (Slender Weavers) planted at each corner of the equipment pad will send up culms that reach 3-4m / 10-13ft within 2-3 years, creating a vertical curtain of dense green foliage. Critical requirement: ONLY plant clumping bamboo species — running bamboo (Phyllostachys species) spreads via underground rhizomes that can travel 10m / 33ft or more from the original planting, invading neighboring properties, lifting paving, and damaging pool shells and plumbing. The clumping habit is a fundamental biological difference, not a matter of installing a root barrier — barriers fail; clumping bamboo is safe by nature. Bamboo screen planting cost: $300-$800 for 3-5 quality clumping bamboo plants in 200-300mm / 8-12 inch pots. The large tropical foliage plants (bird of paradise, elephant ear, etc.) work well as understory companions to the bamboo, filling the lower visual zone while the bamboo provides height. In cold climates where bamboo is not hardy, substitute with fast-growing deciduous shrubs like elderberry (Sambucus) or large ornamental grasses like Miscanthus giganteus that provide seasonal screening.
Photo by gh c on PexelsEquipment Placement & Design: Out of Sight, Out of Mind
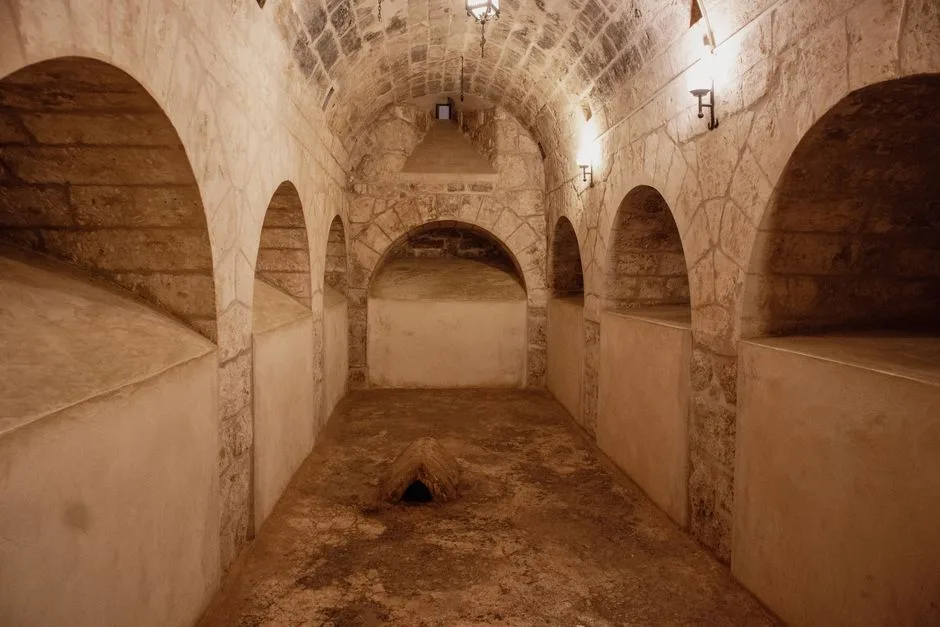
Sunken / Below-Grade Equipment Vault
A sunken equipment vault — a reinforced concrete or precast concrete pit set below ground level, housing the pump, filter, heater, and plumbing with a removable structural lid (typically aluminum diamond-plate or fibreglass grating) at grade level — is the ultimate ‘zero visual footprint’ concealment strategy. The equipment is literally underground: nothing is visible at eye level, the pool deck or lawn runs uninterrupted over the vault lid, and the only sign anything is there is the access hatch flush with the ground. A sunken vault is also the most effective noise solution — the earth and concrete mass absorb and block pump noise almost completely. The trade-offs are substantial: cost ($10,000-$25,000 for excavation, reinforced concrete vault construction, waterproofing, sump pump for groundwater drainage, and installation of equipment within the vault), access complexity (equipment service requires lifting heavy hatch sections and working in a confined space — most pool technicians charge a premium for vault-serviced equipment), and drainage (the vault MUST have an automatic sump pump to prevent groundwater or rain from flooding the equipment — a flooded vault destroys pumps and electrical components in hours). Gas heaters cannot be installed in a sunken vault — they require open-air ventilation and exhaust clearance that an underground enclosure cannot provide. This option is realistically only for new pool builds (where the vault can be designed into the initial construction) or major renovations where the existing equipment pad is being completely relocated. The result, however, is genuinely transformative — the complete disappearance of the equipment from the landscape.
Photo by Zülfü Demir📸 on Pexels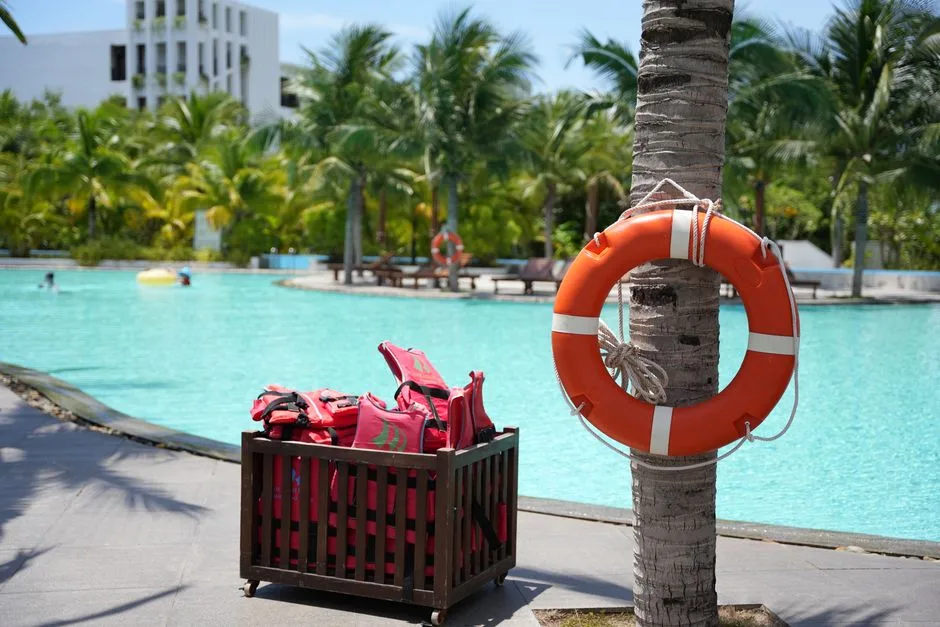
Remote / Detached Equipment Pad
Relocating the pool equipment from its current pad (typically 3-10m / 10-33ft from the pool in most existing pools) to a more distant, naturally screened location — behind the garage, around the side of the house, behind a garden shed, or in a dedicated equipment yard — solves the concealment problem by putting the equipment where it does not need to be concealed because nobody ever sees it. Pool pumps can push water significant distances (the practical limit for most residential pumps is 30-50m / 100-165ft of pipe run, depending on pipe diameter, number of bends, and the pump’s head capacity), so many equipment pads can be relocated to a position that is functionally equivalent but visually invisible. Remote pad relocation costs $3,000-$8,000 for a typical residential pool: the work involves trenching for new suction and return plumbing (the largest cost component — trenching 20-30m / 65-100ft of pipe trench costs $1,500-$4,000 depending on soil, obstacles, and whether deck or paving must be cut and reinstated), running new electrical conduit and cable from the house subpanel to the new pad location (roughly $1,000-$2,500 for 20-30m / 65-100ft), and pouring a new concrete equipment pad at the remote location ($300-$800). The old pad is demolished or repurposed. This is the single most effective concealment strategy because it eliminates the visual problem at its source rather than hiding it — but the cost and disruption of trenching make it a renovation-only option (not a weekend DIY project). Budget $4,000-$10,000 for a complete professional equipment pad relocation including all plumbing, electrical, gas line (if the heater is moving), and concrete work. The remote pad also solves the noise problem: equipment that is 20-40m / 65-130ft away is essentially inaudible from the pool and house.
Photo by Neo Khuat on Pexels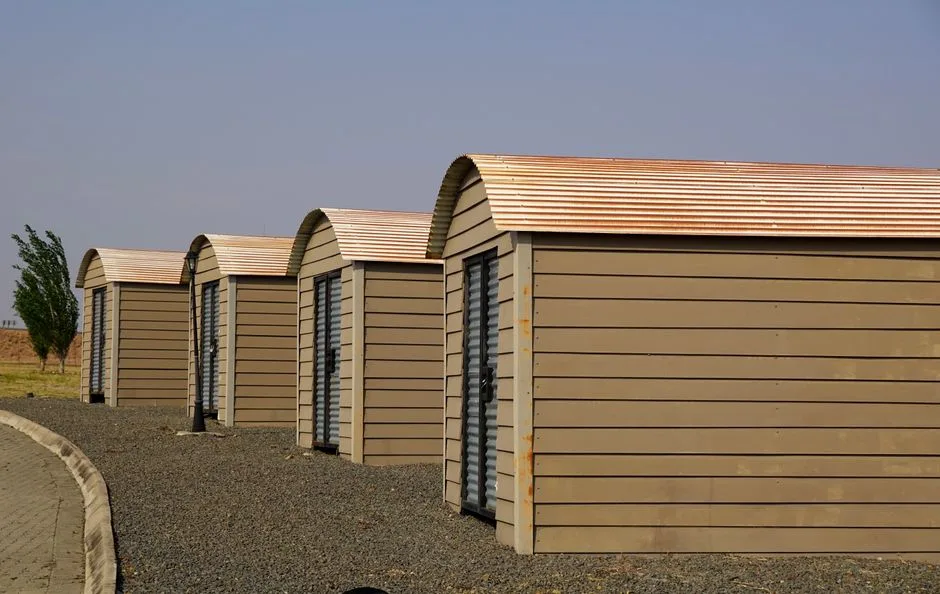
Integrated Pool House / Equipment Shed
Combining a small pool house, garden shed, or cabana with the equipment enclosure — where one half of the structure houses the pool equipment (ventilated, with exterior access) and the other half serves as pool storage, a changing room, or a pool bathroom — solves two backyard needs with one building, uses space efficiently, and the cost of the structure is shared between two functions. A combined equipment shed + pool storage building (roughly 3m × 4m / 10ft × 13ft, with a divided interior — equipment on one side behind a locked door, storage/changing on the other) costs $8,000-$20,000 depending on construction quality (basic timber shed through to fully finished pool house with windows, lighting, and interior lining). The equipment side must have: louvered or screened ventilation (minimum 0.3-0.5m² / 3-5ft² of vent area depending on equipment — gas heaters need significantly more), a hard-wired light and convenience outlet (required by code in most jurisdictions for equipment service), and the equipment must be installed with the same clearance to combustible walls as outdoor installation (typically 15-30cm / 6-12 inch side clearance and 90-120cm / 36-48 inch front clearance for gas heaters — check the specific clearances in your equipment manuals). The combination building is exempt from many residential building permit requirements that would apply to a habitable pool house because the primary function remains utility/storage — but always verify with your local building department. The integrated approach is particularly attractive in smaller backyards where a standalone equipment screen plus a separate storage shed would consume too much space.
Photo by Magda Ehlers on Pexels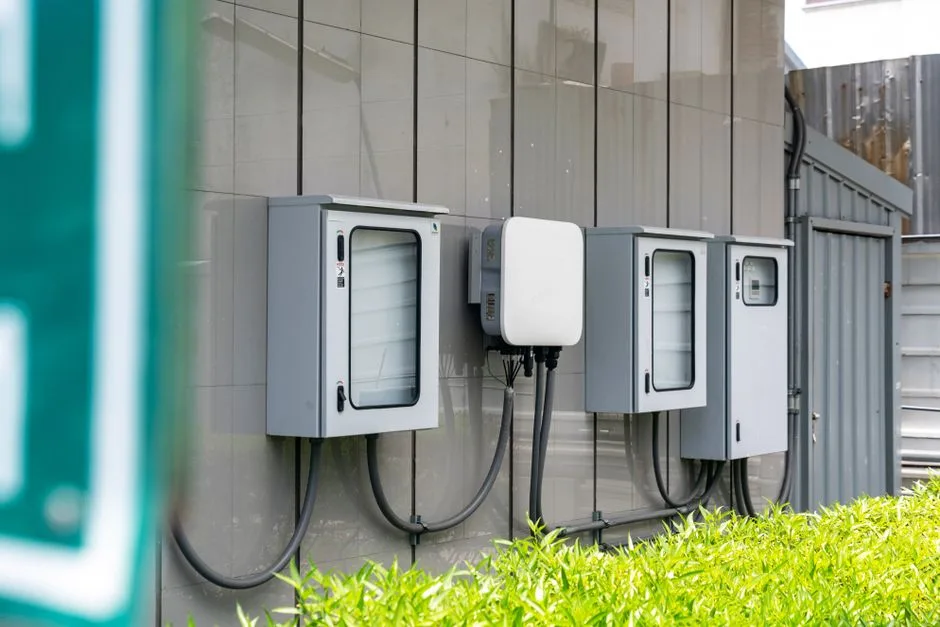
Built-In Cabinet-Style Equipment Housing
A purpose-built, cabinet-style equipment housing — essentially a weatherproof outdoor cabinet custom-sized for the specific pump, filter, and heater on the pad, with louvered doors on the front and/or sides for access and ventilation — treats pool equipment like an outdoor appliance that belongs in a cabinet, similar to how an outdoor kitchen houses a grill and refrigerator. A custom cabinet housing can be built from exterior-grade plywood with a weatherproof coating and louvered doors, or fabricated from powder-coated aluminum for a more permanent, lower-maintenance solution. The cabinet approach encloses the equipment on all four sides and the top, with ventilation louvres integrated into the doors and the top panel, creating a fully enclosed unit that looks like intentional outdoor furniture rather than a screen. Ventilation is the critical design challenge: the cabinet must provide sufficient airflow for the pump motor to cool itself and for any gas heater to draw combustion air and exhaust — this typically means the top must be fully louvered or open, and at least 25-40% of each side panel must be open (via louvres or gaps) to allow cross-ventilation. A custom timber cabinet housing costs $800-$2,500 in materials and 2-3 days of skilled DIY work; a fabricated aluminum cabinet costs $2,500-$6,000 professionally made and installed. The cabinet approach is best suited to small-to-medium equipment setups: a pump, filter, and salt cell in a single cabinet work well; a pump, filter, large sand filter, and gas heater typically need a larger, multi-section cabinet or a different approach entirely.
Photo by panumas nikhomkhai on Pexels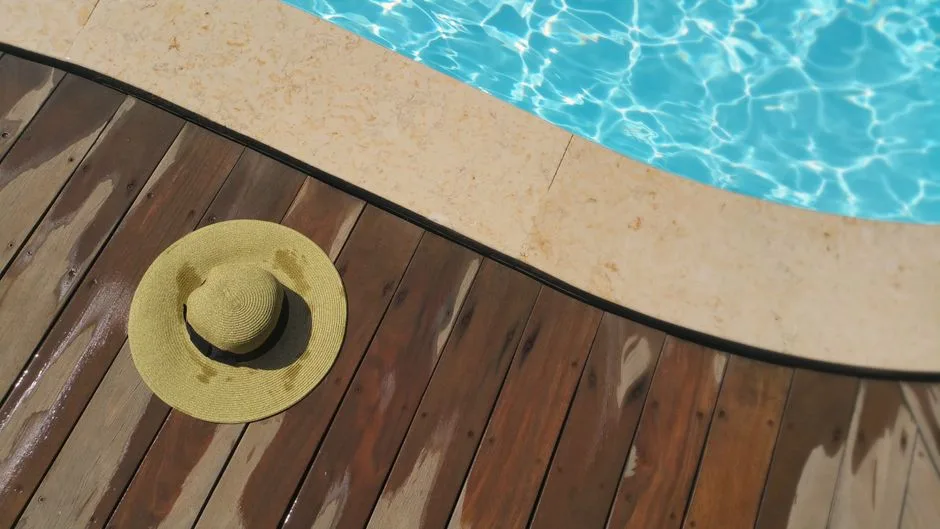
Below-Deck Equipment Placement
Positioning the pool equipment beneath a raised deck, verandah, or elevated pool surround — where the deck structure itself provides the overhead concealment and screens or planting handle the sides — is an efficient concealment strategy that uses the deck’s ‘dead space’ (the area under a raised deck that is typically too low for human use but perfectly adequate for pool equipment) productively. The deck overhead provides shade and weather protection for the equipment (extending equipment life — UV and rain exposure are the primary causes of equipment enclosure corrosion and control panel degradation), and the open sides of the under-deck area provide natural ventilation. This strategy works best with decks that are at least 1.2-1.5m / 4-5ft above ground level — enough clearance for a person to crouch or kneel for equipment service. Lower decks (under 90cm / 3ft of clearance) make equipment access frustratingly difficult and most pool technicians will charge extra (or refuse to service) equipment they cannot physically reach. Key requirements: (1) the equipment pad must be level and raised slightly above the surrounding grade so it does not become a water collection point; (2) the area under the deck must have positive drainage — water should flow away from the equipment, not pool around it; (3) electrical outlets, control panels, and any equipment that needs regular access (pump strainer basket, filter pressure gauge, salt cell for inspection) must be positioned at the outer edge of the under-deck area, not buried in the back corner; (4) gas heaters generally cannot go under a deck — they require overhead clearance for exhaust that a deck structure typically does not provide (check the specific overhead clearance in your heater manual — it is often 1.5-2.4m / 5-8ft minimum to combustible surfaces above). Budget $1,500-$5,000 for relocating equipment under an existing deck including plumbing, electrical, and pad work — the cost varies widely depending on how far the equipment is moving and whether the existing plumbing can be adapted or needs complete replacement.
Photo by Pixabay on Pexels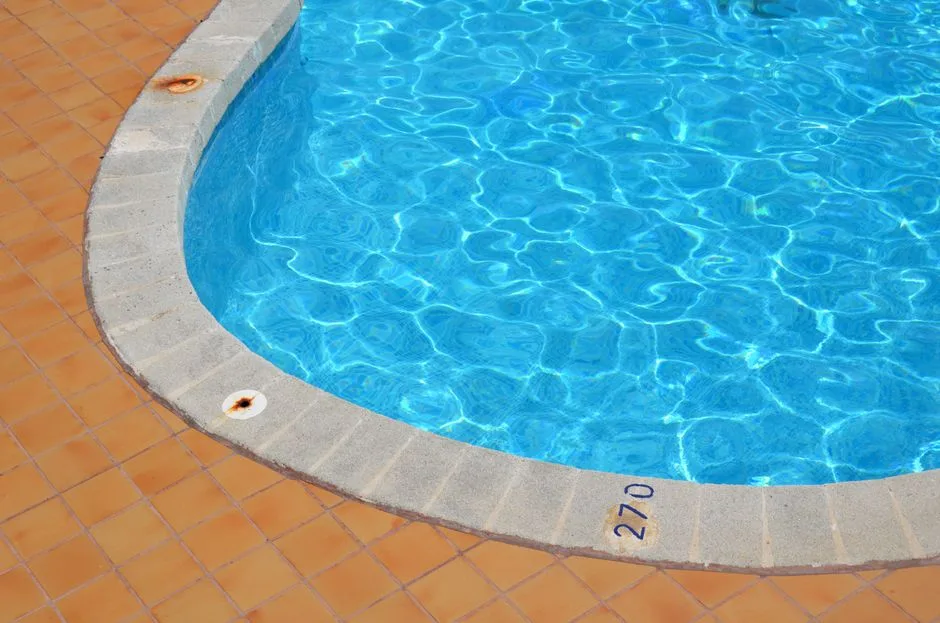
Corner-Tucked Equipment Zone with Minimal Screen
Positioning the equipment pad in the least-visible corner of the backyard — behind a side fence return, tucked behind the garage, or in the corner formed by two boundary fences — and using only a minimal screen (a single panel or short gate) to close off the remaining visible side can be as effective as a full 3-sided or 4-sided enclosure when the site geometry works in your favor. The key insight: if two sides of the equipment are already hidden by existing boundary fences, walls, or buildings, you only need to screen the one or two remaining sides that face the pool, house, or living areas. A single well-designed screen panel positioned at the right angle can completely eliminate the line of sight from all occupied areas. This approach costs $200-$1,000 (for one quality screen panel and maybe a gate) versus $1,500-$8,000 for a full multi-sided enclosure. The first step: spend time observing the equipment pad from every position where people spend time — the pool edge, the main patio, the kitchen window, the lawn area where kids play, the outdoor dining table. Identify exactly which sight lines need to be blocked and from what angles. You may find that the equipment is only visible from one specific angle and a surprisingly small screen positioned precisely can solve the problem completely. This ‘minimal intervention’ approach also has the advantage of making equipment access as easy as possible — less enclosure means less to open, move, or work around when the equipment needs service.
Photo by Jan van der Wolf on Pexels
Equipment Pad with Decorative Gravel & Stepping Stones
Treating the equipment area as a designed landscape feature rather than a utility zone to be hidden — by replacing the standard bare concrete pad with a larger, thoughtfully designed area of decorative gravel, river rock, or crushed stone, with large-format stepping stones or pavers forming a path to and around the equipment, and the equipment itself sitting on a neat concrete plinth within the gravel field — transforms the equipment zone from an eyesore into something that reads as intentional and well-maintained. This approach does not hide the equipment, but it reframes it: surrounded by carefully chosen materials and edged with planting, the equipment becomes a visible but acceptable element of a well-designed backyard rather than something jarring and out of place. A decorative gravel equipment area (roughly 4-8m² / 43-86ft²) costs $200-$600 in materials (landscape fabric, gravel or crushed stone, stepping stones, steel or timber edging) and can be installed in a weekend. The gravel also serves a practical purpose: it suppresses weeds, drains instantly (no puddles around the equipment), and provides a clean, dry surface to stand on when servicing the equipment. Add a few large, sculptural plants in pots (a pair of tall Cordylines, a large Agave, or a clipped Bay Laurel standard in a terracotta pot) positioned to frame but not hide the equipment, and the entire zone reads as a deliberate design choice — the pool’s ‘engine room’ acknowledged and presented with pride rather than shamefully hidden.
Photo by Jan van der Wolf on PexelsNoise Reduction: Making the Equipment Pad Disappear Acoustically
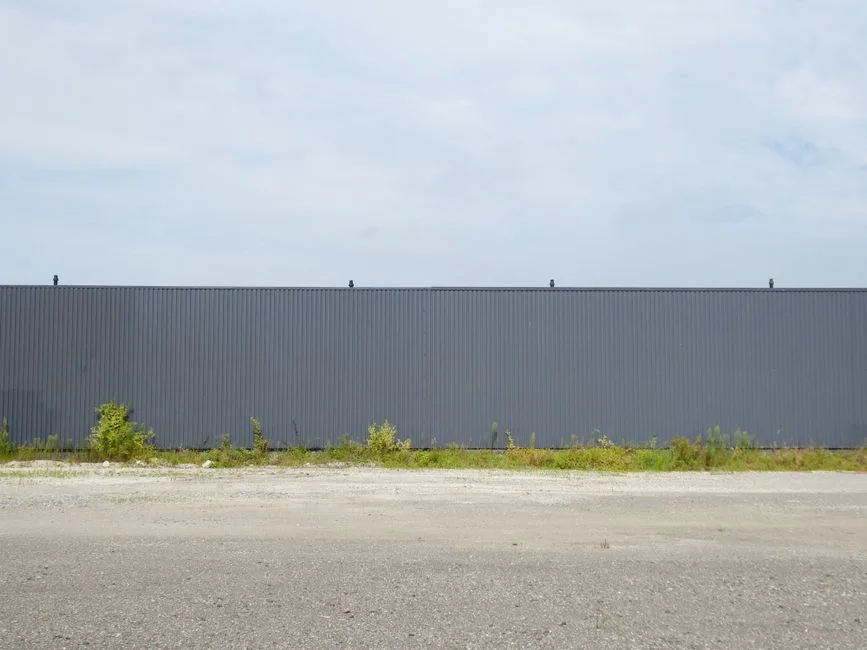
Acoustic Barrier Panel / Sound Fence
An acoustic barrier panel — a dense, solid panel (typically 15-25mm / 5/8-1 inch thick) made from mass-loaded vinyl (MLV) sandwiched between weatherproof layers, or from acoustic-grade plywood with a sound-dampening core, mounted on sturdy posts between the equipment and the pool/house — physically blocks the direct sound path from pump and heater to living areas. Sound behaves like light in one important way: if you cannot see the noise source, the direct sound path is blocked and you are hearing only reflected and diffracted sound, which is significantly quieter. A properly positioned acoustic barrier (tall enough that the equipment is not visible over it from the main listening positions, and with no gaps at the bottom or between panels) typically reduces perceived equipment noise by 8-12 decibels — which sounds roughly half as loud to the human ear (a 10dB reduction is perceived as approximately halving the loudness). A purpose-built acoustic barrier panel system costs $150-$400 per linear meter / $45-$120 per linear foot for the panels plus posts and installation. For a typical 2-3 sided equipment screen (6-10 linear meters / 20-33 linear feet), budget $1,000-$4,000. The most effective acoustic barrier design pairs a dense solid core (for sound blocking — mass is the key variable) with a soft, porous surface layer facing the equipment (for sound absorption — reducing reflected noise that would otherwise bounce around and escape over the top). A hedge or planting in front of the acoustic barrier adds additional high-frequency sound absorption and makes the barrier visually disappear. Note: an acoustic barrier only reduces direct sound — sound still travels over the top and around the sides (diffraction), so the barrier must be tall enough and wide enough to cast a meaningful ‘acoustic shadow’ over the listening area. As a rule of thumb, the barrier should be at least as tall as the equipment plus a margin, and extend at least 1-2m / 3-6ft beyond the equipment on each side.
Photo by Timothy Huliselan on Pexels
Pump Sound Blanket / Insulated Cover Box
A sound blanket (a fitted, multilayered acoustic cover that wraps around the pump motor housing — typically made from mass-loaded vinyl outer layer, acoustic foam middle layer, and a heat-resistant inner lining) or a custom insulated cover box (a ventilated plywood or metal box lined with acoustic foam and mass-loaded vinyl, with airflow openings for motor cooling) targets the noise at its source: the pump motor itself. Pool pump noise comes primarily from two sources — the electric motor (a continuous hum, typically 55-70dB depending on pump size, speed, and age) and vibration transmitted through the plumbing and pad — and a sound blanket or cover box addresses the airborne motor noise directly. A quality fitted pump sound blanket (specific to your pump model or universal-fit) costs $100-$300 and installs in 10 minutes — it is the single cheapest and fastest noise reduction measure available. A custom insulated cover box costs $300-$800 in materials and takes a day to build. Critical safety requirement: the pump motor MUST have adequate airflow for cooling — a sound blanket or cover box that completely seals the motor will cause it to overheat and fail, potentially creating a fire hazard. Commercial pump sound blankets are designed with ventilation gaps and heat-rated materials; a DIY cover box must have ventilation openings equivalent to at least 25-40% of the motor housing surface area, positioned to allow convection airflow (cool air in at the bottom, warm air out at the top). The sound blanket reduces airborne pump noise by 5-10dB; combined with an acoustic barrier (item #22), the total reduction can be 12-18dB — transforming a pump that dominates the backyard soundscape into one that is barely noticeable.
Photo by Erik Mclean on Pexels
Variable Speed Pump (Quiet by Design)
Replacing an older single-speed pool pump with a modern variable speed pump addresses equipment noise at the most fundamental level: the source itself. Single-speed pumps run at a constant 2,800-3,450 RPM, producing 60-75dB of continuous mechanical noise — roughly the level of a vacuum cleaner or a normal conversation, but running for 6-12 hours per day, every day. Variable speed pumps, when running at their low-speed filtration setting (typically 1,200-1,800 RPM), produce just 35-45dB — roughly the level of a quiet library or a refrigerator hum, and subjectively one-quarter to one-eighth as loud as the single-speed pump they replace. The pump only ramps up to higher, noisier speeds for specific tasks (vacuuming, heating, running water features) that typically happen for short periods. A quality variable speed pump (Pentair IntelliFlo, Hayward TriStar VS, Jandy VS FloPro) costs $800-$1,800 for the pump plus $300-$600 for installation, and as a bonus reduces pump electricity consumption by 60-80% (see renovation hub item #15 for the energy economics). For equipment noise, this is the most impactful single change you can make — and unlike screens and barriers that only reduce noise reaching the living areas, a variable speed pump makes the entire backyard quieter, including the area immediately adjacent to the equipment pad. If you are doing an equipment upgrade anyway (old pump nearing end of life, or wanting to reduce energy costs), prioritising a variable speed pump over any other noise measure is the logical first step — it may reduce noise enough that additional barriers or covers are unnecessary.
Photo by Erik Mclean on Pexels
Equipment Pad Vibration Isolation
A significant portion of perceived pool equipment noise — particularly the low-frequency hum and vibration that travels through the ground and into the house — is not airborne sound from the pump motor but structure-borne vibration transmitted from the pump through the equipment pad into the surrounding concrete, soil, and (critically) into the house foundation if the pad is close to the house or the plumbing runs are rigidly connected. Installing vibration isolation — typically rubber or neoprene isolation pads (also called ‘waffle pads’ or vibration damping mats) under the pump and motor mounting feet, and flexible rubber coupling connectors on the pump inlet and outlet plumbing — breaks the mechanical transmission path. The isolation pads ($20-$60 for a set of 4 heavy-duty pump vibration pads) decouple the pump from the concrete pad: the pump can vibrate, but the vibration is absorbed by the rubber pads rather than transmitted into the slab. The flexible plumbing connectors ($30-$80 each, installed on the suction and return lines immediately adjacent to the pump) do the same for the rigid PVC plumbing: vibration that would travel through the pipe walls into the ground and house is instead absorbed by the flexible rubber section. Total cost for a complete vibration isolation kit (pump pads + 2 flexible connectors + stainless steel hose clamps) is $100-$250 in materials and takes 1-2 hours to install (requires cutting the existing PVC plumbing and gluing in the flexible connectors with PVC cement). The improvement is most noticeable in the house — the low-frequency rumble that was audible indoors when the pump was running often disappears entirely. This is an underappreciated but highly effective and inexpensive noise fix.
Photo by www.kaboompics.com on Pexels
Distance + Barrier Combined Strategy
Combining two noise reduction strategies — physical distance (relocating the equipment pad further from the pool, house, and living areas) and an acoustic barrier (positioned between the new pad location and the listening areas) — produces a multiplicative effect, not just additive. Sound intensity follows the inverse square law: doubling the distance from the sound source reduces the sound intensity to one-quarter (a 6dB reduction). So relocating equipment from 5m / 16ft to 15m / 49ft from the pool edge (tripling the distance) reduces sound intensity to roughly one-ninth (approximately a 9-10dB reduction). Then adding an acoustic barrier at the new pad location provides an additional 8-12dB reduction. The combined 17-22dB reduction is transformative: a noisy single-speed pump that was 65dB at the pool edge (intrusively audible, conversation-interrupting) becomes 43-48dB (quiet background, easily ignored, conversation flows without noticing it). The distance component requires relocating the equipment (see item #16 for costs), so this is a renovation-scale solution rather than a weekend fix, but it is the most comprehensive and effective noise strategy available for pools where equipment noise is a genuine quality-of-life issue. The combined approach also handles the two different noise transmission paths: distance reduces both airborne and structure-borne noise reaching the living areas; the barrier handles the remaining airborne noise that distance alone did not eliminate. For new pool builds, the distance strategy should be designed in from the start — it costs very little extra to run the plumbing an additional 10-15m / 33-50ft during initial construction versus retrofitting later.
Photo by cottonbro studio on Pexels
Sound-Absorbing Planting (Dense Shrubs for Noise)
Dense, multi-layered shrub and tree planting between the equipment pad and the pool/house — using species with thick, broad evergreen leaves and dense branching structure — absorbs and scatters high-frequency equipment noise (the whine and hiss components of pump and heater sound) and, perhaps more importantly, masks the remaining noise with the pleasant, natural sounds of wind through leaves and birds. Vegetation is not a replacement for a solid acoustic barrier (leaves and branches are too porous to block low-frequency sound effectively — you need mass for that), but it is an excellent complement: the solid barrier blocks the low-frequency hum, and the vegetation absorbs the high-frequency whine and replaces the mechanical soundscape with a natural one. The most effective noise-absorbing plants have: (a) large, thick, broad leaves that present maximum surface area to incoming sound waves (examples: Fatsia japonica, Philodendron selloum, Magnolia grandiflora ‘Little Gem’, Rhododendron, Viburnum rhytidophyllum), (b) dense branching structure from ground level up (not bare trunks with a canopy high overhead — sound passes straight under those), and (c) evergreen foliage for year-round noise attenuation (deciduous plants provide no noise benefit when leafless in winter — which is often when the pool heater is running and noise is most noticeable). A dense 2-3m / 6.5-10ft deep planting bed of mixed noise-attenuating shrubs costs $800-$2,500 for plants, soil, and mulch, and reaches useful noise-reduction density within 2-4 years of planting. The subjective improvement often exceeds the measured decibel reduction because the remaining equipment noise is perceived differently when it is competing with the sound of rustling leaves — the brain accepts mechanical sounds as less intrusive when they are mixed with natural sounds.
Photo by Wyxina Tresse on PexelsMulti-Functional Equipment Screens: Hide the Gear, Gain Something Useful
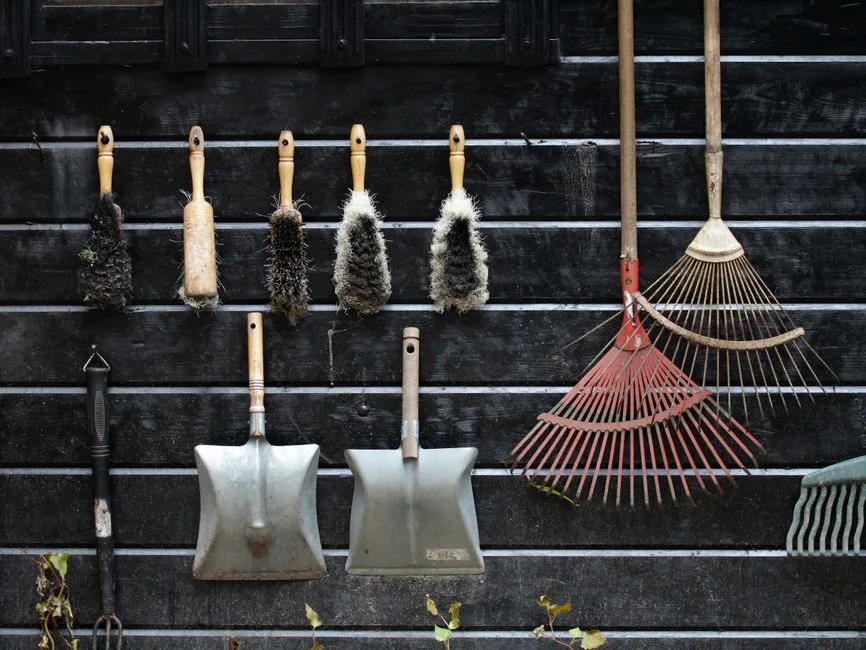
Screen + Garden Tool Storage Combo
A timber or metal equipment screen with a shallow (30-50cm / 12-20 inch deep) integrated storage cabinet on the outward-facing side — purpose-built to hold garden tools, leaf rakes, pool poles, skimmer nets, and hoses — solves the ‘where do I put the pool maintenance gear’ problem at the same time as hiding the equipment. The storage side faces out (toward the yard, where you access the tools), the equipment side faces in (toward the equipment pad, screened from view), and the shared back panel separates the two. This is a surprisingly efficient use of space: the screen was going to be there anyway, and the 30-50cm / 12-20 inch depth it occupies can be useful storage rather than dead space. A DIY screen+storage unit for a typical pad costs $500-$1,200 in materials (treated pine or cedar framing and cladding, stainless steel hinges and latch, hooks and racks inside) and takes a weekend to build. Professional custom build with premium materials (hardwood, composite, or powder-coated aluminum) runs $2,000-$5,000. Design details that make it work: (1) the storage side should have a sloping or waterproof roof (even a simple sloped corrugated panel) to keep tools dry — pool chemicals and metal tools both suffer from being stored in a damp cabinet; (2) a lockable door (simple hasp and padlock or keyed latch) keeps pool chemicals away from children; (3) including a dedicated slot or rack specifically sized for the pool pole and leaf net — these are awkwardly long items that do not fit in a standard-width cabinet, so a full-height narrow compartment (90-100cm / 36-40 inch tall, 15-20cm / 6-8 inch wide) running the height of the screen keeps them organized and out of sight.
Photo by hans middendorp on Pexels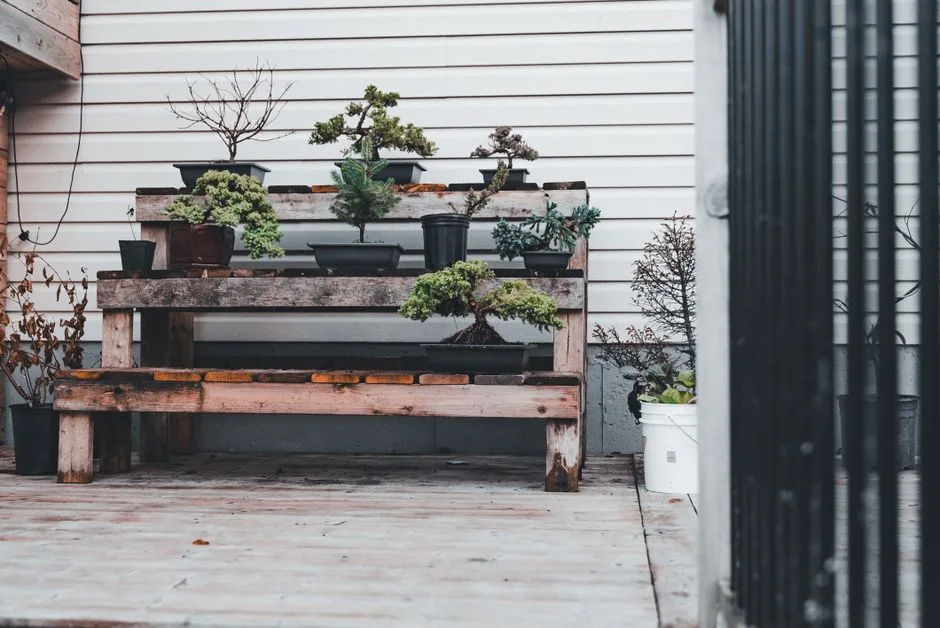
Screen + Potting Bench / Garden Work Station
An equipment screen with a fold-down or fixed workbench surface on the outward-facing side, plus storage for pots, potting mix, and hand tools — transforming the equipment screen into a functional garden workstation. The workbench is positioned at standard bench height (85-95cm / 34-38 inches), with open storage beneath for a bag of potting mix and a bin of garden tools, and a shelf or pegboard above for hand tools, twine, and plant labels. This pairing makes particular sense because equipment pads are often positioned in a side yard or service area that is also the natural location for garden work — you are already in the service zone of the yard, so having the workbench there is convenient rather than out of place. A DIY screen+potting bench costs $400-$1,000 in materials (timber for the frame, screen, and bench, plus a section of weatherproof benchtop — a piece of stone offcut, a concrete paver, or marine ply with several coats of exterior varnish) and takes a weekend to build. The bench surface must be weatherproof (it will get rained on) and should have a small lip or edge at the back to prevent pots and tools rolling off. If the bench surface is at a comfortable working height for standing, add a gravel or paver ‘apron’ in front (1m × 1.5m / 3ft × 5ft minimum) so you are standing on a clean, level surface while working — standing in mud while potting plants defeats the purpose of having a dedicated workstation.
Photo by Erik Mclean on Pexels
Screen + Outdoor Shower Wall
Mounting an outdoor shower on the outward-facing side of the equipment screen — with the shower fixture (wall-mounted shower head, mixer valve, and a simple deck-mounted drain or gravel soakaway below) attached to the screen structure, which doubles as a privacy wall for the shower — is one of the most elegant multi-functional uses of an equipment screen. The shower is plumbed with hot and cold water lines (or cold-only for a rinse-off shower) run from the house or equipment pad, and the screen provides both the structural backing for the shower fixture and the privacy screening so the bather is not visible from the pool or house. This configuration works particularly well when the equipment pad is positioned along a side boundary or fence return that also makes logical sense as a shower location — near the pool but off to the side, not in the middle of the main entertaining area. Building code requirements vary, but generally: the shower must drain to a proper drainage system (not just onto the equipment pad — you do not want shower water pooling around electrical equipment), the hot water supply (if any) must have a tempering valve to prevent scalding, and the shower area should have slip-resistant flooring (a teak duckboard, a textured concrete pad, or gravel). A screen+shower combo costs $1,500-$4,000 including plumbing rough-in, shower fixture, drainage, and screen construction. The dual function (equipment concealment + shower privacy) means you are getting two useful outcomes from one structure, and the screen feels like it exists for the shower — the equipment concealment is almost a byproduct. Run the shower plumbing in a separate trench from the equipment electrical conduit, and keep any electrical connections well clear of the shower zone (minimum 1.5m / 5ft horizontal separation in most codes).
Photo by Yaroslav Shuraev on Pexels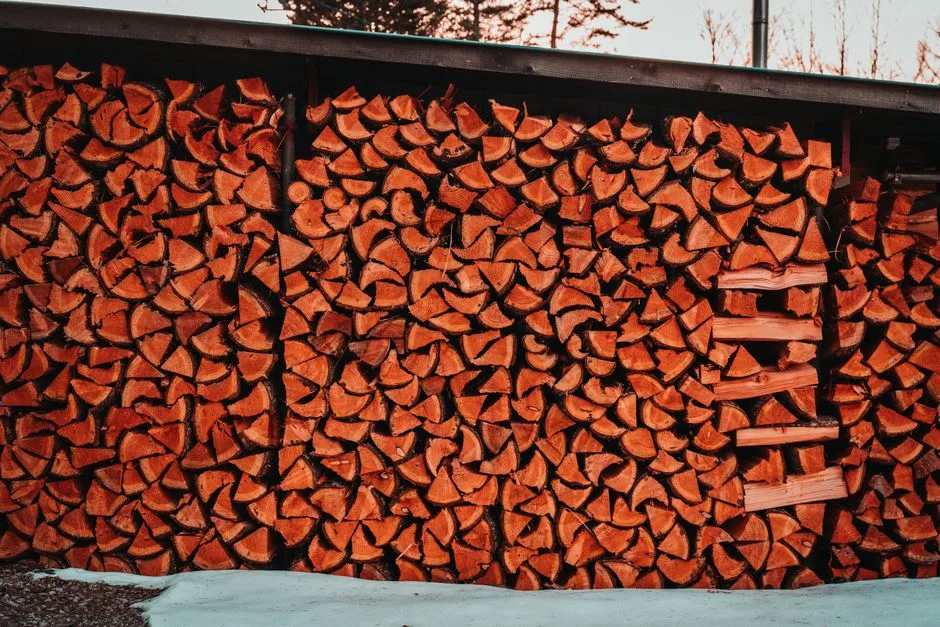
Screen + Firewood Storage
Building a firewood storage bay into the outward-facing side of the equipment screen — essentially a deep open shelf or compartment, 40-60cm / 16-24 inch deep and 1-1.2m / 3-4ft wide, stacked with cut firewood — turns the screen into a useful log store that serves the fire pit or outdoor fireplace. The firewood itself becomes part of the visual screen: a neatly stacked wall of split logs has its own rustic texture and warmth, and the combined screen+wood store reads as an intentional feature of an outdoor living space (firewood storage is inherently associated with fire pits and outdoor gathering — positive associations) rather than a screen hiding something. The firewood bay should be: (1) raised 10-15cm / 4-6 inches above ground level on a slatted or solid base to keep the bottom logs off damp ground, (2) open-fronted for easy access but with a small lip or rail across the front at the base to prevent logs rolling out, (3) roofed or at least partially covered — firewood stored in the open gets rained on and takes longer to season and burns less well; a simple sloped roof extending over the wood bay (even just a sheet of corrugated metal or polycarbonate) makes a big difference to wood quality. A DIY screen+firewood store costs $400-$1,000 in materials and is one of the simpler multi-functional builds (the firewood bay is essentially a sturdy shelf with a lip). The firewood itself costs whatever your local firewood supply costs — but the aesthetic value of a neatly stacked wood wall beside the pool adds a cozy, rustic, four-seasons feel to the backyard. Important: firewood should not be stacked directly against a timber screen that is immediately adjacent to pool equipment — maintain at least 30cm / 12 inch separation between stored firewood and any electrical equipment or gas lines.
Photo by Kai-Chieh Chan on Pexels
Screen + Pool Chemical & Toy Storage Cabinet
A lockable, ventilated chemical storage cabinet integrated into the equipment screen — specifically designed to safely store pool chemicals (chlorine, acid, alkalinity adjuster, test kit) in a cool, dry, well-ventilated compartment that is inaccessible to children — addresses the most important pool safety storage need at the same time as concealing the equipment. Pool chemicals must be stored: (a) in a cool, dry location (not in direct sun — heat degrades liquid chlorine and can cause dangerous pressure buildup in sealed containers), (b) in a well-ventilated space (chemical vapors, especially from chlorine and acid, are corrosive and potentially harmful if they accumulate in an enclosed space), (c) separately — acid and chlorine must never be stored immediately adjacent to each other (if they mix, they produce chlorine gas, which is toxic), and (d) locked and inaccessible to children. A dedicated chemical storage cabinet integrated into the equipment screen, with a lockable door, internal dividers separating acid from chlorine, and ventilation louvres at the top and bottom for convection airflow, costs $300-$800 as part of a screen build. The cabinet can also store pool toys, goggles, and small pool accessories — but keep food-related items (drink holders, snack containers) out of the chemical storage area. This is genuinely one of the most practical home pool safety improvements you can make, and it uses space (the screen depth) that would otherwise be wasted.
Photo by Jiri Ikonomidis on Pexels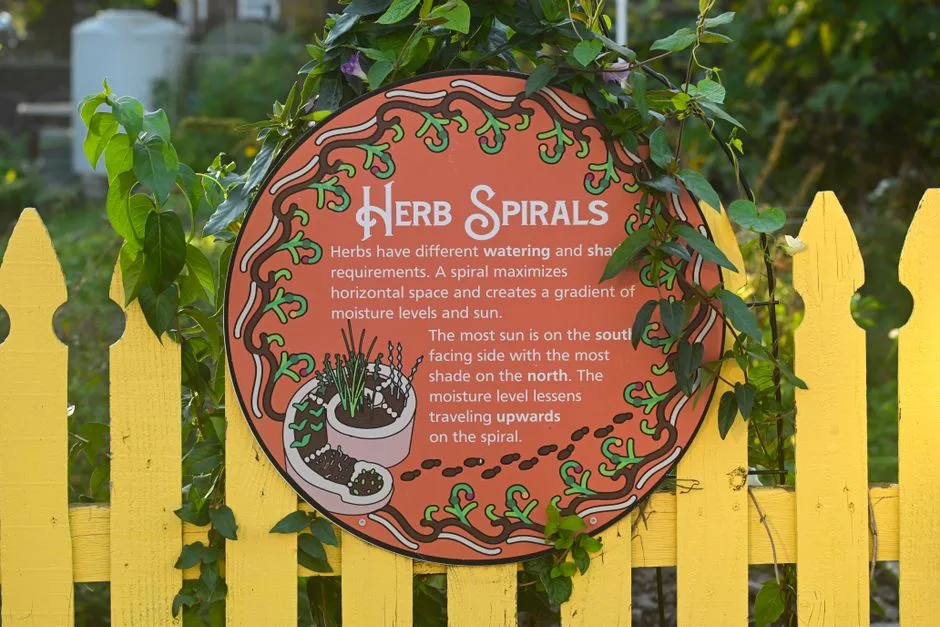
Screen + Vertical Herb Garden
Attaching a vertical herb garden — wall-mounted planting pockets, a series of small planter boxes stacked vertically, or a repurposed pallet planter — to the outward-facing side of the equipment screen turns the screen into a productive kitchen garden. Culinary herbs (rosemary, thyme, oregano, sage, mint, chives, basil in summer) thrive in the warm microclimate created by the equipment pad (the pump and filter radiate a small amount of heat, and the screen itself provides wind protection and reflected warmth), and having fresh herbs steps from the outdoor kitchen or grill is genuinely useful. A vertical herb garden on an equipment screen costs $50-$200 in materials: a set of wall-mounted planter pockets ($30-$80), potting mix ($10-$30), and herb seedlings ($20-$60 for 10-15 plants). The herbs need daily watering in hot weather (wall-mounted planters dry out fast — a drip irrigation line run from the nearest garden tap, with a simple battery-powered timer, solves this for $50-$100), and most culinary herbs are perennials in mild climates (rosemary, thyme, oregano, sage, and mint survive year-round in USDA zones 7-10; basil is an annual that needs replanting each spring). This is the most budget-friendly and charming of the multi-functional screen options — it costs almost nothing beyond the screen itself, it produces something useful and delicious, and a wall of herbs looks and smells wonderful beside the pool. Mint should be planted in its own separate container (not in shared planter pockets) because it is aggressively invasive and will take over any shared root space within a single growing season.
Photo by Eyes2Soul Eyes2Soul on PexelsA note from our service team. Every concealment plan we’ve installed in customer backyards starts with one rule: the pump, filter, and heater must stay reachable in under a minute. Our technicians service dozens of pads each season, and the calls that end in a repair bill instead of a simple cleaning are almost always the ones where a privacy screen or planter box blocked the filter’s pressure gauge or the drain port. If your robot cleaner is picking up less debris than usual, check your filter pressure before blaming the robot — a clogged filter cuts flow to the whole pad. If the pressure reads fine and the robot still underperforms, the robot itself is the aging part — the one upgrade worth making here is a wall-climbing cordless cleaner that works without a booster pump or extra plumbing, so the pad hides fewer components and the pool stays cleaner between your maintenance rounds. Our troubleshooting wizard walks through the water-chemistry side, and this page’s layout ideas all assume a maintenance lane you can actually walk.
More Pool Design Inspiration
This is part of our Pool Design Ideas series — 10 guides covering every detail of pool design, from landscaping and construction to furniture and renovations. Explore the full collection:


